Chapter 2
24
5.
Double-clicking
is a common technique for selecting objects or
launching programs from icons. Once you have moved the
pointer over the object you wish to select, rapidly press the left
button two times. This action is commonly referred to as “double-
clicking” an object.
Dragging
There are two ways to drag:
•
Move the pointer to the desired location then press down the left
button. While still holding down the left button, move the pointer to the
desired location. Release the button.
•
Move the pointer to the desired location. Tap the touchpad twice quickly
as if you were double-clicking, however do not remove your finger after
the second tap. Move the cursor to the desired location. Lift your finger
to finish dragging.
Adjust the touchpad settings by selecting Settings/Control
Panel/Mouse/Buttons. These settings allow you to change the orientation of
the touchpad from right-handed to left-handed, and fine tune the pointer
movement and timing of clicks.
Touchpad Precautions
The Touchpad is a pressure-sensitive device. If not properly cared for, it
can be easily damaged. Please take note of the following precautions.
•
Make sure the touchpad does not come into contact with dirt, liquids or
grease.
•
Do not touch the touchpad if your fingers are dirty.
•
Do not rest heavy objects on the touchpad or the touchpad buttons.
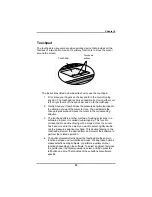
Scrolling lines
If you are scrolling through a document, you may find that using the
scrolling line is more restful to your hand than holding down a mouse
button. The scrolling line is located on the touchpad.
Содержание 2200 Series
Страница 1: ...v1 0 ...
Страница 4: ......
Страница 5: ...v1 0 C Ch ha ap pt te er r 1 1 I In nt tr ro od du uc ct ti io on n ...
Страница 17: ......
Страница 18: ...v1 0 C Ch ha ap pt te er r 2 2 G Ge et tt ti in ng g S St ta ar rt te ed d ...
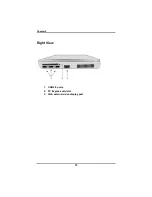
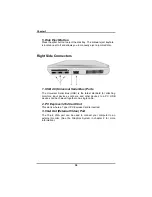
Страница 22: ...Chapter 2 18 Right View 1 USB 2 0 ports 2 PC Express card slot 3 VGA external video display port ...
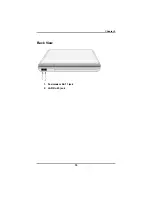
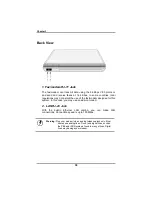
Страница 23: ...Chapter 2 19 Back View 1 Fax modem RJ 11 jack 2 LAN RJ 45 jack ...
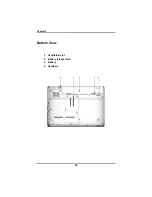
Страница 24: ...Chapter 2 20 Bottom View 1 Ventilation slot 2 Battery release latch 3 Battery 4 Speakers ...
Страница 36: ...v1 0 C Ch ha ap pt te er r 3 3 M Ma ak ki in ng g C Co on nn ne ec ct ti io on ns s ...
Страница 41: ...v1 0 C Ch ha ap pt te er r 4 4 S Sy ys st te em m S So of ft tw wa ar re e ...
Страница 43: ...v1 0 C Ch ha ap pt te er r 5 5 P Po ow we er r M Ma an na ag ge em me en nt t ...
Страница 50: ...v1 0 C Ch ha ap pt te er r 6 6 U Us si in ng g t th he e B BI IO OS S S Se et tu up p U Ut ti il li it ty y ...
Страница 59: ...v1 0 A Ap pp pe en nd di ix x A A F Fr re eq qu ue en nt tl ly y A As sk ke ed d Q Qu ue es st ti io on ns s ...
Страница 62: ...Appendix A 60 Save configuration changes and exit setup OK Cancel ...
Страница 63: ...A Ap pp pe en nd di ix x B B S St ta at te em me en nt ts s ...

