www.avenview.com
Page 7
3.
pANEl DESCRIpTIoN
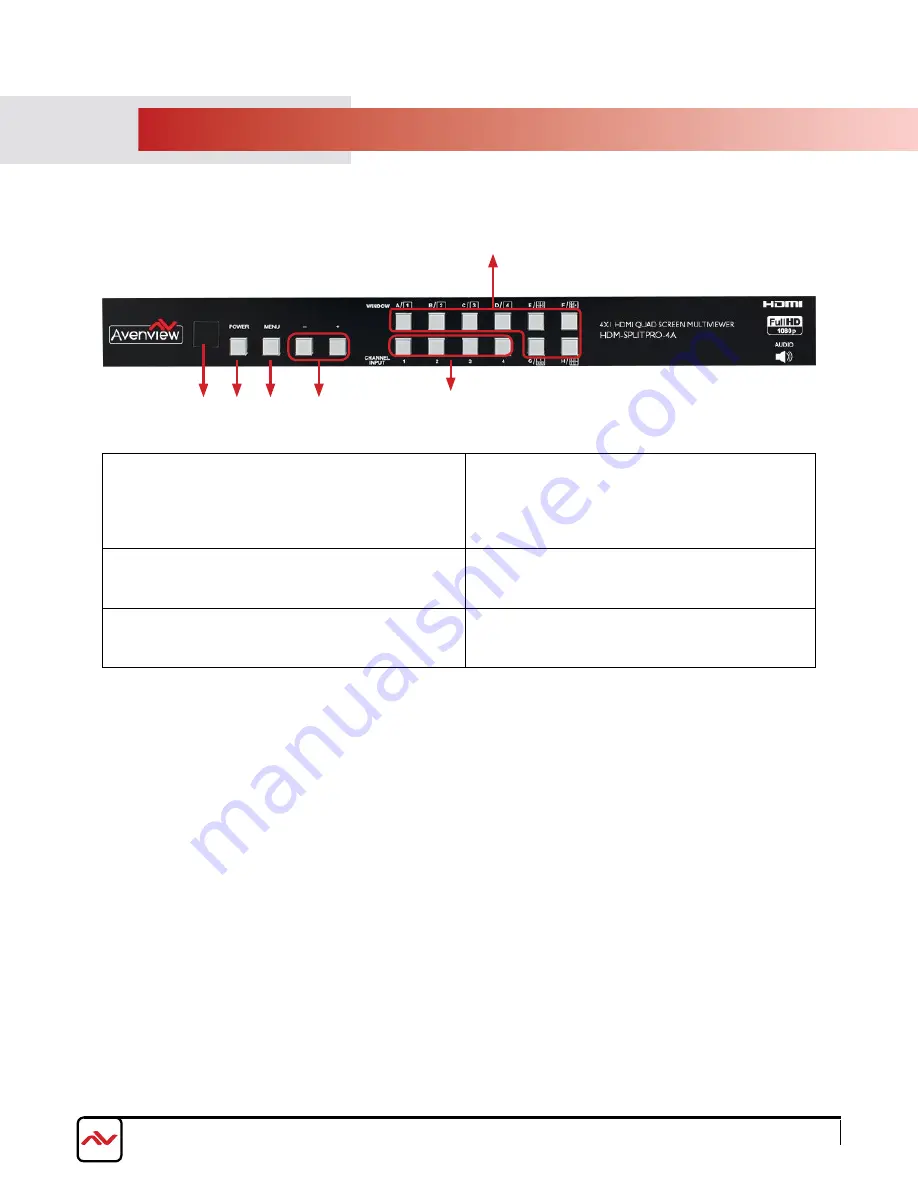
3.1 INPUT PANEL (HDM-SPLITPRO-4A) Front
1.
IR Window: Receives IR signals from the device
remote control (Included in package)
2.
Power Button: Toggle oN/off
first press power on Second press Standby mode.
Note : Quick Factory Reset
HolD power button then connect power supply
to the unit.
3.
Menu Button: Shows the oSD menu on the screen
4.
-/+ Buttons : To scroll down and up
in the oSD menu to confirm the selection “Press
Menu Button”
5.
Input CH 1- CH 4 to change the HDmI 1~4 input
source output order. All channels can select the same
input or each channel a different input.
6.
A-H Button:
See No: 6 below.
NO.5: A-H Buttons
press these hot keys to select the desired layouts pre-configured within the machine
A~D Buttons
when selected displays a full screen of each input channel.
Windows A~D's buttons is corresponding to Channel select No. 1~4. To change window A's input channel must press
Channel select 1's button. Channel select 2~4's button will not activate under window A's selection.
E~H Buttons
are a different combination of all combined inputs on a single HD Display.
- Windows E~H's size and position are adjustable through the oSD menu.
- Window G is pIp (picture in picture).
- Window E,F & H are POP (Picture on Picture).
- Window E~H when overlapping during custom setup, the channel display sequence is CH4 Is the first Channel > CH3
> CH2 >CH1 is last channel.
* Some display/monitor brands the borderline may have interference, adjusting the display's motion setting may resolve the
interference issue.
1
2
3
4
5
6
Содержание DM-SPLITPRO-4A
Страница 8: ...www avenview com Page 6 2 3 APPLICATION DIAGRAM...
Страница 14: ...www avenview com Page 12 Notes...


