Avaya P333R User’s Guide
19
Chapter 2
Avaya P333R Front and Rear Panels
Avaya P333R Front Panel
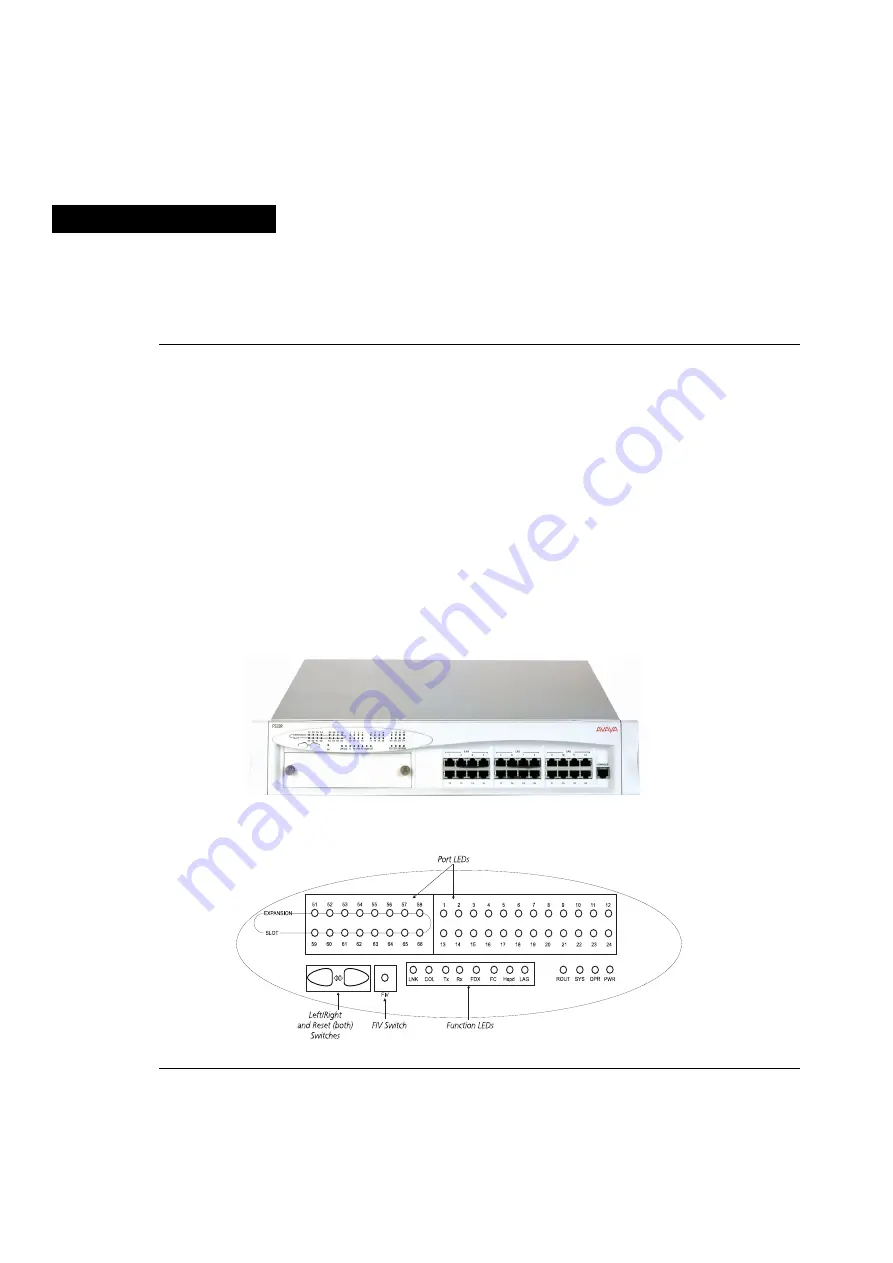
The Avaya P333R front panel contains LEDs, controls, connectors and an expansion
sub-module slot, as well as a console connector. The status LEDs and control
buttons provide at-a-glance information.
The front panel LEDs consist of Port LEDs and Function LEDs. The Port LEDs
display information for each port according to the illuminated function LED. The
function is selected by pressing the left or right button until the desired parameter
LED is illuminated. For example, if the COL LED is illuminated, then all Port LEDs
show the collision status of their respective port. If you want to select the LAG
function, press the right button until the LAG Function LED is lit. If you then want
to select Rx, press the left button several times until the Rx function LED lights.
Avaya P333R front panel shown below includes the Avaya P333R LEDs, buttons,
the Expansion sub-module slot, and the RJ-45 console connector at the bottom right
(refer to Figure 2.1 and Figure 2.2). The LEDs are described in Table 2.1.
Figure 2.1
Avaya P333R Front Panel
Figure 2.2
Avaya P333R LED
Содержание P333R
Страница 1: ...Avaya User s Guide AVAYA P333R STACKABLE 3RD LAYER SWITCH SOFTWARE VERSION 3 11 July 2002 ...
Страница 2: ......
Страница 16: ...Table of Contents xiv Avaya P333R User s Guide ...
Страница 18: ...List of Figures xvi Avaya P333R User s Guide ...
Страница 20: ...List of Tables xviii Avaya P333R User s Guide ...
Страница 54: ...Chapter 4 CLI Architecture Access Conventions 34 P333R User s Guide ...
Страница 246: ...Chapter 7 Cajun Campus CLI Layer 3 226 Avaya P333R User s Guide ...
Страница 249: ...Appendix A Embedded Web Manager Avaya P333R User s Guide 229 The welcome page is displayed Figure A 1 The Welcome Page ...
Страница 266: ...Appendix B Specifications 246 Avaya P333R User s Guide ...


