Facial Recognition
12 Facial Recognition Quick Installation Guide
2.2 Renity Signs - Content Management System (CMS) Setting
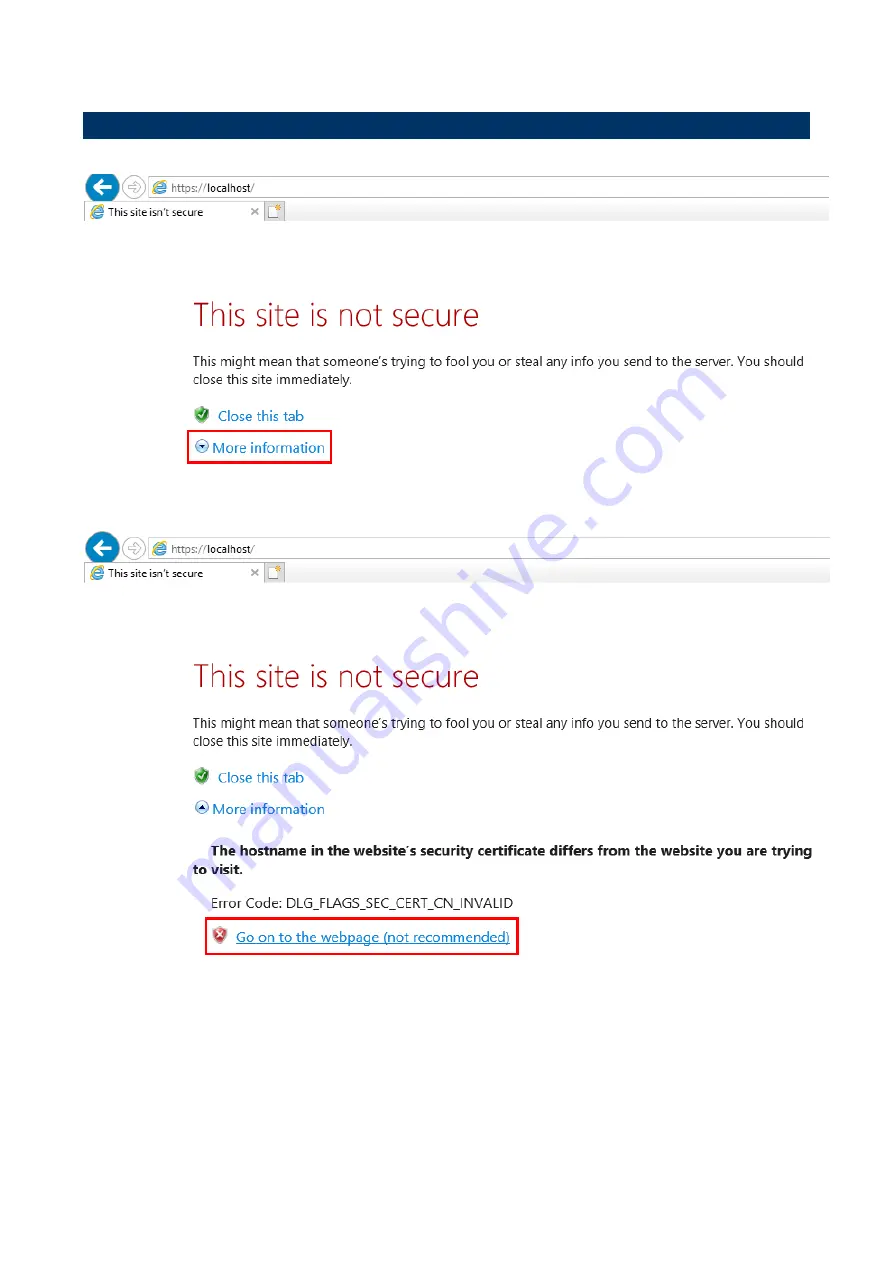
Step1. Use a PC in the same networking. Use a browser to connect to CMS
The
URL should be “https://Device IP Address/”.
When you connect to the device via browser, it will show a warning message. Because it is
a protected SSL self-signed certificate, just click on
“More information” to continue to visit
the signage box. Click on
“Go on to the webpage “ to login page.
Содержание EPC-BYT2
Страница 7: ...Quick Installation Guide Facial Recognition Quick Installation Guide 7 2 Renity Signs Setting...
Страница 21: ...Quick Installation Guide Facial Recognition Quick Installation Guide 21 Step2 Add Customer Company...
Страница 22: ...Facial Recognition 22 Facial Recognition Quick Installation Guide Step3 Add Customer Company Service...
Страница 23: ...Quick Installation Guide Facial Recognition Quick Installation Guide 23 Step4 Add Customer Store...
Страница 24: ...Facial Recognition 24 Facial Recognition Quick Installation Guide Step5 Add Contract...
Страница 25: ...Quick Installation Guide Facial Recognition Quick Installation Guide 25 Step6 Add Customer Device...
Страница 26: ...Facial Recognition 26 Facial Recognition Quick Installation Guide Step7 Add Customer User...
Страница 27: ...Quick Installation Guide Facial Recognition Quick Installation Guide 27 Step8 Add Customer User Role...
Страница 28: ...Facial Recognition 28 Facial Recognition Quick Installation Guide Step9 Step8 Add Customer User Store...
Страница 30: ...Facial Recognition 30 Facial Recognition Quick Installation Guide Step2 People Counting Report...


