


28
GDO-9
Owner Installation Instructions
46
fi g
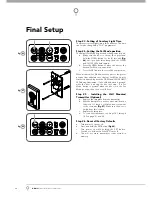
Final Setup
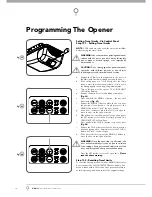
Step 23 - Setting of Courtesy Light Time
The preset courtesy light time is three minutes. This time
can only be changed by “PG3” programmer.
Step 24 - Setting the Pet Mode position
The default Pet Mode height can be changed as follows:
Make sure the door is closed, then press and
hold the OPEN button for six (6) seconds
(Fig.
46)
, until you hear three beeps and the OPEN
and CLOSE LEDs fl ash rapidly.
Press the OPEN button
to move the door to the
desired Pet Mode open position.
Press the SET button to record the new position.
When activated, Pet Mode drives the door to the preset
position from either above or below. Pet Mode’s active
status is indicated by both the OPEN and CLOSE LIMIT
LEDs being illuminated. If a Pet Mode button is pressed
while the door is moving the door will stop. If a Pet
Mode button is pressed when the door is in the Pet
Mode position, then the door will close.
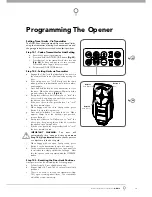
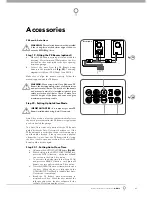
Step 25 - Installing the Wall Mounted
Transmitter (Optional)
Remove the faceplate from the transmitter.
Affi x the baseplate in a convenient wall location
that is out of reach of children and convenient
to the customer
(Fig 47).
Make sure the door is
visible from this location.
Replace the faceplate.
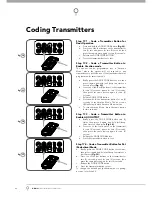
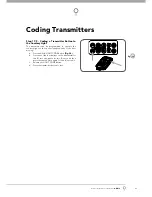
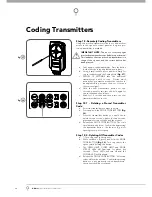
To code the transmitter, see Steps 18.1 through
18.5 on page 21 and 22.
Step 26 - Reset all Factory Defaults
Turn power to opener off.
Press and hold the SET Button
(Fig 48).
Turn power on while holding the SET button.
Continue to hold until all the LED’s are off.
This will not erase transmitter codes stored in
memory.
a.
b.
c.
a.
b.
c.
d.
a.
b.
c.
d.
48
fi g
47
fi g
Содержание GDO-9 Dynamo Gen 2
Страница 9: ...Owner Installation Instructions GDO 9 9 01 17 16 15 14 08 06 02 03 04 05 07 09 10 11 12 13 01 fig ...
Страница 11: ...Owner Installation Instructions GDO 9 11 01 17 16 15 14 08 06 02 03 04 05 07 09 10 11 12 13 02 fig ...
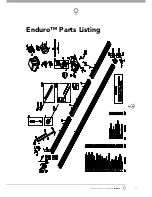
Страница 33: ...Owner Installation Instructions GDO 9 33 Enduro Parts Listing 49 fig ...
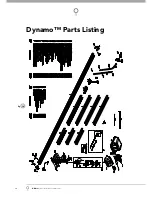
Страница 34: ...34 GDO 9 Owner Installation Instructions Dynamo Parts Listing 50 fig ...


