


www.qtv.com
10
www.autocue.com
Issue
#
: 081
016
©
2003
-200
8
Au
to
cu
e
Grou
p
Ltd
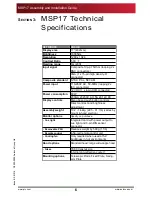
Section 4:
Assembly Procedures
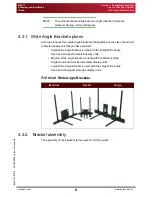
Autocue Wide Angle Bracket
Adjust spacing and location of the mounting bars
MSP17
Assembly and Installation
Guide
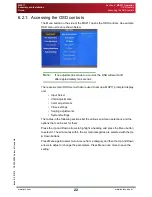
4.2.3: Adjust spacing and location of the mounting bars
N
OTE
:
It is recommended that you check the spacing between the
mounting bars before attaching the mounting bracket to the
plate you have ordered.
1. Loosen all the mounting bars slightly so that they can freely move to the
left and right.
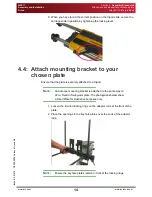
2. Place your prompter display unit face down on a flat, padded surface.
3. Align the horizontal mounting bars with the holes on the rear, side or
bottom of the unit, depending on the prompter display unit you have
ordered.
4. Slide the mounting bars in to the holes to confirm correct positioning.
(The picture below is for illustrative purposes only.)
N
OTE
:
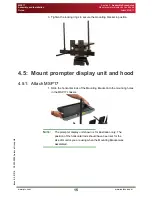
It is recommended that you mount the prompter display unit so
that it is centred along the mounting bracket.
5. Tighten the horizontal mounting bars to secure them in position and
remove them from the rear of the prompter display unit.
6. Carefully place your wide angle hood face down on a flat, padded
surface.


