A
Program lower end position
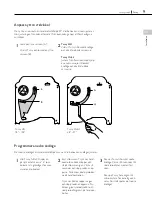
The lower end position is set by default as far down as it will go. The end position
can be adjusted if required.
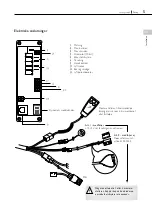
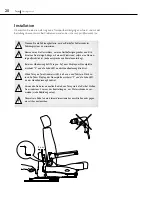
Rotate Turny fully. The display
on the control card should show
“b”, which indicates that the limit
position for max rotated out has
been actuated.
1
Turn off the power. Depress both
buttons on the manual control
and turn the power on again.
Wait for 2 seconds and then re-
lease the buttons. Both the LEDs
on the manual control will now
be flashing.
Depress both buttons again and
then release them. The manual
control's green LED will now flash
rapidly and the red LED slowly.
2
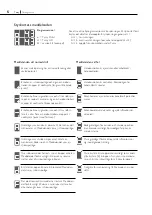
Lower Turny down to the desired
lower end position. Wait for 20
seconds until the red LED lights
up continuously.
Raise Turny all the way until the
upper position microswitch is
actuated. The lower end position
is not saved until now.
3
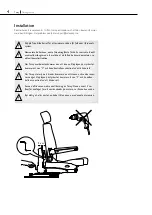
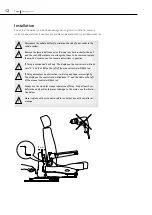
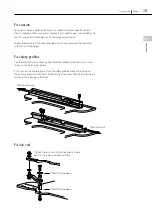
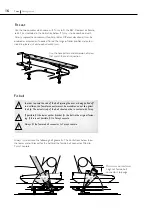
Adjust outward rotation angle
Loosen the inner screw (A).
Rotate Turny and loosen the
outer screw (B).
1
The outward rotation angle is set by default to 90°. The angle can be adjusted if
required. Adjust from the side or from the top by first removing the middle cowl.
Turny Orbit
68°–97°
Turny HD
78°–105°
Turny HD
Rotate Turny to the desired end
position and tighten both the
screws.
Turny Orbit
Adjust from the front to the de-
sired end position using a screw-
driver and tighten both the screws.
2
B
17
Getting seated
Turny
EN
In
st
al
lat
io
n
Содержание Turny
Страница 2: ......

