background image

3. Installation

Mains Lead  Wiring

WARNING

Your amplifier must be earthed at all times!

When you first receive your amplifier it may not have
a mains plug attached. You must ensure that an
appropriate plug is used and corresponds with the
amplifier’s current (ampere) requirements and meets
the approval of your local energy authority.

Please refer termination of this lead to qualified
personnel. Australian Monitor takes no
responsibility for any damage or harm resulting
from improper termination of this lead!

The wires in the mains lead are coloured in accordance
with the following code:

GREEN AND YELLOW = EARTH

Connect to the terminal marked with the letter E, with
the EARTH SYMBOL or coloured GREEN.

BLUE = NEUTRAL

Connect to the terminal marked with the letter N (or
coloured WHITE in USA and Canada, or coloured
BLACK in the United Kingdom).

BROWN = ACTIVE (LIVE)

Connect to the terminal marked with the letter A or L
(or coloured BLACK in USA and Canada or coloured
RED in the United Kingdom).

Power Requirements

Mains Voltage

Circuit Breaker Rating

100 to 120 volts

20 Amps

220 to 240 volts

10 Amps

Power Consumption at idle

= 350  Watts

Consumption at rated 4 ohm power

= 2700  Watts

Ensure that your mains voltage is the same as the rear
panel mains voltage marker (+/- 10%).

Mounting

Your amplifier is designed for standard 19" rack
mounting and occupies 3 EIA rack units (5.25"). The
mounting centres are:

Vertical:

2.25" (57.15mm)

Horizontal: 18.15" (461.1mm) to 18.62" (473.0mm).

The slots in the mounting flange will accept bolt
diameters up to 1/4" (6.35mm).

We recommend that you provide additional support for
the amplifier, especially if road use is planned, as the
weight can bend some racks otherwise. This support
can be provided by secure shelving, support rails or a
rear rack mounting strip to match up with the rear rack
mount points provided on your amplifier.

Cooling

Each channel of your 

AM1600

 amplifier is cooled by an

axial fan which draws cool air from the front of the unit
and expels the heated air via the rear of the unit. These
units offer two speed fans which run at half speed,
switching to full speed when the internal heatsink
temperature exceeds 60

C (128

0

 F).

An unrestricted airflow into and out from the unit must
be provided. Any restriction of the air flow will cause
heat to build up within the unit and possibly force the
unit into its thermal shutdown mode.

If the units are to be operated in an environment
where the airflow is restricted such as sealed racks or
even when running 2 ohm loads, the cooling should
be supplemented by extra cooling fans to evacuate
the heated air and aid the flow of cool air through the
unit.

Input Wiring

IMPORTANT! Do not directly connect pin 1 on the
amplifier’s input or strapping XLR, to the amplifier’s
chassis, speaker ground or power ground!

NOTE: Input signal ground is not to be used as
a safety ground (earth)
.

The input to your amplifier is a balanced 3-pin system
and requires all three pins to be connected. Only high
quality twin-core shielded cable should be used.

When wiring for a balanced source the connector
going to the input of your amplifier should be wired as
follows:

Pin  2 = HOT (In Phase - non inverting).
Pin  3 = COLD (Reverse Phase - inverting).
Pin  1 = GROUND / SHIELD.

When wiring from an unbalanced source you must
ensure that pin 3 is connected to pin 1 (input ground),
either by linking the pins in the input connector or by
the source equipment's output wiring.

When wiring for an unbalanced source:

Pin 2 = HOT (in phase with the amplifier’s output),
Pin 3 = GROUND/SHIELD (joins to pin 1).
Pin 1 = GROUND/SHIELD

Installation  11

Содержание AM1600

Страница 1: ...O p e r a t i o n M a n u a l AM1600 ...

Страница 2: ...n equilateral triangle is intended to alert the user that there is important operatingandmaintenanceliteraturethataccompanies the unit The unit should not be operated in a situation where it mayencountertheentryofwater rain oranyfluids To exposetheunittotheaboveconditionsmaymakethe operation of the unit hazardous and increase the risk of electrical shock The user should not attempt to service the ...

Страница 3: ...witching control Input muting at turn on Inputovervoltageprotection Radio frequencyinterferencesuppression Short circuit protection and indication Active balanced inputs 21 Position detented attenuators Massive heat sink heat exchangers Efficient front to back cooling Quad twin speed axial fans Multi role level fault indication Front and rear carry handles Front and rear mounting points High quali...

Страница 4: ... Operation 13 5 Bridge Mode 15 6 Two Ohm or Not Two Ohm 16 7 Maintenance 17 8 Warranty 18 9 Specification 19 List of Illustrations Page Figure 1 Block Diagram 5 Figure 2 Front Panel Layout 6 Figure 3 Rear Panel Layout 8 Figure 4 Case Dimensions 10 Figure 5 Speakon Connector Wiring 12 Figure 6 Bridge Mode Speaker Wiring 15 ...

Страница 5: ...evity The AM1600 amplifiers are 3 unit 5 25 tall 19 wide rack mountable units Each channel of the amplifier comprises a balanced active input with an attenuator driving a differential class A drive stage which in turn drives a fan cooled class AB MOSFET output stage configured as a sourcefollower Theunitoperatesfromahighcurrent capable linear power supply Theseunitshavebeenspecificallydesignedtode...

Страница 6: ...6 Controls Connectors Figure 2 Front Panel Layout 2 Controls Connectors Indicators Insert 1 VU Meter Satus Indicator ...

Страница 7: ... LED will not illuminate during normal use of the amplifier In the advent of a thermal overload this LED will illuminateredindicatingthattheinternaloperating temperature of one or both amplifier channels has exceededasafelevelofoperationandthe amplifier willbeshutdown Thefanswillcontinuetorunand oncetheamplifierhascooleddownsufficiently the amplifierwillstartupautomaticallyprovidingInrush Current ...

Страница 8: ...8 Controls Connectors Figure 3 Rear Panel Layout ...

Страница 9: ...VE BLUE NEUTRAL GREENANDYELLOW EARTH Controls Connectors 9 CAUTION Your amplifier must always be earthed 9 Mains Circuit Breaker A push to reset thermal acting circuit breaker is suppliedonyouramplifierprovidingoverallprotection of your amplifier s power supply and the interconnectingmains Thebreakerwillisolatethe active mains conductor in the event of a high current internal fault or in continued...

Страница 10: ...Figure 4 Dimensions 10 Installation ...

Страница 11: ...This support can be provided by secure shelving support rails or a rearrackmountingstriptomatchupwiththerearrack mount points provided on your amplifier Cooling EachchannelofyourAM1600amplifieriscooledbyan axial fan which draws cool air from the front of the unit andexpelstheheatedairviatherearoftheunit These units offer two speed fans which run at half speed switching to full speed when the inter...

Страница 12: ...ctlytothechassisoftheconnector Do not link this lug to pin 1 at the amplifier s input as it will defeat the amplifier s input grounding scheme This lug is often referred to as a drain and is used to provide a termination to the chassis for shielding purposes when a floating signal ground is required between the source and destination or when disconnecting the signal ground is required to reduce ea...

Страница 13: ...mend turning the attenuators on your amplifier down when turning the unit on When you power up your amplifier your amplifier goes through an establishment period before it will acceptsignal TheInrushCurrentSuppression ICS circuit is in operation for the first 0 5 seconds This limitsthemainscurrenttoprevent nuisancetripping of circuit breakers During this period the THERMAL LED will flash red whils...

Страница 14: ...d from a balanced signal source NOTE Be wary of quasi balanced outputs these are often no more than floating unbalancedoutputs 14 Operation 1 2 Each channel of your amplifier has a nominal balanced input impedance of 18k Ohms 1kHz and should not present a difficult load for any signal source Your signal source i e the equipment feeding the amplifier should have an output impedance of 600Ohmsorlowe...

Страница 15: ...foranapplica ble load AsshowninFigure6 therearefourstepsinsettingup yourAM1600amplifierforrunningitinBRIDGEmode Whilst the amplifier is off 1 ConnectthesignalsourcetotheChannel Afemale inputXLR 2 Loop from Channel A male XLR to Channel B fe male input XLR with a Reverse Phase Lead A reverse Phase Lead is wired Channel A Channel B Pin 1 to Pin 1 Pin 2 to Pin 3 Pin 3 to Pin 2 3 Connect your load bet...

Страница 16: ...eatagiven frequency Though this method is in line with the variousstandardsthatexist itonlygivesanindication to the maximum voltage swing before clipping for a given load This method of rating power does not give an indication of the current Ampere capability of the amplifier nor does it show the amplifier s ability to sustainhighenergywaveforms YourAM1600amplifierhasbeenspecificallydesigned to be...

Страница 17: ...eed only hold the fan rotor still and wipe the dust off the blades Many users stall the fan and use Maintenance 17 compressed air to blow the dust off the fan blades It is important to note that the fan blades must be held still whilst blowing air over the blades otherwise you may burn out the bearings in the fan NOTE Make sure the unit is off and is unplugged from the mains Give the main filter c...

Страница 18: ...ERIES2YEARWARRANTYREGISTRATION IMPORTANT Please complete this card and return it immediately after unpacking the product This card is to be sent DIRECTLY to Australian Monitor NOTE Warranty is effective ONLY upon receipt of this card COMPANY NAME MODEL ADDRESS SERIAL No DATE PURCHASED CITY DEALER STATE CODE COUNTRY Ensure that you fill out and send your warranty registration card Use this copy to ...

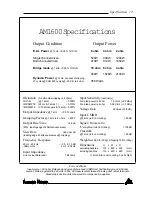
Страница 19: ...ms THD N 1 kHz 0 005 IMDSMPTE 60 Hz 7 kHz 4 1 0 015 IMD DIM 30 3 15kHz square 15 kHz 0 007 Output Impedance 1 kHz 0 013 ohms Damping Factor 1 kHz re 8 ohms 650 1 Output Rise Time 2 2µS 80 leading edge of 20kHz square wave Slew Rate 65V per µS leading edge 20kHz square wave clipping Frequency Response 20 Hz 20 kHz 0 5 0 15 dB 3dB points 5 Hz 90 kHz Input Impedance Line to Line Balanced 18k ohms Inp...

Страница 20: ...y Ph 02 9647 1411 Fax 02 9648 3698 E mail nsw audiotelex com au Melbourne Ph 03 9890 7477 Fax 03 9890 7977 E mail vic audiotelex com au Brisbane Ph 07 3852 1312 Fax 07 3252 1237 E mail qld audiotelex com au Adelaide Ph 08 8352 4444 Fax 08 8352 4488 E mail sa audiotelex com au Perth Ph 08 9228 4222 Fax 08 9228 4233 E mail wa audiotelex com au Auckland Ph 09 415 9426 Fax 09 415 9864 E mail audiotlx ...

Отзывы: