-3-
E
n
g
lis
h
4
.
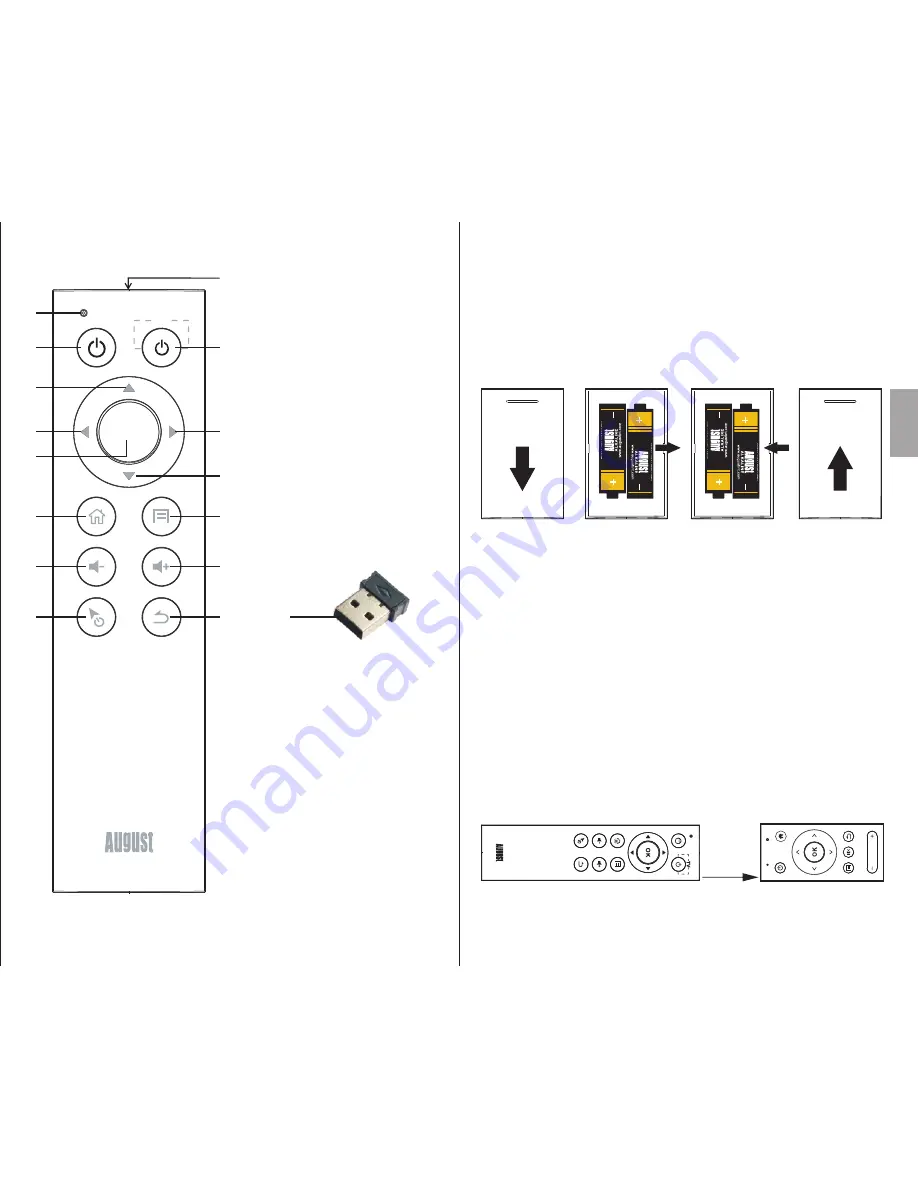
Part Names and Functions
1. Status LED
2. Programmable Button 1
3. Up
4. Left
5. OK
6. Home
7. Volume Down
8. Air Mouse Switch
9. Programmable Button 2
10. Right
11. Down
12. Menu
13. Volume Up
14. Return
15. IR Diode
16.USB Receiver
OK
TV
TV
1
2
3
4
6
7
8
5
9
10
11
12
13
14
15
5. Battery Replacement
1
)
Press and slide the battery cover in direction shown.
2
)
Remove old AAA batteries if required.
3
)
Insert new AAA batteries following the positive and
negative markings.
4
)
Replace battery cover and slide to lock.
6. Operation
To use the remote, plug the USB receiver into a USB port of
the device you wish to use it with.
The drivers will be automatically installed and you will be
able to use the remote quasi instantly.
- Programmable Buttons
There are two programmable buttons on the PCR450. They
can be programmed from any other IR remote control.
To program a button:
1. Press and hold the programmable button for 6 seconds
to active the learning function. Once activated, the
status LED will light blue constantly.
2. Whilst activated, point the IR Transmitter of your source
remote at the IR LED of the PCR450.
0.5-5cm
-4-
16


