background image

CHANNEL 2 OUTPUT:

This system provides an additional hardwire remote output to control an assortment of optional upgrades.
This output is an independent channel from the transmitter, and is controlled by button #2 on the transmitter. It is a delayed
ground pulse (300 mA maximum), and can be used to control:

Optional trunk release relay AS-9256
Optional remote starter AS-9151

Optional window roll up AS-9153

Page 2

DASH MOUNTED L.E.D.:

A small red L.E.D. is included that will serve as a visual indicator of the alarm status. It should be installed in the dash,
located where it can be easily seen from outside the vehicle, yet not be distracting to the driver.
Once a location has been selected, check behind the panel for wire routing access, and to confirm the drill will not damage
any existing components as it passes through the panel.
Drill a 15/64" diameter hole, and pass the red and blue wires from the L.E.D. through the hole, from the front of the panel.
Firmly press the body of the L.E.D. into the hole until fully seated.

SIREN:

Select a mounting location in the engine compartment that is well protected from access below the vehicle. Avoid areas
near high heat components or moving parts within the engine compartment. To prevent water retention, the flared end
of the siren must be pointed downward when mounted.
Mount the siren to the selected location using the screws and bracket provided.

CONTROL MODULE:

Select a mounting location inside the passenger compartment (up behind the dash), and secure using two screws
provided.
The control module can also be secured in place using cable ties.

Do not

mount the control module in the engine compartment, as it is not waterproof. You should also avoid mounting the

unit directly onto factory installed electronic components. These components may cause RF interference, which can
result in poor transmitter range or intermittent operation.

INSTALLATION OF MAJOR COMPONENTS:

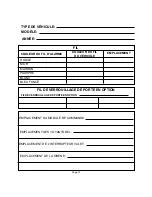
FUTURE REFERENCE CHART:

As an added convenience to the professional security installer, a chart has been printed in this guide for recording wire
colors, component mounting locations, and any other useful tips particular to the vehicle you are working on. Taking a
few extra moments on each installation to fill in the chart, can save you valuable time in the future.

HOOD OR TRUNK PIN SWITCH:

A pin switch is included for use in protecting the hood or trunk (or hatchback) of the vehicle.
The switch must always be mounted to a grounded, metal surface of the vehicle. It is important to select a location where
water cannot flow or collect, and to avoid all drip “gutters” on hood and trunk fender walls. Choose locations that are
protected by rubber gaskets when the hood or trunk lid is closed.
The pin switch can be mounted using the bracket provided, or direct mounted by drilling a 9/32" diameter mounting hole.
Keep in mind that when properly mounted, the plunger of the pin switch should depress at least 1/4" when the hood or
trunk lid is closed.

VALET SWITCH:

Select a desired mounting location for the switch, that is easily accessible to the driver of the vehicle.
The switch does not have to be concealed, however, concealing the switch is always recommended, as this provides
an even higher level of security to the vehicle. The switch may be mounted below the dash using one of the brackets
provided, or mounted in the dash by drilling a 1/4" diameter hole in the location. Be sure to check behind the dash for
adequate clearance for the body of the switch, and to confirm that the drill will not damage any existing components as
it passes through the dash.
Whichever mounting method is used, make certain the back of the switch is accessible for wiring later in the installation.

Содержание Prestige APS-15CL

Страница 1: ...MountingComponents 2 WiringTheSystem 2 4 CompletingInstallation 4 WiringDiagram 5 WiringReference 6 Notes 7 TABLE DES MATIERES Préparationàl installation 8 MontagedesComposants 9 CâblageduSystème 9 11 Finitiondel installation 11 Câblage 12 ChaînePorte clefs 13 Remarque 14 INDICE Preinstalación 15 Instalacióndecomponentes 16 Cableadodelsistema 16 18 Terminacióndelainstalación 18 Cableado 19 Referen...

Страница 2: ...ssive Arming and Voltage Sensing are selected you must hardwire the driver s door pin switch or passive arming will never be initiated STARTER DISABLE This system provides an output to control an optional starter cut relay not included When this option is installed any time the system is armed the vehicles starting circuit is inoperable CHANNEL 3 TRANSMITTER ONLY The transmitters included in this ...

Страница 3: ...led electronic components These components may cause RF interference which can result in poor transmitter range or intermittent operation INSTALLATION OF MAJOR COMPONENTS FUTURE REFERENCE CHART As an added convenience to the professional security installer a chart has been printed in this guide for recording wire colors component mounting locations and any other useful tips particular to the vehic...

Страница 4: ...g lights Connect the white wire to the positive side of one of the vehicle s parking lights DARK GREEN WIRE INSTANT TRIGGER This is an instant on ground trigger wire It must be connected to the previously installed hood and trunk pin switches PURPLE WIRE DOOR TRIGGER If the vehicle s door courtesy light switches have a 12 volt output when the door is opened most Fords and some Imports you must con...

Страница 5: ...re to the wire that provides a low current ground signal from the factory door lock switch to the factory door lock control relay The green wire provides a ground pulse during disarming or the pulsed ground unlock output Connect the green wire to the wire that provides a low current ground signal from the factory door unlock switch to the factory door lock control relay GREY WIRE VALET SWITCH Conn...

Страница 6: ...ARM WIRE COLOR VEHICLE WIRE COLOR LOCATION RED BLACK YELLOW BROWN PURPLE WHITE UNLOCK LOCK CONTROL MODULE LOCATION L E D LOCATION VALET SWITCH LOCATION SIREN LOCATION Page 6 DARK BLUE TYPE OF DOOR LOCK CIRCUIT OPTIONAL DOOR LOCK WIRING ...

Страница 7: ...ADDITIONAL NOTES AND SKETCHES NOTES Printed in U S A Audiovox Corp 150 Marcus Blvd Hauppauge N Y 11788 Form No 128 4827 Page 7 ...

Страница 8: ...MEMENT PASSIF et DÉTECTION DE TENSION il faut câbler le contacteur de la porte du conducteur à l alarme sinon l armement passif ne s initialisera jamais PROGRAMMATION DES ÉMETTEURS Seul le canal 1 des émetteurs faisant partie de cet ensemble a été programmé à l usine armement désarmement et fonction de déclenchement de la sirène Toute fonction additionnelle du système canal 2 3 du récepteur doit ê...

Страница 9: ... 1 4 po à l emplacement prévu Vérifier qu il existe assez de place derrière le tableau de bord pour faire passer le corps de l interrupteur et que l on n endommagera aucun élément en perçant le tableau de bord au foret Quelle que soit la méthode de montage utilisée veiller à ce que l arrière de l interrupteur soit accessible pour le câblage ultérieur dans i nstallation INSTALLATION DES PRINCIPAUX ...

Страница 10: ... portes du véhicule AVERTISSEMENT Ne pas utiliser le fil marron si le véhicule est équipé d interrupteurs de porte à sortie 12 V Voir fil violet FIL BLANC À FILET NOIR SORTIE POSITIVE À LA SIRÈNE Faire passer ce fil dans une cloison coupe feu munie d un passe fil en caoutchouc et l amener à l emplacement de la sirène Brancher le fil blanc à filet noir sur le fil positif de la sirène Fixer le fil d...

Страница 11: ...sommé par ces sorties ne doit pas dépasser 300 mA VERROUILLAGE DE PORTE À 3 FILS PAR IMPULSION DE MASSE Dans cette application le fil rouge fournit une impulsion de masse lors de l armement ou la sortie impulsions de masse de verrouillage de porte Brancher le fil rouge au fil qui fournit un signal de masse à faible courant de l interrupteur de verrouillage de porte monté d usine au relais de comma...

Страница 12: ...ON BLANC BLEU FONCÉ POURPRE NIOR FIL DE VERROUILLAGE DE PORTE EN OPTION EMPLACEMENT DE L INTERRUPTEUR VALET EMPLACEMENT DE LA SIRENE EMPLACEMENT DES VOYANTS DEL EMPLACEMENT DU MODULE DE COMMANDE MODÈLE ANNÉE TYPE DE VÉHICULE FIL FIL DE VERROUILLAGE DE PORTE EN OPTION Page 13 ...

Страница 13: ...REMARQUE ET CROQUIS Page 14 Printed in U S A Audiovox Corp 150 Marcus Blvd Hauppauge N Y 11788 Form No 128 4827 ...

Страница 14: ...PASIVA y SENSOR DE VOLTAJE se debe conectar el conmutador de clavija de la puerta del conductor o nunca funcionará la activación pasiva del sistema DESACTIVACION DEL ARRANCADOR Este sistema proporciona una salida para controlar un relé de corte opcional del arrancador no se incluye Cuando se instala esta opción cada vez que se activa el sistema el circuito de arranque del vehículo no funciona CANA...

Страница 15: ...én cerrados Lo conmutadore de clavija pueden instalarse usando lo soporte incluido o montarse directamente perforando un agujero de 9 32 de pulgada de diámetro Tenga en mente que cuando están bien instalados el percutor debe presionarse 1 4 de pulgada por lo menos cuando la tapa del baúl o el capó están cerrados GRÁFICA PARA REFERENCIA FUTURA Como una conveniencia adicional para el profesional que...

Страница 16: ...INSTANTÁNEO Este es un cable a tierra de disparo instantáneo Debe conectarse a los conmutadores de clavija del capó y baúl previamente instalados CABLE MORADO DISPARADOR DE PUERTA Si los interruptores de la lámpara de cortesía de la puerta del vehículo tienen una salida positiva de 12 voltios cuando la puerta está abierta la mayoría de los Fords y algunos importados usted debe conectar este cable ...

Страница 17: ...ra durante la activación o la salida pulsada de cerradura con conexión a tierra Conecte el cable rojo al cable que proporciona una señal a tierra de baja corriente desde el interruptor de cerradura de puerta de fábrica al relé de control de cerradura de puertas de fábrica El cable verde proporciona un impulso a tierra durante la desactivación o la salida pulsada para abrir las cerraduras Conecte e...

Страница 18: ...L VEHÍCULO LOCALODAD TIPO DE CIRCUITO DE CERRADURA DE PUERTA UBICACION DEL L E D UBICACION DEL MODULO DE CONTROL UBICACION DEL INTERRUPTOR DERIVANTE DE EMERGENCIA UBICACION DE LA SIRENA ROJO NEGRO PARDO PURPURADO BLANCO AZUL OBSCURO Page 20 CAVLEADO DE LA CERRADURA DE PUERTA OPCIONAL ...

Страница 19: ...NOTAS Printed in U S A Audiovox Corp 150 Marcus Blvd Hauppauge N Y 11788 Form No 128 4827 Page 21 ...

Отзывы: