


The Architect
Model 100 & Model 200
Installer’s Guide
Quick Hook-Up
Guide
3
Experienced Installer’s Quick
Hook-Up Guide
What follows are “Express” hook-up diagrams for profession-
als and experienced audio buffs.
1) Connect the AC power and Remote Turn-On Control.
(Page 7) Start with the GROUND LIFT switch in the
GROUND position. If you have a ground loop hum, try the
other two positions for the best operation. This switch ONLY
isolates the audio ground from the earth ground. The chassis
is ALWAYS connected to earth ground.
2) Connect the Speaker and Audio Inputs. (Page 8) The Archi-
tect is designed to drive multiple speaker loads down to 2
ohms. To simplify connection,
there are two sets of speaker
terminals in parallel. Remember to
figure in both sets of connections
when calculating the total system
speaker impedance.
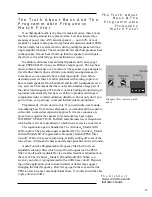
3) Adjust the PFM filter. (Page 15)
The PFM bass-blocking filter
comes factory set to 40Hz. Please
refer to your speaker’s frequency
response specifications before
adjusting this filter. Don’t be afraid
of leaving this filter frequency set
fairly high. We have found over the
years that a system actually sounds
louder and has more bass when the
subsonic filter is set at a higher fre-
quency.
4) Set the Equalization (Model 200
only). (Page 12) Adjustment of The
Architect(tm) Model 200’s speaker
optimizer controls is best done with a
one-third octave real time analyzer
and pink noise test signal, but it can
be done by ear.
5) Fill Out The Warranty Card. Please
make certain the warranty card is
filled out and mailed back to our
factory. Comments received from
these warranty cards are one of the
ways we are constantly improving our products.
Remote Power Control Hookup
Four Zone System with
Model 200 and L-pads
Содержание Architect 100
Страница 4: ......


