6
QUARTZ SLEEVE:
Installation of the Quartz Sleeve:
Always handle quartz sleeves carefully to prevent breaking or chipping. The quartz sleeves are to be
clean and free of fingerprints before installing.
Remove the compression nut. Install the quartz sleeve through the stainless steel threaded nipple
allowing an equal amount to extend beyond each nipple. Install the O-Ring down the top of the
nipple. Avoid riding the O-Ring on any threaded part of the nipple. Hand-tighten each compression
nut to form a compression seal around the quartz sleeve.
Avoid overtightening
the nuts, which may
cause a fracture on the end of the quartz sleeve. Under normal operation conditions, hand-tightening
will provide a 100 psi seal. Do not use any devices to tighten end nuts. Repeat this procedure at the
opposite end of the chamber.
After you have tightened the compression nut and all other plumbing connections, open the outlet valve.
Slowly open the inlet valve and flush out all remaining air. Then close the outlet valve and
slowly open the inlet valve fully. Check the unit for leaks. If you find a leak at the compression nut,
tighten the nut further. If the leak continues, drain the unit and inspect the quartz O-Ring and quartz
sleeve for proper seal. Once you complete checking the unit, reassemble O-Ring and tighten gland nut.
Repressurize the unit and check again.
REQUIREMENTS FOR CLEANING THE QUARTZ SLEEVE:
As water passes through the U.V., minerals, debris and other matter in the water may deposit onto the
quartz sleeve. After sufficient film has formed on the quartz sleeve, the ability of the ultraviolet
germicidal rays to pass though the quartz sleeve and into the water may be impaired. Therefore, it is
necessary to determine a cleaning schedule for the quartz sleeve. The frequency will depend on the
specific type of water conditions. If the water has been processed through deionization, reverse
osmosis, or is distilled, cleaning may be required only once per year. If untreated water is used, the
cleaning frequency will vary. A minimum of once yearly is standard recommendation for cleaning and
lamp replacement. Contact your local dealer for scheduling this service. Your specific situation will
vary the frequency time according to the water quality of the home or facility application.
QUARTZ SLEEVE CLEANING PROCEDURES:
To clean the quartz sleeve, turn off the water flow to the disinfection unit, turn power off, and disconnect
the electrical service to the lamp pins. Carefully remove the U.V. lamp. Loosen the compression nuts
with O-Rings and remove the quartz sleeve while draining the water from the chamber. The quartz
sleeve may then be washed with a mild soap and hot water solution and rinsed clean with hot water.
Should this be insufficient to clean the quartz sleeve, a mild acid may be used (i.e. vinegar). Be certain
to follow all recommended safety and handling procedures on the acid container. It is important to
handle the quartz sleeve with care to prevent breakage. Make certain that all finger prints are wiped
clean before reinstalling (see installation of the quartz sleeve). Replace O-Rings [ATS8-544(1)] every
time a quartz sleeve is cleaned or replaced.
Содержание Safe Lite SL-2V
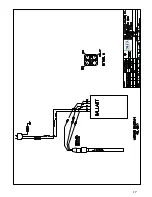
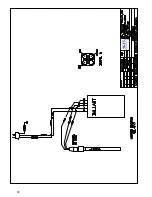
Страница 16: ...16 WIRING DIAGRAM...
Страница 17: ...17...
Страница 18: ...18...
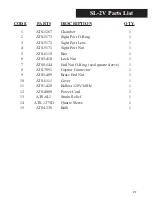
Страница 19: ...19 DRAWING AND PART NUMBERS...
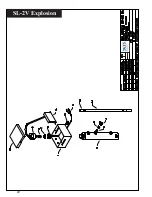
Страница 20: ...20 SL 2V Explosion...
Страница 22: ...22 SL 8V Explosion...


