11
SANITATION PROCEDURE FOR INSTALLATION
AND BULB REPLACEMENT:
HOW TO DISINFECT A WATER SYSTEM:
Every new well, or existing water supply system that has been disrupted for service or repair, should be
disinfected before it is returned to use. Water in the well and storage tank should be treated with a strong
chlorine solution to destroy disease organisms. All pipelines and fixtures in the distribution system should be
rinsed and flushed with chlorinated water. Upon installation of a U.V. disinfection unit or yearly bulb replace-
ment service, disinfection with chlorine to initially flush the system is recommended to assure line sanitation
prior to U.V. start up.
The source of chlorine can be ordinary household liquid laundry bleach (about 5.25% available chlorine). The
quantity required depends on the volume of water to be treated. The United States Environment Protection
Agency (EPA) indicated that about 100 parts of chlorine, by weight, mixed in a million parts of water will
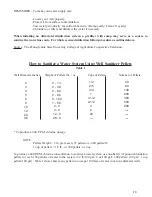
destroy essentially all water-borne disease organisms. Table 1 shows the quantity of liquid bleach required to
disinfect wells of various diameters and depths.
DISINFECTION PROCEDURE:
DRILLED WELLS: Remove the cap or seal form the casing and measure the depth of the water in the well,
then refer to Table 1 to determine how much chlorine solution should be used. In some instances removing the
seal to measure the water can be a difficult task, and it is easier to guess at the quantity of disinfectant needed
than it is to make a more accurate determination (footnote, Table 1). As a general rule, it is better to use too
much chlorine than too little. The disadvantage in doing so is that it will take longer for the taste and odor to
leave the system.
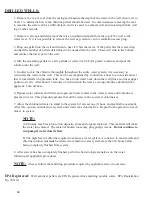
Mix the required chlorine disinfectant with a few gallons of water in a plastic bucket and pour it into the well.
If the seal has a removable vent, unscrew the pipe or plug and pour the disinfecting solution through the hole
into the well. For maximum effectiveness, the chlorine must be mixed with the water in the well. This can be
accomplished by connection a hose to a faucet beyond the pressure tank, and circulating the water from the tank
back into the casing. After about 20 minutes, close this faucet, open another at the far end of the distribution
line and let the water run until the odor of chlorine can be detected.
Close this faucet and repeat the procedure for each of the other outlets on the line until chlorinated water can be
detected throughout the entire system. Keep this water in the pipeline for at least 6 hours, (preferably overnight)
then start the pump and flush the system. Continue pumping until the odor of chlorine disappears. For U.V.
installations or replacement bulb servicing, this can be shortened to 20 minute time.
Содержание DWS-15
Страница 6: ...6 ATS 280CB RESET BUTTON MOUNTED UNDER TOP PLATE OUTLET MAINS BALLAST LAMP...
Страница 19: ...19...
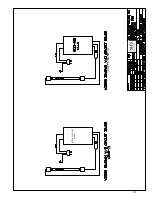
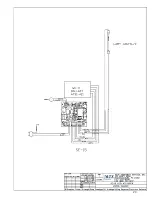
Страница 20: ...20 WIRING DIAGRAM...
Страница 21: ...21 ATS1 421 CCASE WH 3C DWS 15 DWSW 15...
Страница 22: ...22 ATS1 421 CCASE WH 3C...
Страница 23: ...23...
Страница 24: ...24 ATS1 421 WH 3C...
Страница 25: ...25...
Страница 26: ...26...
Страница 27: ...27 DRAWING AND PART NUMBERS...
Страница 28: ...28 DWS 7 Explosion...
Страница 30: ...30 DWS 15 Explosion...
Страница 32: ...32 SE 7 Explosion...
Страница 34: ...34 SE 15 Explosion...
Страница 36: ...36 DWSW 8 Explosion...
Страница 38: ...38 DWSW 15 Explosion...


