AT-HDVS-150-TX / AT-HDVS-150-TX-PSK
13
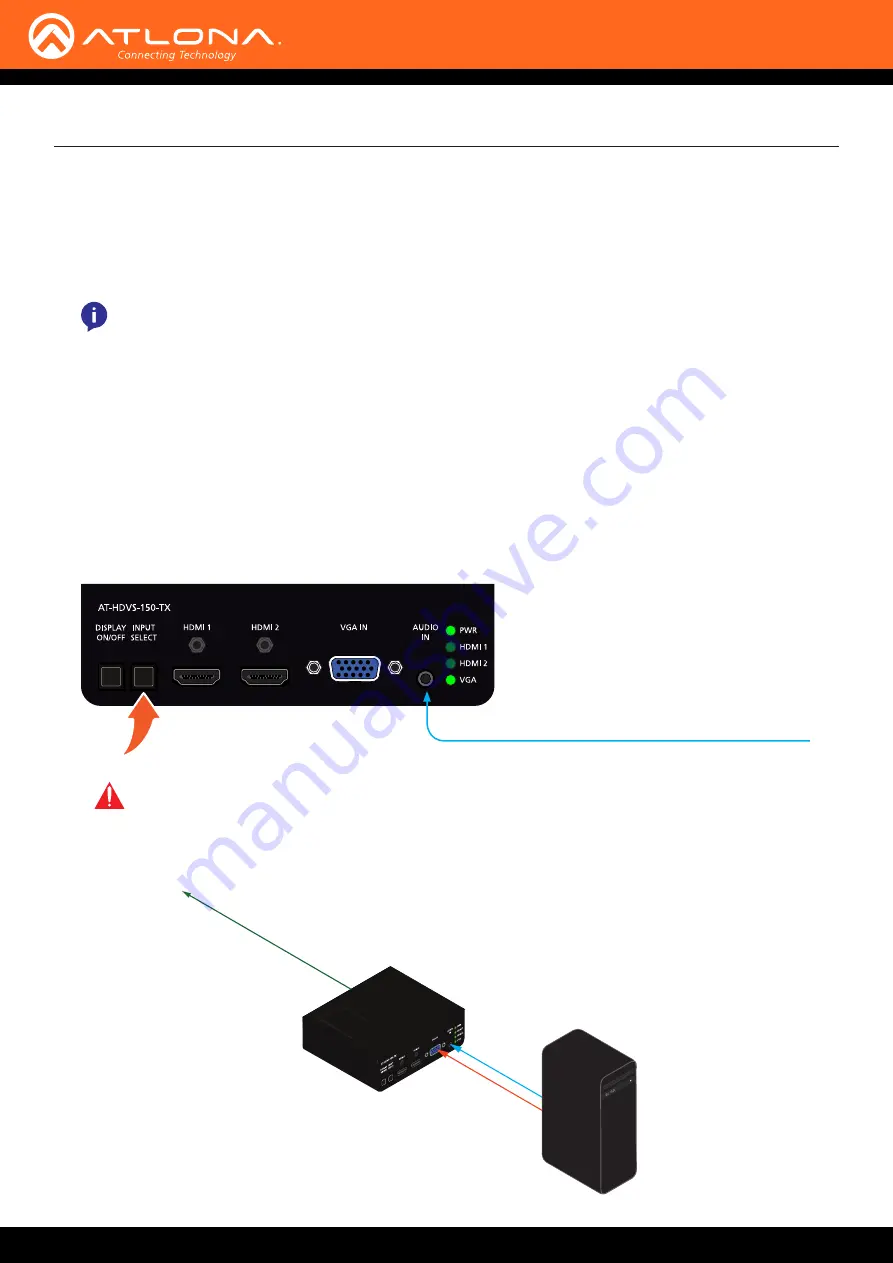
Both products can pass two-channel analog audio with the VGA signal. In order for the audio to be passed to the
receiver, an active VGA source must be connected to the
VGA IN
port and the port must be selected. Analog audio
cannot
be embedded on an HDMI signal.
1. Connect a VGA source to the
VGA IN
port on the transmitter.
2. Connect a 3.5 mm mini-stereo cable from the
AUDIO IN
port to the analog audio source.
3. Press the
INPUT SELECT
button until the
VGA
indicator turns bright green.
The example below, shows a desktop PC providing both the audio and video source. However, these signals
may be connected to separate sources.
Both products have auto-switching capability. The default setting is OFF and can be set using a compatible receiver.
The unit will automatically switch to the most recently-connected or powered source when a source is disconnected.
For example, if the connection sequence is
HDMI 2
>
HDMI 1
>
VGA
, then disconnecting the source from
HDMI 1
will result in the product automatically switching to the
VGA
port.
Passing Analog Audio
Auto Switching
Basic Operation
VGA
Audio
VGA
+ Audio
AT-HDVS-150-TX
Desktop PC
USB
USB
from analog audio source
IMPORTANT
: The
AUDIO IN
port will pass audio only when both the
VGA IN
port is selected
and
when the
VGA IN
port is connected to an active VGA source. Audio cannot be passed without
video.
NOTE:
Auto-switching is triggered by a Hot-Plug Detect (HPD) event. If HPD is not detected,
then AT-HDVS-150-TX will not switch inputs. VGA does not support HPD.


