background image


ENG


22 

3.0


OPERATION 

3.1 Transfer to Maintenance Bypass 

Before transferring to maintenance bypass, make sure the Power LED is lighting.  

Move the UPS must in Bypass mode. 

Transfer  the  rotary  bypass  switch  from  “Normal”  to  “Bypass”.  At  this  time,  all 

connected devices are powered by the utility power directly. You may turn off the 

UPS and disconnect two cables connecting to UPS. Then you may now service the 
UPS. 

3.2 Transfer to UPS Protection 

After maintenance service is done, make sure the UPS operation is normal. Then, 
reconnect UPS to the unit by following Installation Section. Verify the Power LED is 

lighting.  
Once connected the UPS will move in Bypass mode. 

Then transfer the rotary bypass 

switch from “Bypass” to “Normal”.


Move the UPS must to LINE mode. 

Now, all connected devices are protected by UPS. 

3.3 Master/Slave Function Operation 

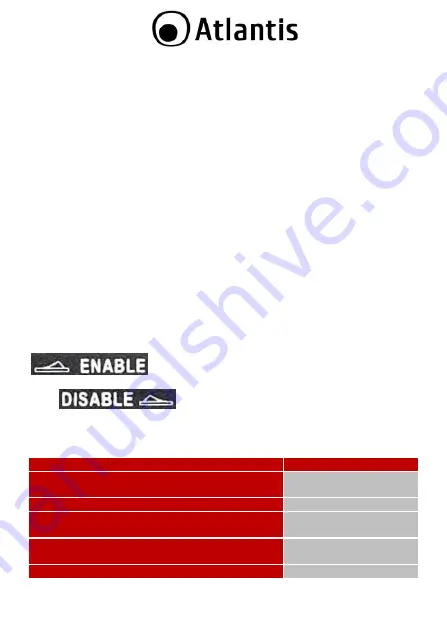
After connecting all devices to the unit, press “Master/Slave switch” to enable status


[

]. The Slave On LED will light up when connecting load on 

master  output  is  above  20W.  Press  “Master/Slave  switch”  to  disable 

status[

], the function is disabled and the Slave On LED will 

be on. 

3.4 Status and LED 

Status 

Indicator 

Utility is normal. 

Utility fails but UPS is providing power. 

Power LED (Green) on 

Utility Fails 

Power LED (Green) off 

Master/Slave function is enabled and the connecting 

load on master output is above 20W 

Slave On LED (Yellow) on 

Master/Slave function is enabled and the connecting 

load on master output is below 20W. 

Slave On LED (Yellow) off 

Master/Slave function is disabled. 

Slave On LED (Yellow) on 

Содержание U power A03-PDUMBS-R

Страница 1: ......

Страница 2: ...re detailed instructions on configuring and using this device please refer to the online manual FRANCAIS Ce produit est couvert par une garantie Atlantis On Site de 2 ans Pour des informations plus détaillées référez vous svp au site Web www atlantis land com DEUTSCH Dieses Produkt ist durch die Atlantis On Site 2 Jahre Garantie gedeckt Für weitere Informationen beziehen Sie sich bitte auf Web Sit...

Страница 3: ... 3 2 Attivazione del Maintenance Bypass Switch Normal 13 3 3 Master Slave 13 3 4 Status and LED 13 APPENDICE A Supporto 14 A 1 1 Supporto Offerto 14 ENGLISH MANUAL 17 1 0 PDU Maintenance Bypass Switch Module 17 1 1 Inspection 17 1 2 Package Contents 17 1 3 Placement 17 1 4 Rack Mount Wall Mount the Unit 18 2 0 INSTALLATION and SETUP 19 2 1 Rear Panel Explanation 19 2 2 Connect to the Wall Outlet 2...

Страница 4: ...4 APPENDIX A SUPPORT 23 A 1 1 Support 23 Technical Features 24 A03 PDUMBS R_MX01 rel 19 0 2 2020 ...

Страница 5: ...ri e dei prodotti e qualsiasi marchio registrato o meno menzionati in questo manuale sono usati al solo scopo identificativo e rimangono proprietà esclusiva dei loro rispettivi proprietari ATTENZIONE Questo apparato va installato esclusivamente da personale qualificato La garanzia decade se non vengono rispettate tutte le norme e le prescrizioni indicate nel presente manuale operativo L UPS può es...

Страница 6: ...putabili all utilizzo all installazione in ambienti non ignifughi o non idonei alla rottura o al malfunzionamento di prodotti Atlantis Attenzione Durante l installazione del prodotto verificare che la somma delle correnti di dispersione non ecceda 3 5mA Restrizioni di responsabilità Il software di controllo ove presente è dato in licenza Atlantis non offrirà supporto sull utilizzo installazione né...

Страница 7: ...lore di umidità Preparazione Al fine di evitare rischi di incendi o shock elettrici disporre l apparato in ambiente indoor con temperatura ed umidità controllate e privo di agenti conduttori di ogni genere Non installare in luoghi in cui il dispositivo sia sotto irraggiamento solare diretto ...

Страница 8: ...immediatamente il dispositivo Rivolgersi al rivenditore qualora il dispositivo fosse danneggiato La confezione in cartone è in materiale riciclabile e andrebbe conservata e utilizzata per proteggere il prodotto durante la spedizione Nel caso in cui il prodotto venga riconsegnato in un imballo non originale o palesemente non adatto e o integro il materiale viaggia a rischio e pericolo del Consumato...

Страница 9: ...tà controllata Non va collocato in ambienti infiammabili va messo lontano da legno parquet tappeti e superfici simili Assicurarsi che il cavo di alimentazione non sia schiacciato da altri dispositivi o da altri oggetti pesanti Il cavo che connette i carichi al dispositivo non deve superare i 10 metri di lunghezza 1 4 Collocazione Rack Muro dell unità Il dispositivo può essere montato in un armadio...

Страница 10: ...ket da collegare all USCITA dell UPS 4 Socket da collegare all INGRESSO dell UPS 5 Bypass Switch L azionamento di questo switch permette di commutare l alimentazione del carico identificativo 1 e 2 direttamente sull ingresso identificativo 6 Questa operazione va fatta ESCLUSIVAMENTE dopo aver messo l UPS in ByPAss 6 Socket da collegare alla rete elettrica di alimentazione tramite il cavo fornito 7...

Страница 11: ... in assenza di rete elettrica 2 3 Connessione all UPS Collegare il socket identificativo 3 all uscita dell UPS Collegare il socket identificativo 4 all ingresso dell UPS Nella figura sotto riportata è riportato lo schema di collegamento col codice A03 OP3001 RC 2 4 Connessione del carico Il dispositivo integra 2 blocchi di prese identificativo 1 definite Master e l identificativo 2 definite Slave ...

Страница 12: ...se Master Si faccia riferimento agli schemi seguenti Computer collegati alle uscite Master Periferiche collegate alle uscite Slave Quando i carichi connessi alla prese Master sono spenti il dispositivo spegnerà i carichi connessi alle uscite Slave Se il computer attiva la modalità Sleep il dispositivo potrebbe essere ingannato assorbimento sotto 20W e non spegnere i carichi slave ...

Страница 13: ...e Bypass Switch Normal Ricollegare l ups al maintenance Bypass Switch seguendo le istruzioni prima riportate Verificare che il led Power sia acceso L UPS dovrebbe spostarsi in modalità ByPass Ruotare l interruttore di Bypass da Bypass a Normal Ora tutti i carichi verranno alimentati direttamente dalla rete elettrica Spostare l UPS in modalità LINE Ora tutti i carichi verranno protetti dall UPS 3 3...

Страница 14: ...o è possibile contattare il servizio di assistenza tecnica Atlantis tramite l apertura di un ticket on line sul portale http www atlantis land com ita supporto php Nel caso non fosse possibile l accesso al portale di supporto è altresì possibile richiedere assistenza telefonica al numero 02 93550066 consultare il sito per verificare gli orari in cui il servizio viene erogato Per esporre eventuali ...

Страница 15: ...carried out only by qualified maintenance personnel Caution Connect the device UPS system only to an earthed shockproof outlet which must be easily accessible and close to the UPS system Caution Risk of electric shock hazardous live parts inside this UPS can be energized from the battery supply even when the input AC power is disconnected Caution Risk of electric shock Battery Circuit is not isola...

Страница 16: ...ctive earthing of the UPS system and of all connected loads Caution Do not let liquid or foreign objects enter the product Caution Do not place the unit near liquid or in an excessively damp environment Caution The product must be used indoor only Caution Ground the product using a 2P ground sockets Caution When installing the product ensure that the sum of the leakage currents of the product and ...

Страница 17: ...on feature and the master controlled design it provides maintenance bypass function and power saving within a rack mechanism 1 1 Inspection Inspect the device upon receipt Notify the carrier and dealer if there is damage The package is recyclable save it for reuse or dispose of it properly 1 2 Package Contents Make sure that you have the following items Maintenance bypass switch module Power Cable...

Страница 18: ...lation openings free from obstruction and do not place any foreign objects on top of the device 1 4 Rack Mount Wall Mount the Unit The module can be mounted to a 19 enclosure or wall Please follow below chart for rack wall mount installation If the temperature around the unit will rise above 40 C ventilation is required ...

Страница 19: ...e in a safe place for future use 2 1 Rear Panel Explanation Number Explanations 1 Master output receptacle for connecting a computer IEC 320 C13 C19 2 Slave output receptacles for connecting peripherals IEC 320 C13 3 Socket to UPS output 4 Socket to UPS input 5 Bypass switch 6 AC input 7 Circuit breaker 8 Master Slave function switch A Power LED B Slave On LED ...

Страница 20: ...2 3 Connect UPS Connect a power cord from UPS input to UPS input socket on the unit Use one power cord to connect UPS output to UPS output socket on the unit 2 4 Connect Equipment There are two types of output receptacles Master and Slave To save power consumption the unit is equipped with Master and Slave output receptacles The Master output receptacle will sense if master device computer is ...

Страница 21: ...mputer into Master Output Receptacle Plug peripherals into Slave Output Receptacle When the computer is turned off the Master output receptacle shuts off power to the slave output receptacles However when the computer goes into sleep mode or the power consumption of connected device to Master output receptacle is below 20 W the Master output receptacle may not properly recognize the reduced power ...

Страница 22: ...ansfer the rotary bypass switch from Bypass to Normal Move the UPS must to LINE mode Now all connected devices are protected by UPS 3 3 Master Slave Function Operation After connecting all devices to the unit press Master Slave switch to enable status The Slave On LED will light up when connecting load on master output is above 20W Press Master Slave switch to disable status the function is disabl...

Страница 23: ...r help desk by ticket on http www atlantis land com ita supporto php For generic informations please send an e mail to info atlantis land com For presales informations please send an e mail to prevendite atlantis land com Atlantis Website http www atlantis land com Email info atlantis land com ...

Страница 24: ...C13 10A Output Master 1 xIEC 320 C19 16A MAIN MAIN INPUT 1 x IEC 320 C20 16A receive power from MAIN CONNECTIONS UPS UPS INPUT 1 x IEC 320 C19 16A supply power to UPS INPUT UPS Output 1 x IEC 320 C20 16A receive power from UPS OUTPUT MECHANICAL 438mm x 80mm x 44mm 1U Weight 1 5Kg ENVIRONMENTS Temperature 0 40 C Humidity 20 90 non condensing Package Contents Maintenance bypass switch module Power C...

Страница 25: ...25 ...

Страница 26: ...Atlantis via C Chiesa 21 Pogliano Milanese MI 20010 Italy info atlantis land com ...

Отзывы: