background image

52

 Reference     

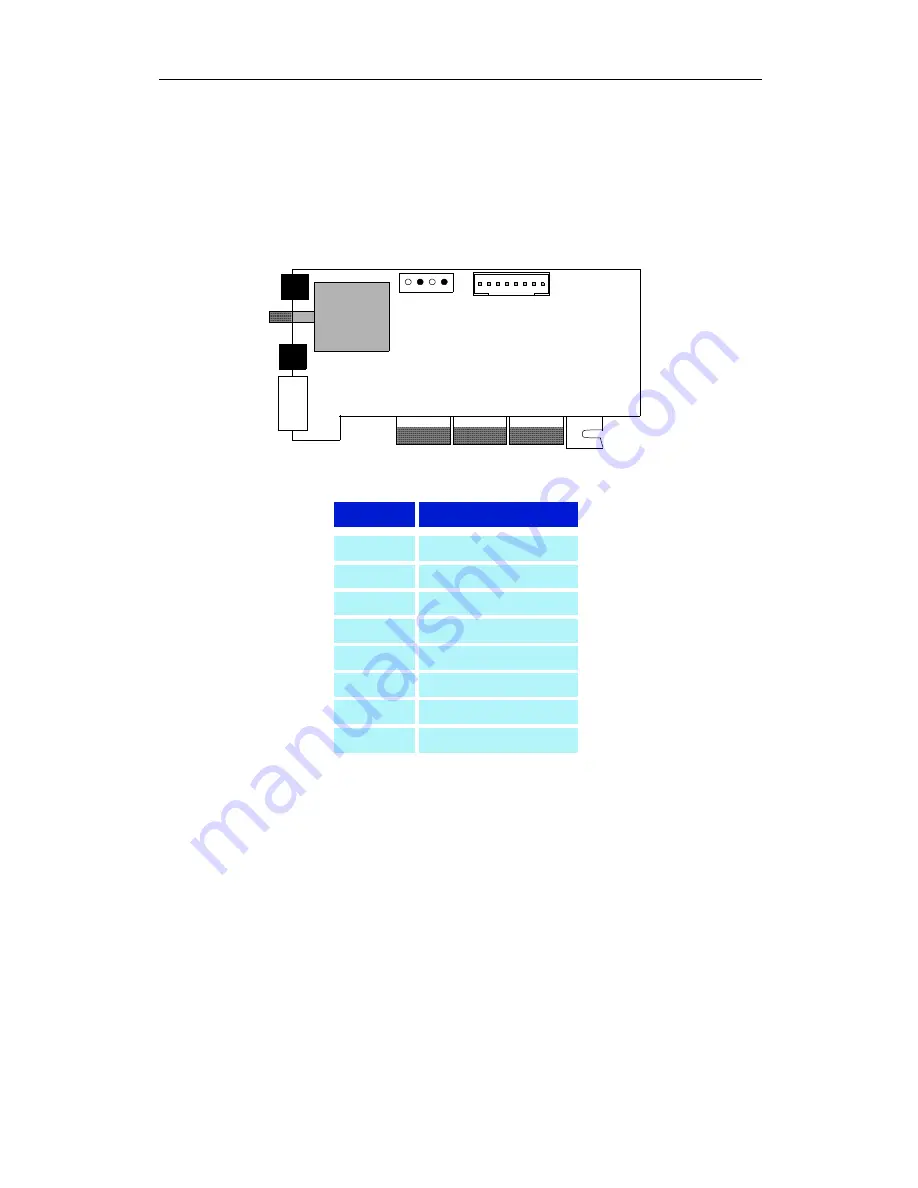
Internal Audio/Video Input Header

The following illustration shows the optional, internal 
audio/video input header connectors on your 
ALL-IN-WONDER 9800 Series card.  

Pin

Signal

1

CVBS / Y in

2

Video Ground

3

Luma / Pr in

4

Video Ground

5

Chroma / Pb in

6

Audio Left in

7

Audio Ground

8

Audio Right in

1

8

Internal 

Audio/Video 

Input Header

ALL-IN-WONDER

CD OUT

ALL-IN WONDER 9800 SERIES

This table lists 
the pin 
assignments for 
the internal 
audio/video input 
header on your 
card.

Содержание 9800PRO - 128MB Dell - Radeon AGP 8x Vga DVI Tv-out DDR X2603

Страница 1: ...ed trademarks of ATI Technologies Inc All other company and or product names are trademarks and or registered trademarks of their respective owners Features performance and specifications are subject to change without notice Product may not be exactly as shown in the diagrams Reproduction of this manual or parts thereof in any form without the express written permission of ATI Technologies Inc is ...

Страница 2: ...s of merchantability fitness for a particular purpose and non infringement Product Notices Dolby Laboratories Inc Manufactured under license from Dolby Laboratories Confidential Unpublished Works c 1992 1997 Dolby Laboratories Inc All rights reserved Macrovision Apparatus Claims of U S Patent Nos 4 631 603 4 577 216 4 819 098 and 4 907 093 licensed for limited viewing uses only This product incorp...

Страница 3: ...tenna or cable system is grounded so as to provide some protection against voltage surges and built up static charges Article 810 of the National Electrical Code ANSI NFPA 70 provides information with regard to proper grounding of the mast and supporting structure grounding of the lead in wire to the antenna discharge unit size of grounding conductors location of antenna discharge unit connection ...

Страница 4: ...iv ...

Страница 5: ... 6 Warranty Service 6 Limitations 7 Installing the Hardware and Software 9 Do This First 9 Uninstalling Old Graphics Card Software 10 Installing Your ALL IN WONDER Card 11 Power connection requirements 12 Windows New Hardware Found 14 Installing the CATALYST Software Suite 14 Troubleshooting Tips 16 Multiple Display Support 16 Increasing the number of colors 17 Starting the ATI Multimedia Center 1...

Страница 6: ...ideo Adapter 35 System Requirements 36 Setting up your ATI HDTV Component Video Adapter 36 Installing your ATI HDTV Component Video Adapter 37 Using your HDTV Component Video Adapter 39 Windows Control Panel Settings 39 Troubleshooting tips 41 Reference 43 Troubleshooting 43 Basic troubleshooting tips 44 Troubleshooting tips 45 Audio and Video Troubleshooting 46 Audio problems 46 Video problems 48...

Страница 7: ...stall your ALL IN WONDER card What is the ALL IN WONDER family The ALL IN WONDER family of cards deliver high performance 3D and 2D graphics as well as advanced multimedia features Play games watch TV or videos listen to audio CDs explore the Internet and work in Windows as never before TV ON DEMAND and TV Listings enhance your television experience Using an attached video camera the ALL IN WONDER...

Страница 8: ...NDER also turns your PC into an intelligent TV with the following features TV ON DEMAND THRUVIEW MULTVIEW Zoom in Scheduled Viewing Channel Scanning Video recording Closed Captioning with Hot Words Program transcript recording North America only TV MAGAZINE Personal Video Recorder with real time video compression Interactive Program Guide in selected countries AC 3 Digital Audio playback supportin...

Страница 9: ...r requires available USB port Expansion Slot AGP 2X AGP 8X or AGP 2X 4X 8X slot Operating System Windows 98 SE Windows Me Windows 2000 Windows XP The Windows Me driver installs on Windows 98 SE Monitor VGA supporting minimum 640x480 resolution A Plug and Play monitor that supports VESA s Display Channel specifications DDC1 or DDC2b is required to take advantage of the DDC1 DDC2b features The DVI I...

Страница 10: ...r right corner of your screen ATI Multimedia Center Guide The online ATI Multimedia Center User s Guide explains how to use the special features that the ATI Multimedia Center provides To open the ATI Multimedia Center User s Guide 1 Insert the ATI Installation CD ROM into your CD ROM drive then click User Guide The Online Manual opens in Adobe Acrobat Reader 2 Click User s Guides click ATI Multim...

Страница 11: ...duct use one of the following options Online For product information video drivers Frequently Asked Questions and Email support visit http www ati com and select Customer Service for Built By ATI products Telephone Available Monday to Friday 9 00 AM 7 00 PM EST 905 882 2626 Access to Telephone Support is available to registered users at no additional cost for the first 30 days from the date of pur...

Страница 12: ...uctions natural or personal disaster or unauthorized alterations repairs or modifications For a detailed description of the ATI Hardware Warranty Service Statement visit http www ati com online warranty statement Warranty Service For warranty service instructions visit http www ati com online warranty or contact one of our Customer Service Representatives using one of the aforementioned means Befo...

Страница 13: ...lity of ATI in respect of any defective product will be limited to the repair or replacement of such product ATI may use new or equivalent to new replacement parts Defective product will be sent in for repair or replacement only ATI makes no other representations or warranties as to fitness for a particular purpose merchantability or otherwise in respect of the product No other representations war...

Страница 14: ...8 Getting Started ...

Страница 15: ...This driver is required by your new ATI card to function correctly with your motherboard It is very important that the correct AGP driver be installed before installing an AGP video card in your system To determine what motherboard chipset is present on your system 1 Right click My Computer then click Properties 2 Click the Hardware tab in Windows 2000 or Windows XP Device Manager tab then scroll ...

Страница 16: ...are To ensure successful installation of your ALL IN WONDER card you must uninstall the graphic drivers for the existing graphics card before removing it from your computer To uninstall old graphics drivers With your current graphics card still in your computer 1 Close all applications that are currently running 2 Click Start Settings Control Panel then select Add Remove Programs 3 Select your cur...

Страница 17: ...d monitor 2 Disconnect the monitor cable from the back of your computer and disconnect all other connectors from the back of your old video card 3 Remove the computer cover If necessary consult your computer s manual for help in removing the cover Discharge your body s static electricity by touching the metal surface of the computer chassis ...

Страница 18: ...ion Cable to the graphics card power connector as shown The cable may already be connected to the graphics card 2 Connect B to the power supply connector then connect C to the Hard Drive power connector 3 After locating the AGP slot and if necessary removing the metal cover align your ALL IN WONDER card with the AGP slot and press it in firmly until the card is fully seated 4 Replace the screw to ...

Страница 19: ...ter and monitor If you have an ALL IN WONDER 9800 Series card you can connect an analog CRT display using the DVI I to VGA adapter as shown below ALL IN WONDER 9800 Series Power Connection DVI I CONNECTOR VGA CONNECTOR ON CARD FROM MONITOR DVI I TO VGA ADAPTER ...

Страница 20: ...PCI Graphics Adapter If prompted for the Windows CD ROM insert it into your CD ROM drive 2 Type the following D operating system name for example D WinME If D is not your CD ROM drive substitute the correct drive letter 3 Click OK click Finish to close the Wizard then restart your computer Installing the CATALYST Software Suite ATI s CATALYST software suite provides the ultimate software required ...

Страница 21: ...xt then click Yes to the license agreement 6 Click ATI Easy Install to begin the Installation Wizard 7 Follow the Wizard s on screen instructions to complete the installation then restart your computer The Express installation option is recommended The multimedia components will automatically be installed along with the ATI graphics driver Custom installation allows you to select individual softwa...

Страница 22: ...your motherboard For more information consult your computer s manual or contact the manufacturer NOTE Some manufacturers do not allow the built in graphics to be disabled or to become the secondary display Make sure you selected the appropriate display device and graphics card when you installed the ATI driver For more troubleshooting tips right click the ATI icon in the taskbar and select Trouble...

Страница 23: ...e maximum number of colors The ALL IN WONDER card s advanced DirectX 8 1 and OpenGL 3D acceleration gives you detailed color graphics and 3D features like multi texturing alpha blending and fog effects ALL IN WONDER also provides powerful 2D graphics features through the Display Properties pages Settings Customize your desktop settings such as desktop size screen resolution and color depth and sto...

Страница 24: ...ltimedia Center features just click the one you want LaunchPad opens automatically when you start your computer or if you prefer you can right click LaunchPad and uncheck Load on Startup in the drop down menu to disable this feature From Windows taskbar 1 In the Windows taskbar click Start then point at Programs 2 Point at ATI Multimedia Center then select CD Audio DVD File Player LaunchPad Librar...

Страница 25: ...To hear sound when you use your ALL IN WONDER card s TV feature ensure that the ALL IN WONDER card s output cable is connected to the line in connector of your sound card see page 21 For information on the CD audio connectors see page 51 i ALL IN WONDER ALL IN WONDER 2 3 1 4 ALL IN WONDR Video In CATV In 1 2 ALL IN WONDER 3 4 ALL IN WONDER Card Connectors Video Out 9800 Series DVI I Out ALL IN WON...

Страница 26: ...rd as shown The audio and video output connectors on your VCR camcorder or laserdisc player will be similar to these Use composite video out or S video out S Video will provide better results ALL IN WONDER A V IN CATV A V OUT Cable with S Video plug at each end Cables with RCA plugs at each end available separately from a consumer electronics dealer S VIDEO OUT COMP VIDEO OUT L AUDIO OUT R AUDIO O...

Страница 27: ... IN S Video will provide better results ATI output adapter Cable with RCA plug at each end available separately from a consumer electronics dealer Cable with S Video plug at each end LINE IN SOUND CARD OR LINE OUT Dolby Digital AC 3 Amplifier S PDIF connection S PDIF Cable with RCA plugs available from a consumer electronics dealer To record audio on your stereo VCR or to hear audio through your T...

Страница 28: ... A V IN CATV A V OUT ALL IN WONDER Dolby Digital AC 3 Amplifier S PDIF connection Pr Pb Y HDTV Video Inputs Cable with RCA plugs available from a consumer electronics dealer LINE IN must be connected LINE IN SOUND CARD LINE OUT Input and output cable lengths should not exceed 50 feet 15m Y Green Pb Blue Pr Red ATI component video adapter Cables with RCA plugs available from a consumer electronics ...

Страница 29: ...ONDER card s audio output cable to your sound card s Line In connector 4 Click Next to open the TV Sound Initialization Wizard 5 Click the audio input that matches the connection between your ALL IN WONDER card and your sound card Line In is the standard audio input when the ALL IN WONDER card s audio output cable is connected to the sound card s Line In connector If you are not sure how it is con...

Страница 30: ...t corner of your screen then click Open Volume Controls 2 If the Line In volume slider is not visible click Options then click Properties 3 Click the Line In volume control checkbox then click OK If the Mute checkbox is checked click it to cancel muting If the speaker icon is not in your Taskbar do the following In the Windows taskbar click Start point to Settings then click Control Panel Double c...

Страница 31: ...t operation of your card s multimedia features the ALL IN WONDER 9800 Series card must be your computer s primary graphics card For more information see Multiple Display Support on page 16 Connecting Your PC to a Video Source To connect your computer to a VCR or camcorder attach a connector cable from the VCR or camcorder to the ATI Input Output Adapter Most VCRs and camcorders have a Composite vi...

Страница 32: ... Your Card Using your ALL IN WONDER card s Composite or S Video output you can connect a television set as your computer s display You can use your card to view computer output directly on your television Depending upon your television you can choose NTSC or PAL formats You can display images on both the TV and VGA monitor simultaneously The ALL IN WONDER provides a big screen experience for enter...

Страница 33: ...card 4 Connect the supplied output cable adapter to the A V OUT connector on the card see Input and Output Adapters on page 19 5 Using a cable with either S Video or RCA connectors attach one end of the cable to the output cable adapter and the other to your television 6 Turn on your computer and your television If there is no display you may need to enable the television output capability see Usi...

Страница 34: ...monitor and television is set to 50Hz Some monitors may not support this refresh rate and could be damaged Please check the documentation supplied with your monitor to see if your monitor supports a refresh rate of 50Hz If your monitor does not support 50 Hz or if you are not sure then turn off your monitor before turning on your computer when using your television as a display For information on ...

Страница 35: ...ed The television screen may become scrambled temporarily during the initial Windows logo display This is only a temporary effect and your television screen will be restored within a few seconds During start up your TV Out graphics card will go through a sequence of mode settings during which your television display will remain blank This process takes only a few seconds and helps program the tele...

Страница 36: ...y on your monitor only Click the Television button to adjust the television display only TV reception tips In the TV Tuner tab ensure that you click the correct setting for cable or antenna For the best indoor antenna reception use an amplified model and move it as far away from your monitor as possible If you experience problems with cable input a signal amplifier may improve reception Viewing te...

Страница 37: ...n your television and the PC application you are running To reduce edge distortion you can increase the horizontal size To increase the horizontal size 1 Click Start point to Settings then click Control Panel 2 Double click Display then click the Settings tab 3 Click the Advanced button then click the Displays tab Windows 98 users click the Advanced button then click the Displays tab 4 Click the T...

Страница 38: ...hanges you have made Changing display configurations If you move your computer to a place where you are using television display only make sure that you have the television display feature enabled first see To enable and disable the television display on page 29 Using games and applications Some older games and applications may program the graphics card directly to run under a specific display mod...

Страница 39: ...e windows If you use dual monitors you can drag the MULTVIEW window to the secondary monitor MULTVIEW can be displayed in a window or full screen in the secondary monitor MULTVIEW controls include channel up down Mute unmute audio swap channel volume slider and channel status When MULTVIEW is in focus you can also type a channel number or name to change channels To enable MULTVIEW In the MULTVIEW ...

Страница 40: ... the embedded MULTVIEW window is in focus its borders are red when it is not in focus its borders are black For example when the borders are red a REMOTE WONDER channel change command will change the MULTVIEW channel MULTVIEW audio requirements If you have one audio card or an integrated audio chip you must connect one audio path internally CD In for example and the other externally Line In for ex...

Страница 41: ...movies and browsing the Internet The standard A V Output adapter black allows you to connect a standard TV using a Composite Video or S Video cable The HDTV Component Video Adapter red can be used in place of the standard A V Output cable to connect to an HDTV or other component input device using component video cables The HDTV Component Video Adapter is for use in North America only and is inclu...

Страница 42: ...ation and Setup User s Guide Setting up your ATI HDTV Component Video Adapter Setting up the ATI HDTV Component Video Adapter consists of two easy steps Installing the software page 37 Connecting the Adapter page 37 Processor Pentium 4 III II Celeron AMD K6 Athlon or compatible Graphics Adapter ALL IN WONDER 9800 Series card Operating System Windows 98 SE Windows Me Windows 2000 Windows XP The Win...

Страница 43: ...ent Video Adapter Kit into your CD ROM drive If Windows runs the CD automatically go to step 4 2 Click Start then click Run 3 Type the following D Setup If D is not your CD ROM drive substitute the correct drive letter 4 Click OK then follow the on screen prompts 5 Shut down your computer 6 Plug the ATI HDTV Component Video Adapter into the A V Out connector on your ALL IN WONDER card Digital flat...

Страница 44: ...ything until Windows starts This may take several minutes A V IN CATV A V OUT ALL IN WONDER Pr Pb Y HDTV Video Inputs ATI component video adapter Cables with RCA plugs available from a consumer electronics dealer CRT Analog Flat Panel Monitor Input and output cable lengths should not exceed 50 feet 15m Y Green Pb Blue Pr Red For complete cabling instructions see page 22 S PDIF connector To sound c...

Страница 45: ...the Windows Start button point at Settings then click Control Panel 2 Double click the Display icon click the Settings tab and use the Screen Area slider to select the resolution you want Note If the resolution you select is not related to a timing the system will reduce the resolution to the closest supported timing 3 Click the Advanced button then click the Displays tab 4 Click the YPbPr tab The...

Страница 46: ... experience problems Please contact your dealer for more advanced troubleshooting information Windows XP does not enable 640 x 480 screen resolution by default To set 640 x 480 resolution right click your desktop click Properties click the Settings tab click the Advanced button click the Adapter tab click List all modes then select 640 x 480 60Hz Progressive 30Hz Interlaced i ...

Страница 47: ...utes Set your TV to YPbPr input Ensure that the HDTV Component Video Adapter is properly connected then restart your computer Ensure that the drivers in the ATI HDTV Component Video Adapter Kit have been installed DVDs will not play in 720p or 1080i modes Copy protected DVDs restrict playback to 480i and 480p modes I can t see the entire display If your component input device supports it try 720p ...

Страница 48: ...42 Using Your ALL IN WONDER ...

Страница 49: ...N WONDER card Troubleshooting The following troubleshooting tips may help if you experience problems ATI s documentation contains helpful installation configuration tips and other valuable feature information Please contact your dealer for more advanced troubleshooting information ...

Страница 50: ...hat you selected the appropriate monitor when you installed your enhanced driver Poor TV reception If you use an indoor antenna you will get the best results with an amplified model Place it as far away from the PC monitor as possible to avoid interference Splitting the cable or antenna input can reduce the signal quality For the best reception connect the cable or antenna directly to your card No...

Страница 51: ...p Menu In Safe Mode open the Device Manager and check for duplicate display adapter and monitor entries if you are using only one graphics card Disable any programs that start automatically when you start Windows Check that you have the correct monitor and display driver selected in the Display Properties For more information click Help in the Start menu Check for the existence of memory managers ...

Страница 52: ...Play button to preview the sound If you still do not hear any sound open the Volume Control Click Start point at Programs point at Accessories point at Entertainment then select Volume Control Or right click the speaker icon usually in the lower right corner of your screen then click Open Volume Controls If the speaker icon is not in your Taskbar do the following In the Windows Taskbar click Start...

Страница 53: ...The Recording Control opens 3 Ensure that Line or the Audio input you selected in the TV Sound Initialization Wizard see page 23 is checked then click to close the dialog Can t record sound when recording from a videotape Connect the VCR audio output to your PC Left and right audio output from your VCR must be connected to your ALL IN WONDER 9800 Series card note that S Video does not provide an a...

Страница 54: ...ideo connector is set to the correct source Check that the audio and video connectors are securely plugged into the correct jacks Check that your video card is securely seated in its slot Please refer to the user guide for the card location Video recording stops unexpectedly Video files are typically very large ensure that you have sufficient disk space Ensure that you are recording to the correct...

Страница 55: ...ess speed and free up the system CPU Close all other running tasks including those in the System Tray clock popup reminders virus scanners etc Close and exit from any Task Scheduler Do not log on to your network Do not connect USB devices while recording Do not open or close CD ROM trays while recording Do not move the mouse while recording MPEG recording requires a very fast CPU to encode the vid...

Страница 56: ...from 480x480 to 480x240 In the Personal Video Recorder Settings page click the Set Custom button then click the Edit button choose your AVI preset then edit the frame size If you are recording in MPEG format ensure that Deinterlacing is checked In the Personal Video Recorder Settings page click the Set Custom button then click the Edit button choose your MPEG preset then check Deinterlacing ...

Страница 57: ...800 Series Card Pin Signal J1 Pin 1 GND CD OUT J1 Pin 2 LEFT OUT CD OUT J1 Pin 3 GND CD OUT J1 Pin 4 RIGHT OUT CD OUT This table lists the pin assignments for the CD audio connectors on your card The CD connectors are provided for internal audio connection The internal audio cabling not included must match your sound card CD OUT connectors pins 2 and 4 see the following table ALL IN WONDER CD OUT ...

Страница 58: ... your ALL IN WONDER 9800 Series card Pin Signal 1 CVBS Y in 2 Video Ground 3 Luma Pr in 4 Video Ground 5 Chroma Pb in 6 Audio Left in 7 Audio Ground 8 Audio Right in 1 8 Internal Audio Video Input Header ALL IN WONDER CD OUT ALL IN WONDER 9800 SERIES This table lists the pin assignments for the internal audio video input header on your card ...

Страница 59: ... Add Remove button 5 Click Yes to remove the ATI Multimedia Center then click Yes to restart your computer To Remove the ALL IN WONDER Drivers 1 In the Windows taskbar click Start point to Settings then click Control Panel 2 Double click Add Remove Programs then click the Install Uninstall tab 3 Select ATI Display Driver from the list 4 Click the Change Remove button Windows 98 users click the Add...

Страница 60: ...nd on the user is encouraged to try to correct the interference by one or more of the following measures Re orient or relocate the receiving antenna Increase the separation between the equipment and receiver Connect the equipment to an outlet on a circuit different from that to which the receiver is connected Consult the dealer or an experienced radio TV technician for help The ALL IN WONDER 9800 ...

Страница 61: ...mpliance Information EMC Directive 89 336 EEC and Amendments 92 31 EEC and 93 68 EEC for Class B Digital Device EN 55022 1998 CISPR 22 1997 Class B Limits and Methods of Measurement of Radio Disturbance Characteristics of Information Technology Equipment EN55024 1998 CISPR 22 1997 Information Technology Equipment Immunity Characteristics Limits and Methods of Measurement Low Voltage Directive for ...

Страница 62: ...es de mesure Directive de Basse Tension pour produits contenir tuner de télévision 73 23 CEE Directive basse tension EN 60950 2000 08 Sécurité du matériel des technologies de l information CE befolgungInformationen EMC Richtlinie 89 336 EEC und Änderungen 92 31 EEC und 93 68 EEC Digitales Gerät der Klasse B EN 55022 1998 CISPR 22 1997 Klasse B Grenzwerte und Meßverfahren für Funkstörungen von Einr...

Страница 63: ...from ATI website 18 removing 53 E EAZYLOOK 34 G GART driver 9 H HDTV displaying PC output on 22 HDTV Component Video Adapter 35 Hydravision 3 I Input and output adapters 19 displaying PC output on high definition TV 22 displaying PC output on TV and recording on videotape 21 watching movies on your PC and recording video 20 Installing the hardware and software 9 input and output adapters 19 Instal...

Страница 64: ...oting tips 16 43 TV attaching to your card 26 changing display configurations 32 displaying PC output on 21 MULTVIEW 33 reception tips 30 reducing edge distortion 31 selecting sound card connector for TV audio input 23 using games and applications 32 viewing text on 30 TV Out enabling using adjusting 29 TV WONDER 33 U Uninstalling old graphics card software 10 Using your HDTV Component Video Adapt...

Отзывы: