IP Phone User’s Guide
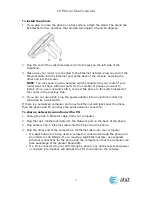
To install the phone:
1.
If you plan to place the phone on a flat surface, attach the stand. The stand can
be attached in two positions that provide two angles: 45 and 60 degrees.
2.
Plug the end of the coiled handset cord into the jack on the left side of the
telephone.
3.
Make sure your router is connected to the Ethernet network. Plug one end of the
Ethernet cable into the Ethernet port at the back of the console, and plug the
other end into the router.
NOTE: You may need to use a network switch connected to your router if your
router does not have sufficient ports for the number of phones you want to
install. If you use a network switch, connect the phone to the switch instead of
the router in the previous step.
4.
If you are not using PoE, plug the power adapter into an electrical outlet not
controlled by a wall switch.
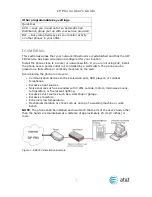
If there is a networked computer and no extra Ethernet wall jacks near the phone,
then the phone and PC can share the same network connection.
To share a network connection with a PC:
1.
Unplug the Cat.-5 Ethernet cable from your computer.
2.
Plug that Cat.-5 Ethernet cable into the Network port on the back of the phone.
3.
Plug another Cat.-5 Ethernet cable into the PC port on the phone.
4.
Plug the other end of the second Cat.-5 Ethernet cable into your computer.
If a GigE network is being used, a computer connected through the phone will
be limited to 100 Mbits/s. If you require a GigE Ethernet rate, use separate
Ethernet connections for the phone and the computer so that the computer can
take advantage of the greater bandwidth.
If a PC is connected to your LAN through a phone, any phone resets and power
or network interruptions will disrupt the PC’s connection to the network.
4


