GB 25
INSTALLATION
click
4
3
2
1
C
B
D
B
D
L
M
1
2
M
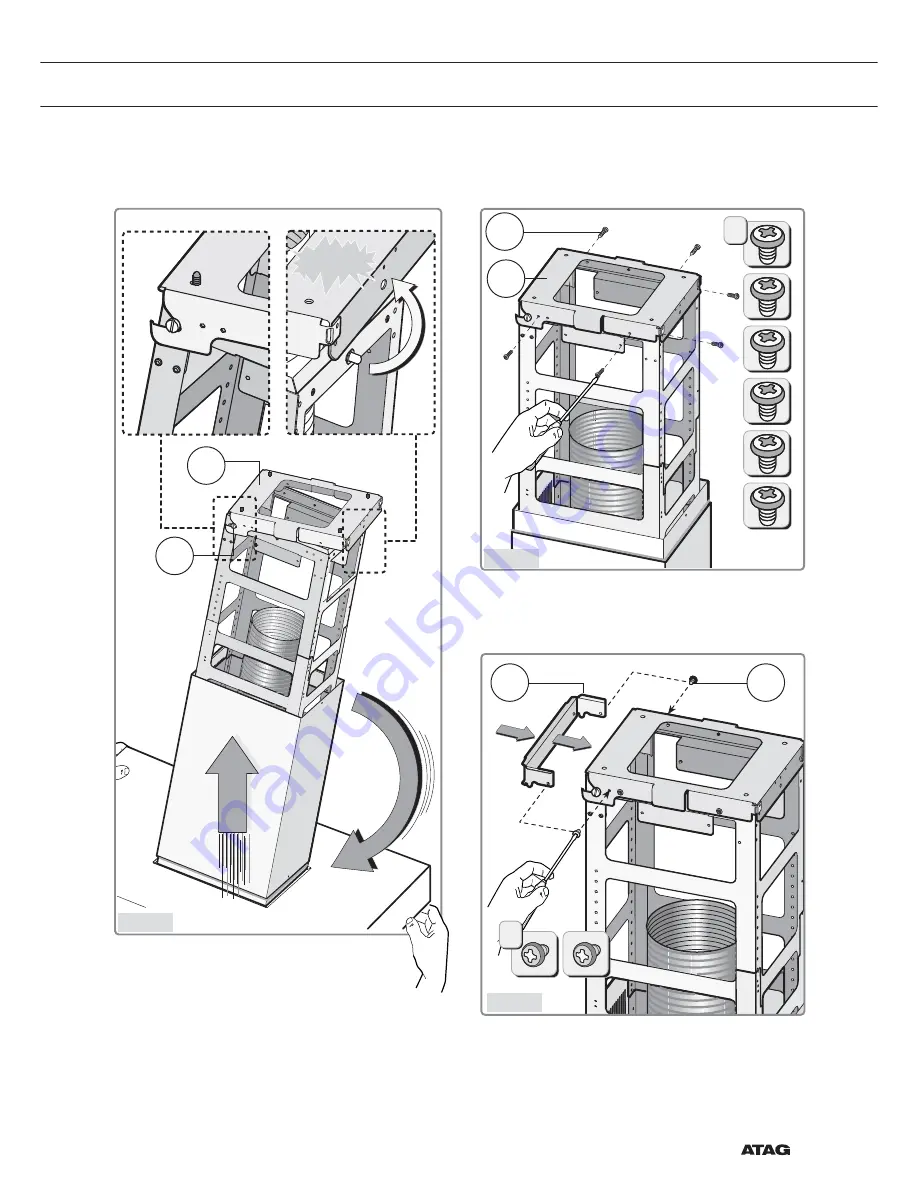
- Take the hood and incline it as shown
in Figure 12 – step 1.
- Using the 2 side pivots
C
already
on the structure, hang the hood on the bracket
B
Figure 12 – steps 2-3.
- Move the hood into position, to engage the
safety pivot in the hole of the bracket
B
Figure
12 – step 4.
-
Attention!
Fasten the hood immediately on
the bracket
B
with the 6 screws
D
(Fig.13).
- Take the safety bracket
L
and fasten it
definitively on the telescopic structure with
the two screws
M
as shown in Figure 14 –
steps 1-2.
Fig.12
Fig.13
Fig.14
Содержание ES1011MAM
Страница 2: ......
Страница 23: ...NL 23 INSTALLATIE A B Verbind de onderste schacht A met de bovenste B zoals weergegeven in Figuur 11 Fig 11 ...
Страница 52: ...FR 28 ...
Страница 74: ...DE 24 INSTALLATION A B Verbinden Sie den unteren Rauchabzug A mit dem oberen Abb 11 B siehe Abb 11 Abb 11 ...
Страница 78: ...DE 28 ...
Страница 100: ...GB 24 INSTALLATION A B Connect the bottom chimney A to the top one B as shown in Figure 11 Fig 11 ...
Страница 104: ...GB 28 APPENDICE ...


