background image

17

Chapter 1:  Basics

Starting for the first time

When you turn your ASUS Phone on for the first time, Setup Wizard will guide you through the 
setup process. Follow the onscreen instructions to select your language, select input methods, set 
up your mobile network and Wi-Fi, sync accounts, and configure your location services. 

Use your Google or ASUS account to set up your device, if you do not have a Google or ASUS 
account yet, go ahead and create one.

Google Account

Using a Google Account allows you to fully utilize these Android OS features:

t 0SHBOJ[FBOETFFBMMZPVSJOGPSNBUJPOGSPNBOZXIFSF

t "VUPNBUJDBMMZCBDLVQBMMZPVSEBUB

t -FWFSBHF(PPHMFTFSWJDFTDPOWFOJFOUMZGSPNBOZXIFSF

ASUS Account

Having an ASUS Account gets you to enjoy the following perks:

t 1FSTPOBMJ[FE"464TVQQPSUTFSWJDFBOEXBSSBOUZFYUFOTJPOGPSSFHJTUFSFEQSPEVDUT

t 'SFF(#PG$MPVETUPSBHFTQBDF

t 3FDFJWFUIFMBUFTUEFWJDFBOEöSNXBSFVQEBUFT

NOTE: 

You can also use the Setup Wizard to reconfigure your device, any time at your convenience. 

From the Home screen tap  

  > 

Setup Wizard

.

Содержание ZENFONE T500

Страница 1: ...T500 User Guide ...

Страница 2: ... power adapter complies with this rating Do not use damaged power cables accessories and other peripherals with your device Keep your device dry Do not use or expose your device near liquids rain or moisture You can put your device through x ray machines such as those used in conveyor belts for airport security but do not expose the device to magnetic detectors and wands The device screen is made ...

Страница 3: ...recycling The symbol of the crossed out wheeled bin indicates that the product electrical electronic equipment and mercury containing button cell battery should not be placed in municipal waste Check local regulations for disposal of electronic products DO NOT throw this product in fire DO NOT short circuit the contacts DO NOT disassemble this product ZenTalk Fans Forum http www asus com zentalk g...

Страница 4: ... Sharing pages 29 Reading the pages later 30 Saving the pages for offline reading 30 Adding a new tab 30 Bookmarking pages 31 Smartly read online 31 Clearing the browser cache 32 Email 32 Setting up email accounts 32 Adding email accounts 33 Setting up a Gmail account 33 Emailing invites to events 34 Emailing later 34 Calendar 35 Creating events 35 Creating an event from your account 35 Do It Late...

Страница 5: ...and entertainment Using a headset 57 Connecting the audio jack 57 Music 58 Launching Music 58 Playing songs 58 Streaming Cloud music 59 Creating a playlist 60 Radio 61 6 Your precious moments Capture moments 62 Launching the Camera app 62 Using Camera for the first time 62 Advanced camera features 65 Using the Gallery 67 Viewing files from your social network or cloud storage 67 Viewing the photo ...

Страница 6: ... 76 Bluetooth Tethering 77 8 Travel and Maps Weather 78 Launching the Weather app 78 Weather home screen 79 Clock 80 World Clock 80 Alarm clock 81 Stopwatch 81 Timer 82 9 ZenLink Share Link 83 10 Zen Everywhere Special Zen Tools 85 Flashlight 85 Calculator 87 Quick memo 88 Sound Recorder 89 Power Saving Mode 91 11 Maintain your Zen Keeping your device up to date 92 Updating your system 92 Storage ...

Страница 7: ...nswers from FAQs Frequently Asked Questions or provide your feedbacks in the user forum Camera With PixelMaster technology capture those precious moments in vivid and high quality photos and videos Do It Later Get hold and act on your important emails SMS messages interesting websites or other important tasks when it is more convenient for you to do so Share Link Use this app to connect with other...

Страница 8: ...VTJOH B TDSFFO QSPUFDUPS BT JU DBO JOUFSGFSF XJUI UIF QSPYJNJUZ TFOTPS G ZPV want to use a screen protector ensure that it does not block the proximity sensor t FFQ UIF EFWJDF QBSUJDVMBSMZ UIF UPVDI TDSFFO ESZ BMM UIF UJNF 8BUFS PS PUIFS MJRVJET DBO DBVTF UIF touch screen to malfunction t OTVSF UIBU UIF JDSP 4 NFNPSZ DBSE DPNQBSUNFOU DPWFS JT BMXBZT DMPTFE XIFO PQFSBUJOH PS carrying the device Mic...

Страница 9: ...IF NJDSP 4 DBSE TMPU t 5VSO Pò ZPVS EFWJDF CFGPSF JOTFSUJOH B NJDSP 4 DBSE t F FYUSB DBSFGVM XIFO IBOEMJOH B NJDSP 4 DBSE 464 JT OPU SFTQPOTJCMF GPS BOZ MPTT PS EBNBHF incurred to your micro SIM card t P OPU JOTFSU B NFNPSZ DBSE JOUP UIF NJDSP 4 DBSE TMPU G B NFNPSZ DBSE IBQQFOT UP CF JOTFSUFE into the micro SIM slot send your device to an ASUS qualified service personnel To install a micro SIM ca...

Страница 10: ...ike screwdrivers to remove the rear cover t DO NOT pry the micro USB port 4 Remove the battery 5 Insert the micro SIM card into one of the slots then put rear cover back in place CAUTION t P OPU VTF TIBSQ UPPMT PS TPMWFOU PO ZPVS EFWJDF UP BWPJE scratches on it t 6TF POMZ B TUBOEBSE NJDSP 4 DBSE PO ZPVS 464 1IPOF nano to micro SIM adapter or a trimmed SIM card may not properly fit into and may not...

Страница 11: ... NFNPSZ DBSE 464 JT OPU SFTQPOTJCMF GPS BOZ EBUB MPTT PS EBNBHF incurred to your memory card t P OPU JOTFSU B NJDSP 4 DBSE JOUP UIF NFNPSZ DBSE TMPU G B NJDSP 4 DBSE IBQQFOT UP CF JOTFSUFE into the memory card slot bring your device to an ASUS qualified service personnel To install a memory card 1 Turn off your device 2 Locate the groove on the lower right corner CAUTION Be careful when you pry op...

Страница 12: ...card CAUTION t F FYUSB DBSFGVM XIFO IBOEMJOH B NFNPSZ DBSE 464 JT OPU SFTQPOTJCMF GPS BOZ EBUB MPTT PS EBNBHF incurred to your memory card t KFDU UIF NFNPSZ DBSE QSPQFSMZ UP TBGFMZ SFNPWF JU GSPN EFWJDF 5P FKFDU UIF NFNPSZ DBSE HP UP Home All Apps Settings Storage Unmount external storage To remove a memory card 1 Turn off your device 2 Locate the groove on the bottom right corner CAUTION Be caref...

Страница 13: ...pter 1 Basics 4 Remove the battery 5 Remove the microSD card from the microSD card slot 6 Put the rear cover back in place CAUTION Do not use sharp tools or solvent on your device to protect it from scratches ...

Страница 14: ... t 8IFO VTJOH ZPVS 464 1IPOF XIJMF QMVHHFE JO UP B QPXFS PVUMFU UIF QPXFS PVUMFU NVTU CF OFBS your device and easily accessible t 5P DPOTFSWF FMFDUSJDJUZ VOQMVH UIF QPXFS BEBQUFS GSPN UIF QPXFS PVUMFU XIFO OPU JO VTF t P OPU QMBDF IFBWZ PCKFDUT PO UPQ PG ZPVS 464 1IPOF CAUTION t 8IJMF DIBSHJOH ZPVS 464 1IPOF DBO CFDPNF XBSN 5IJT JT OPSNBM IPXFWFS JG ZPVS EFWJDF becomes unusually hot disconnect the...

Страница 15: ...NF XJUI ZPVS EFWJDF 6TJOH B EJòFSFOU QPXFS BEBQUFS NBZ damage your device t 6TJOH UIF CVOEMFE QPXFS BEBQUFS BOE 464 1IPOF TJHOBM DBCMF UP DPOOFDU ZPVS 464 1IPOF UP B power outlet is the best way to charge your ASUS Phone t 5IF JOQVU WPMUBHF SBOHF CFUXFFO UIF XBMM PVUMFU BOE UIJT BEBQUFS JT 7 7 5IF PVUQVU WPMUBHF PG UIF EFWJDF JT 7 1A 5W 4 When fully charged disconnect the USB cable from your ASUS ...

Страница 16: ... starts up Turning your device off To turn your device off 1 If your screen is turned off press the power button to turn it on If your screen is locked unlock the device screen 2 Press and hold the power button then when prompted tap Power off then tap OK Sleep mode To put your device in sleep mode press the power button once until the screen turns off Power key ...

Страница 17: ... go ahead and create one Google Account Using a Google Account allows you to fully utilize these Android OS features t 0SHBOJ F BOE TFF BMM ZPVS JOGPSNBUJPO GSPN BOZXIFSF t VUPNBUJDBMMZ CBDLVQ BMM ZPVS EBUB t FWFSBHF PPHMF TFSWJDFT DPOWFOJFOUMZ GSPN BOZXIFSF ASUS Account Having an ASUS Account gets you to enjoy the following perks t 1FSTPOBMJ FE 464 TVQQPSU TFSWJDF BOE XBSSBOUZ FYUFOTJPO GPS SFHJT...

Страница 18: ... power of your ASUS Phone battery Close all running apps that are not in use When not in use press the power button to put the device in sleep mode Activate Power Saving mode Decrease brightness of display Keep the speaker volume to a low level Disable Wi Fi feature Disable Bluetooth feature Disable the screen auto rotate feature Disable all auto sync features in your device ...

Страница 19: ...lecting items Do any of the following t 5P MBVODI BO BQQ TJNQMZ UBQ PO JU t 5P TFMFDU BO JUFN TVDI BT JO JMF BOBHFS BQQ TJNQMZ UBQ PO JU Moving or deleting items Do any of the following t 5P NPWF BO BQQ PS XJEHFU UBQ BOE IPME UIFO ESBH JU UP UIF MPDBUJPO XIFSF ZPV XBOU JU UP CF t 5P EFMFUF BO BQQ PS XJEHFU GSPN UIF PNF TDSFFO UBQ BOE IPME UIFO ESBH JU VQ UP Remove ...

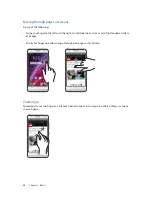
Страница 20: ... öOHFS UP UIF MFGU PS UP UIF SJHIU UP TXJUDI CFUXFFO TDSFFOT PS UP øJQ UISPVHI B BMMFSZ of images t 4DSPMM ZPVS öOHFS VQ PS EPXO UP HP UISPVHI XFC QBHFT PS MJTU PG JUFNT Zooming in Spread apart your two fingers on the touch panel to zoom in an image in Gallery or Maps or zoom in a web page ...

Страница 21: ...our two fingers on the touch panel to zoom out an image in Gallery or Maps or zoom out of a web page NOTE PV NBZ OPU CF BCMF UP PPN JO PVU PG TPNF XFC QBHFT BT UIFTF QBHFT NBZ IBWF CFFO designed specifically to fit your mobile screen ...

Страница 22: ...matter to you right from your Home screen Swipe the Home screen to the left or right to display the extended Home screen NOTE To add more pages to your Home screen see Extended Home screen Swipe down this area once to display System notifications Tap to display Time settings Tap to update Weather settings Tap to open All Apps screen Tap to open an app Tap to open Google Search page Tap to open Voi...

Страница 23: ... you have an unread message Wi Fi Shows the signal strength of your Wi Fi connection Bluetooth Shows that Bluetooth is turned on Auto sync Shows that auto sync is enabled Battery life Shows the battery status of your ASUS Phone MicroSD card Shows that a microSD card is inserted in your ASUS Phone Screenshots Shows that you took screenshots of your ASUS Phone Airplane mode Shows that your ASUS Phon...

Страница 24: ... top of your screen and tap NOTE A blue button indicates that the feature is currently enabled while a gray button indicates a disabled feature The green buttons refer to individual utilities that you can quickly access via the Quick Settings Notification Panel Tap these buttons to enable or disable their functions Slide left or right to adjust the screen s brightness Tap to open Settings Tap to l...

Страница 25: ...ost of these changes are data and system related To launch the System notifications panel swipe down from the top of your screen Tap this to delete all of the listed notifications t 4XJQF UIF OPUJöDBUJPO UP UIF MFGU PS SJHIU UP remove it from the list t 5BQ PO UIF OPUJöDBUJPO UP WJFX JUT EFUBJMT Tap to open Settings Tap on this area to switch to Quick settings panel ...

Страница 26: ...r often used or favorite apps from your Home screen You can add remove or group your apps into one folder You can put widgets which are small dynamic apps on your Home screen Widgets provide you with quick views of the weather forecast calendar events information battery status and more Adding app shortcuts or widgets To add an app shortcut or a widget 1 Tap and hold an empty area on your Home scr...

Страница 27: ... You may add a translucent background tint to your wallpaper for readability and clarity You can also select an animated wallpaper to make your screen come alive Applying wallpaper and background tint To apply wallpaper and background tint 1 Tap and hold an empty area on your Home screen and select Wallpapers If you do not want to add a background tint to your wallpaper skip to step 4 2 Tick Backg...

Страница 28: ...ages 2 Tap to a add a new page If you wish to delete an extended Home screen select then drag and drop it into Setting up the date and time By default the date and time displayed on your Home screen automatically syncs with your mobile provider s settings To change the date and time settings 1 Launch the Settings screen by doing any of the following t Swipe down from the top of your screen then ta...

Страница 29: ...istracting items such as banner ads You can also mark an interesting page as a read later task which you can retrieve from the Do It Later app and read at your convenient pace IMPORTANT Before doing any Internet surfing or Internet related activities ensure that your ASUS Phone is connected to a Wi Fi or mobile network For more details see Staying connected Launching the Browser app From your Home...

Страница 30: ...ges for offline reading Save a page and read it even when there s no Internet connection 1 To save a page tap Save for offline reading 2 To retrieve the page do any of the following t BVODI UIF CSPXTFS UBQ Saved pages t 5BQ or on the bottom of the browser then scroll to the right to display the Saved pages tab Adding a new tab Hide the current website and open a new window to continue surfing or b...

Страница 31: ...e supports Wikipedia CNN ESPN BCC and NY Times sites To use the Smart Reader Mode t 5BQ UIF 4NBSU 3FBEFS PEF JDPO to automatically remove any unneccessary or distracting items and show only the main contents of the page t SPN UIF 4NBSU 3FBEFS PEF QBHF EP BOZ PG UIF GPMMPXJOH t Tap to show your Reader s List or saved pages t Tap to launch the Marker tool and select your preferred color then swipe o...

Страница 32: ...count or send and receive emails from added accounts For more details see Staying connected Setting up email accounts Set up your existing personal or work email account so you can receive read and send emails from your ASUS Phone 1 From the Home screen tap Email to launch the Email app 2 Tap the mail provider you want to set up 3 Key in your email address and password and tap Next NOTE Wait while...

Страница 33: ...setup process Setting up a Gmail account Set up your Gmail account to get into Google related services and apps as well as receive send and browse emails right from your ASUS Phone 1 Tap Google then tap Gmail 2 Tap Existing and key in your existing Gmail account and password then tap NOTES t 5BQ New if you do not own a Google account t 8IFO TJHOJOH JO ZPV IBWF UP XBJU XIJMF ZPVS EFWJDF DPNNVOJDBUF...

Страница 34: ...em notifications panel see System notifications 6 On the Reminders field select the time that you want to get an alert or reminder about the event 7 Tap the Guests field and select the contacts you want to send the invites to 8 Once finished tap to save and exit NOTE You can also email invites from the Calendar app For details see Creating events Emailing later When you receive an email you can se...

Страница 35: ...System notifications panel as to the days left until this event takes place NOTE For details on the System notifications panel see System notifications 5 On the Reminders field select the time that you want to get an alert or reminder about the event 6 Once finished tap to save and exit Creating an event from your account After adding online accounts that you would like to sync with Calendar you m...

Страница 36: ...QQT DBO TIBSF BOE BEE UBTLT UP P U BUFS Adding to do tasks Create important to do tasks to organize your work or social activities in your professional or social life 1 From the Home screen tap ASUS Do It Later 2 Tap then fill in the necessary information 3 If you want to set the importance level select High in the Importance field 4 When you re done tap Prioritizing to do tasks Set the importance...

Страница 37: ... later task and reply to it at a later time from the Do It Later app 1 From the Home screen tap ASUS Do It Later 2 Select the email that you want to reply now then tap Reply now 3 When you re done tap to mark the task as completed NOTE For details on setting your emails as reply later tasks see Emailing later Catching up on my online reading now You can retrieve pages that you ve previously marked...

Страница 38: ...ter 2 Select the SMS message that you want to send a reply to then tap Reply now 3 When you re done tap to mark the task as completed NOTE For details on setting pages as reply later tasks see Messaging later Deleting to do tasks You can delete any completed overdue or unnecessary to do tasks from the Do It Later app 1 From the Home screen tap ASUS Do It Later 4XJQF UIF UBTL ZPV XBOU UP SFNPWF GSP...

Страница 39: ...ager IMPORTANT Before accessing files saved on the network and cloud storage ensure that Wi Fi or mobile network is enabled on your ASUS Phone For details see Staying connected Tap to display the files under the category Displays the usage of the internal and external storage Tap to search for a file Tap to access the internal external network and cloud storage Tap to clear search history invite a...

Страница 40: ...r for or sign in to ASUS WebStorage and get free cloud storage Automatically upload newly captured photos for instant sharing sync files among different devices or share files via your ASUS WebStorage account NOTE To the enjoy auto upload function enable Instant Upload from Settings Instant Upload in your ASUS WebStorage IMPORTANT Ensure that Wi Fi or mobile network is enabled on your ASUS Phone F...

Страница 41: ...d answers from FAQs Frequently Asked Questions or directly interact with other Zen UI users to find and share solutions about ZenUI 2 0 apps To access ASUS Support 1 Tap ASUS Support 2 Tap ZenUI FAQs then select the app that you want to find answers for ...

Страница 42: ...o SIM cards Change the names of your micro SIM cards on your ASUS Phone so that you can identify them easily To change the names of your micro SIM cards tap SIM1 or SIM2 Alias name then key in the names for your micro SIM cards NOTE If your SIMs have different mobile service providers we recommend you to use the names of these providers for your SIM names If both SIMs have the same mobile service ...

Страница 43: ...ake a call your ASUS Phone automatically uses the preferred micro SIM card to connect the call To assign a micro SIM card for voice calls tap Voice then tap the SIM that you want to use IMPORTANT You can only use this feature if you make a call from your contacts list SIM card for data service To assign a micro SIM card for data service tap Mobile data then select from SIM1 or SIM2 ...

Страница 44: ...Contacts then tap the number keys 2 Select from call buttons SIM1 or SIM2 to dial the number NOTE The labels of the call buttons may vary depending on the setting that you made to your micro SIM cards For more details see Dual SIM feature Dialing an extension number When you need to call an extension number you can do any of these steps to skip the voice prompts Prompting for confirmation of an ex...

Страница 45: ...tact you re trying to reach is on the list of possible matches then you can quickly place that call 1 Launch the Phone app then enter the number or name of the contact 2 From the list of possible matches tap the contact you wish to call If the contact is not on list enter the complete number or name of the contact 3 Select from call buttons SIM1 or SIM2 to make the call NOTE The labels of the call...

Страница 46: ...l be saved on the Speed dial setting screen Deleting a speed dial entry To delete a speed dial entry 1 From the Phone app tap and hold any digits from 2 to 9 to launch the Speed dial setting screen 2 Tap and hold a speed dial entry then tap Replacing a speed dial entry You can replace the contact assigned to a speed dial key with another contact 1 From the Phone app tap and hold any digits from 2 ...

Страница 47: ...is an incoming call The display of the incoming call also varies depending on the status of your ASUS Phone Answering calls There are two ways to answer a call depending on the status of your ASUS Phone t G ZPVS EFWJDF JT BDUJWF UBQ Answer or to reject a call tap Decline t G ZPVS EFWJDF JT MPDLFE ESBH to to answer or to to reject the call Setting callbacks for incoming calls When you can t answer ...

Страница 48: ...e service provider this icon allows you to add a contact or contacts in an active call NOTES t 5IF OVNCFS PG QBSUJDJQBOUT JO UIF DPOGFSFODF DBMM EFQFOE PO ZPVS DPOGFSFODF DBMM subscription You can inquire from your mobile service provider about this service t PS NPSF EFUBJMT PO DPOGFSFODF DBMM TFF Managing multiple calls SuperNote Launches the SuperNote app letting you take down notes during an ac...

Страница 49: ...nce call that suits for business meetings party lines and other group calls Answering another call While you are talking on your ASUS Phone you can hear a beeping sound indicating of another incoming call Tap Answer on the touch screen to receive an incoming call while on an active call Switching between calls To switch between calls tap on the touch screen ...

Страница 50: ... one conference call 1 Call a contact or dial a number Wait for the other line to answer your call 2 When your call is answered tap then tap a contact or dial a number that you wish to include in your conference call 3 Tap to put the two calls in a conference call 4 Tap to add another contact then tap to merge the call to the current conference call 3FQFBU UIJT TUFQ JG ZPV XBOU UP BEE NPSF DPOUBDU...

Страница 51: ...up for private conversation or disconnect a contact from the conference call 1 From the Conference call screen tap Manage conference call to open a list of contacts in the conference call 2 To remove a contact from the conference call tap To disconnect a contact from the conference call tap 3 Tap to go back to the Conference call screen ...

Страница 52: ...ntact or dial a number 2 Tap to record the call IMPORTANT Before recording a call ensure that you ask for permission from the other party or parties 3 To stop recording tap This icon appears on the system notification bar 4 Swipe down the upper left corner of the screen then tap Call recording saved notification to view the recorded conversation ...

Страница 53: ...contacts from the Contacts settings Such display PQUJPOT JODMVEF EJTQMBZJOH POMZ UIPTF DPOUBDUT XJUI QIPOFT TPSUJOH MJTU CZ öSTU MBTU OBNF PS WJFXJOH DPOUBDU OBNFT BT öSTU MBTU OBNFT öSTU PV DBO BMTP DIPPTF XIJDI PG UIFTF UBCT UP EJTQMBZ on your Contacts screen Favorites and Groups Setting up your profile Make your ASUS Phone truly your own and set up your profile info 1 Launch the Contacts app th...

Страница 54: ... information tap Add another field 6 Tap the icon beside the contact s name to add your contact s photo from Gallery or by capturing a photo 7 When you ve completed the info tap Done Adding an extension number to a contact number You can add a contact s extension number to skip the voice prompts when making a call 1 In the contact s information screen enter the contact s main number and extension ...

Страница 55: ... In your selected contact s screen select VIP under the Groups field 4 When finished tap Done The contact is added to your VIP list Marking your favorite contacts Set your frequently called contacts as your favorites to be able to call them quickly from the Phone app NOTE Only the contacts saved in your phone can be set in the Favorites group 1 From the Home screen tap ASUS Contacts 2 Select the c...

Страница 56: ...ing app t 5BQ t 5BQ Messaging Sending messages 1 Launch the Messaging app then tap 2 In the To field enter the number or tap Recent to select a recent contact Contacts to select a contact from your list or Groups to select a group of contacts 3 Start composing your message in the Type message field 4 When you re done select the SIM account where you re going to send your message from Replying to m...

Страница 57: ...NG t P OPU JOTFSU PUIFS PCKFDUT JOUP UIF BVEJP KBDL QPSU t P OPU JOTFSU B DBCMF XJUI FMFDUSJD QPXFS PVUQVU JOUP UIF BVEJP KBDL QPSU t JTUFOJOH BU B IJHI WPMVNF GPS MPOH QFSJPET DBO EBNBHF ZPVS IFBSJOH NOTES t 8F IJHIMZ SFDPNNFOE UP VTF POMZ DPNQBUJCMF IFBETFUT PS UIF CVOEMFE IFBETFU XJUI UIJT EFWJDF t 6OQMVHHJOH UIF BVEJP KBDL XIJMF MJTUFOJOH UP NVTJD BVUPNBUJDBMMZ QBVTFT UIF NVTJD QMBZFE t 6OQMVH...

Страница 58: ...o play a song 1 From the Music app tap Music then select Songs You can also select these other options how you want to to browse your music files Album Artist Genres Composer or Folder 2 From your list tap the song that you want to play Tap Play All if you want to play all songs 3 Swipe up from the song title bar to get a full screen of the song that s currently playing Tap to add the song to your...

Страница 59: ... the Equalizer settings and get better audio for your songs Sleep timer Set the time when the music will stop playing Settings Tap this option to configure the Music settings Feedback Help Get answers to your questions and you can send to us your feedbacks Streaming Cloud music Register or sign in to a cloud account and stream music from your cloud account to your ASUS Phone IMPORTANT Ensure that ...

Страница 60: ...ap Save Adding songs to a playlist You can add several songs to your playlist at on time from your local source internal and external storages or cloud accounts 1 From the Music home screen tap 2 Under Playlist tap My playlist then tap the name of your playlist 3 Tap Add songs 4 Tap the music source where you want to get your songs from to add to your playlist 5 Select how you d want to browse you...

Страница 61: ...1 Connect the bundled headset with your ASUS Phone 2 Tap Radio Tap to add your favorite stations Tap to decrease the band frequency by 0 1MHz 5BQ UP UVSO PO Pò UIF TQFBLFS 5BQ UP UVSO PO Pò UIF IFBEQIPOF Tap to increase the band frequency by 0 1MHz Move to select a band frequency Tap to turn off the FM Radio ...

Страница 62: ...e screen Tap Using Camera for the first time After launching the Camera for the first time two consecutive features appear to help you get started Tutorial and Image locations Tutorial If it is your first time to use your ASUS Phone s camera you will encounter the following tutorial screen after launching the Camera app Refer to the following steps to proceed from this screen On the Tutorial scree...

Страница 63: ...o features a video stabilization function that helps prevent shakiness while video recording Tap the icons to start using your camera and explore the image and video features of your ASUS Phone Adjust settings Switch between the front and rear cameras See the Gallery Record videos Take photos Use advanced camera settings Enable or disable the flash function ...

Страница 64: ...ettings first before taking images 1 On the camera s home screen tap 2 Scroll down and configure the available options Video settings Adjust the appearance of your recorded videos by configuring your camera s settings using the steps below IMPORTANT Apply the settings first before taking images 1 On the camera s home screen tap 2 Scroll down and configure the available options ...

Страница 65: ...Photo Solid Using PixelMaster your camera s light sensitivity is increased by up to 400 to enhance noise reduction and boost color contrast by up to 200 Use this mode to transform any subject into a great photo or video with or without ample natural lighting Capturing Photo Solid photos 1 From the Camera app s home screen tap Photo Solid 2 Tap to start capturing photos Capturing Low light videos 1...

Страница 66: ...ing your ASUS Phone a timeline of thumbnails appears on the lower part of your screen as it captures the scenery 3 Tap when finished Smart cut Eliminate unwanted details immediately after capturing the image using the Smart cut feature Capturing Smart remove photos 1 From the Camera app screen tap Smart cut 2 Tap capturing photos that can be edited using Smart cut Face Smile Capture the perfect sm...

Страница 67: ...ing the Gallery View images and play videos on your ASUS Phone using the Gallery app This app also allows you to edit share or delete image and video files stored in your ASUS Phone From Gallery you can display images in a slideshow or tap to view the selected image or video file To launch Gallery tap ASUS Gallery Viewing files from your social network or cloud storage By default your Gallery disp...

Страница 68: ...rea where the photos are taken as well a map of the location via Google Map or Baidu in China only To view the details of a photo 1 Turn on the location access from Settings Location 2 Ensure that you have shared your location to Google Map or Baidu 3 Launch the Gallery app and select the photo whose photo details you want to view 4 Tap the photo then tap Tap to show the photo location details ...

Страница 69: ...n 3 Tap the files you want to delete A check mark appears on top of the image you select 4 Tap Editing images The Gallery also features its own image editing tools that you can use to enhance images saved on your ASUS Phone 1 From the Gallery screen tap the folder where the files are located 2 After opening the folder tap the image you want to edit 3 Once the image is opened tap it again to show i...

Страница 70: ... folder containing the photos taken during an event 4 Select the Calendar event you would like to integrate with the photo folder 5 The icon appears on the upper right corner of the photo folder indicating that the photos are successfully posted on the event wall 6 To view the event photos open the event from the Calendar app then tap IMPORTANT t This feature is only enabled after setting events o...

Страница 71: ...ry then tap to select the location of your photos 2 Tap to activate file selection 3 After selecting your photos tap MiniMovie 4 Select the MiniMovie theme you would like to use for your photo slideshow Tap any of these themes to see its preview 5 After selecting a theme tap to save the slideshow You can access your saved slideshows from ASUS File Manager Videos MiniMovie 6 You can then share the ...

Страница 72: ...app to create a collage from your collection of photos To launch the PhotoCollage app tap from your Home screen then tap PhotoCollage Tap to create collages with differents grids Tap to use more photo effects Tap to create magazine style collages Tap to get more stickers ...

Страница 73: ...POBM DIBSHFT XJMM CF JODVSSFE EFQFOEJOH PO your data plan t PS NPSF EFUBJMT PO ZPVS NPCJMF OFUXPSL DIBSHFT GFFT BOE TFUUUJOHT DPOUBDU ZPVS NPCJMF TFSWJDF provider Wi Fi The Wi Fi technology of your ASUS Phone gets you connected to the wireless world Update your social media accounts browse the Internet or exchange data and messages wirelessly from your ASUS Phone Enabling Wi Fi 1 Launch the Settin...

Страница 74: ... Fi switch to the left to turn off the Wi Fi NOTE You can also disable the Wi Fi from Quick Settings screen See Quick Settings on how to launch Quick Settings screen Bluetooth Use the Bluetooth feature of your ASUS Phone to send or receive files and stream multimedia files with other smart devices over short distances With Bluetooth you can share your media files with your friends smart devices se...

Страница 75: ...JT discoverable t 4FF UIF VTFS HVJEF UIBU DBNF XJUI ZPVS EFWJDF UP MFBSO IPX UP FOBCMF JUT MVFUPPUI BOE BOE TFU JU UP discoverable 2 Tap SEARCH FOR DEVICES to scan for more Bluetooth devices 3 In the list of available devices tap the Bluetooth device that you want to pair with 4 Ensure that the same passkey show on both devices then tap Pair NOTE Turn off the Bluetooth feature when you re not usin...

Страница 76: ...mobile connection t Only a limited number of mobile devices can tether to your ASUS Phone for Internet access t Turn off the tethering feature when you re not using it to help save battery power Wi Fi Hotspot Turn your ASUS Phone into a Wi Fi Hotspot to share Internet connection with other devices 1 Do any of the following to launch the Settings screen t Launch Quick settings then tap t Tap Settin...

Страница 77: ...mobile devices such as a laptop or a tablet 1 Enable Bluetooth on your ASUS Phone and the other device 2 Pair both devices NOTE For details see Pairing your ASUS Phone to a Bluetooth device 3 From the Settings screen tap More Tethering hotspot then tick Bluetooth tethering You can now surf the Internet or do Internet related activities on your ASUS Phone ...

Страница 78: ... Using Weather you can also check other weather details from around the world Launching the Weather app From your Home screen launch the Weather app using either of the following options t Tap Weather t From your ASUS Phone s home screen tap the weather icon Travel and Maps 8 8 Travel and Maps ...

Страница 79: ... of the world You can display the weather updates or daily weather forecast on the Calendar app NOTE For more details see Getting the weather updates Tap to search for a city s weather info Swipe up to see other weather information Swipe to the left or right to see the weather information of other cities in your location list ...

Страница 80: ...k app using either of the following options t Tap Clock t From your ASUS Phone s home screen tap the digital clock display World Clock Tap to access the world clock settings of your ASUS Phone Tap this to set your clock on night mode Tap this to edit the cities marked on your world clock Tap this to add a new city to mark on your world clock s map Tap this to access the Clock app settings ...

Страница 81: ...tings of your ASUS Phone Stopwatch Tap to use your ASUS Phone as a stopwatch Tap this button to start running the stopwatch feature Tap this to access the settings of the alarm clock feature Tap this to delete any of the previously set alarms Tap this to set a new alarm time ...

Страница 82: ...o do this follow the steps below Setting the timer 1 Tap to access the timer feature of your ASUS Phone 2 Tap to change the target time to change the timer s ringtone to delete a timer 3 Tap Start to start the timer Add a timer Delete a timer Change the timer s ringtone Change the target time ...

Страница 83: ...or other mobile devices via a Wi Fi hotspot With this app you can send or receive files that are larger than 100 MB and lets you share or receive multiple files at the same time Share Link app sends and receives files faster than using Bluetooth Sharing files 1 From your Home screen tap Share Link 2 Tap Send file s then select from the options that appear on your screen ...

Страница 84: ...d then tap Done 4 After your ASUS Phone detects the other devices tap the device that you want to share your files with Receiving files To receive files 1 From your Home screen tap then tap Share Link 2 Tap Receive file s to receive the files from the sender ...

Страница 85: ...one to an instant flashlight by launching your Quick settings panel from any screen or any open app From the Quick settings panel simply tap on the Flashlight icon to activate its function Zen Everywhere 10 10 Zen Everywhere Tap this to enable the flashlight ...

Страница 86: ...p any of these icons to toggle between the flashlight s speed while blinking Tap this to turn on or turn off the light Tap this to use the rear camera flash as the flashlight Tap this to use your phone screen as the flashlight Move this to adjust the screen brightness Tap this to spread the color to full screen Tap this to change your screen color ...

Страница 87: ...ipe and a tap is all it takes to launch your Calculator When you open the Quick settings panel the Calculator icon is there visibly on top of the list Tap it to get started with your computations Tap this to enable the calculator Calculator screen ...

Страница 88: ...member After creating notes you can share them via Share Link and social media sites or turn them into a task inside Do It Later Creating a sticky note You can turn Quick memo notes into a sticky note so you can view them wherever on your ASUS Phone To create a sticky note just tap on the pin icon on the upper right corner of Quick memo after creating your note ...

Страница 89: ... your ASUS Phone by enabling the Sound Recorder app Launching Sound Recorder To launch Sound Recorder tap Sound Recorder Tap to start audio recording Tap to view the list of saved audio recording files During recording tap this to temporarily stop or pause the recording ...

Страница 90: ...sume the recording Tap to save the recording Tap to delete the recording Recording List From the Recording List you can play rename share or delete a saved audio recording file To view your recording list tap from the Sound Recorder main screen 5BQ UP QMBZ QBVTF ZPVS TFMFDUFE SFDPSEJOH Tap to share rename or delete your selected recording ...

Страница 91: ...of your ASUS Phone when the battery level is below 15 To enable the Power Saving Mode 1 Launch the Settings screen by doing any of the following t Swipe down from the top of your screen then tap t Tap Settings 2 Tap Power Saving Mode then tick Power Saving Activate ...

Страница 92: ...iles to or from the computer to your ASUS Phone Backup and reset Back up data Wi Fi passwords and other settings to Google servers using your ASUS Phone 1 Tap then tap Settings Backup reset 2 From the Backup reset window you can t Back up my data This feature backs up your data Wif Fi passwords and other settings to Google servers when enabled t Backup account Allows you to specify the account you...

Страница 93: ... carrier and provide the information to blacklist the unauthorized use of your ASUS Phone To display your ASUS Phone s identity 1 Tap All Apps then tap Settings 2 On the Settings screen slide down to display other items then tap About phone The About screen displays the status legal information model number operating system version hardware and software information of your ASUS Phone 3 To see the ...

Страница 94: ...F BSF DPNQMJBOU XJUI UIF TPVOE QSFTTVSF MFWFM SFRVJSFNFOU MBJE EPXO JO UIF BQQMJDBCMF BOE PS TUBOEBSE required by French Article L 5232 1 CE Mark Warning CE marking for devices with wireless LAN Bluetooth 5IJT FRVJQNFOU DPNQMJFT XJUI UIF SFRVJSFNFOUT PG JSFDUJWF PG UIF VSPQFBO 1BSMJBNFOU and Commission from 9 March 1999 governing Radio and Telecommunications Equipment and mutual recognition of con...

Страница 95: ...you to be able to responsibly recycle our products batteries other components as well as the packaging materials Please go to IUUQ DTS BTVT DPN FOHMJTI 5BLFCBDL IUN for detailed recycling information in different regions Coating notice IMPORTANT To provide electrical insulation and maintain electrical safety a coating is applied to JOTVMBUF UIF EFWJDF FYDFQU PO UIF BSFBT XIFSF UIF 0 QPSUT BSF MPDB...

Страница 96: ... up Index incoming calls 47 Calls 44 calling from Contacts 47 calling your favorite contacts 47 dialing a phone number 44 launching the Phone app 44 other call options 48 recording 52 replacing a speed dial entry 46 see also Contacts 53 see Callbacks 47 see Extension number 44 see Home Dialing 47 see Multiple calls 49 see Smart Dialing 45 see Speed Dialing 45 Camera 62 Camera home screen 63 first ...

Страница 97: ...ed 28 notification icons 23 personalizing 26 see also App shortcuts 26 see also Wallpapers 27 see also Widgets 26 L Low light see also Advanced camera features 65 M Messaging 56 launching 56 messaging later see also Replying now 38 replying 56 sending 56 Micro SIM cards 42 assigning a preferred micro SIM card 43 data service 43 renaming 42 voice calls 43 Miniature see also Advanced camera features...

Страница 98: ...res 65 Time Rewind 66 see also Advanced camera features 65 Touchscreen 19 launching apps or selecting items 19 moving or deleting items 19 moving through pages or screens 20 zooming in 20 zooming out 21 V VIPs 55 setting up from the contact s screen 55 W Wallpapers 27 animated wallpaper 28 wallpaper and background tint 27 Weather 78 launching 78 Weather home screen 79 WebStorage 40 Widgets 26 Wi F...

Отзывы: