


ASUS Z9PE-D8 WS
5-35
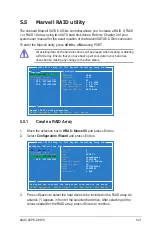
5.4
Intel
®
Rapid Storage Technology
enterprise Utility (Windows)
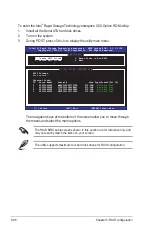
The Intel
®
Rapid Storage Technology enterprise utility allows you to create RAID 0,
RAID 1, RAID 10 (RAID 1+0), and RAID 5 set(s) from Serial ATA hard disk drives
that are connected to the Serial ATA connectors supported by the Southbridge.
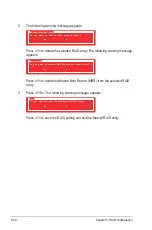
Before you using Intel
®
Rapid Storage Technology enterprise utility, you need to
change BIOS setting first:
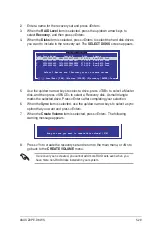
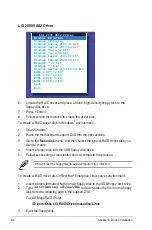
1. Enter the BIOS Setup during POST.
2. Go to the
Advanced Menu > Chipset Configuration > PCH Configuration>
Onboard SATA Oprom
, then press <Enter>.
3. Set
Onboard SATA Oprom
to [Enabled].
4. Press <F10> to save your changes and exit the BIOS Setup.
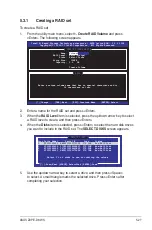
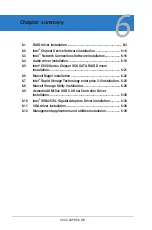
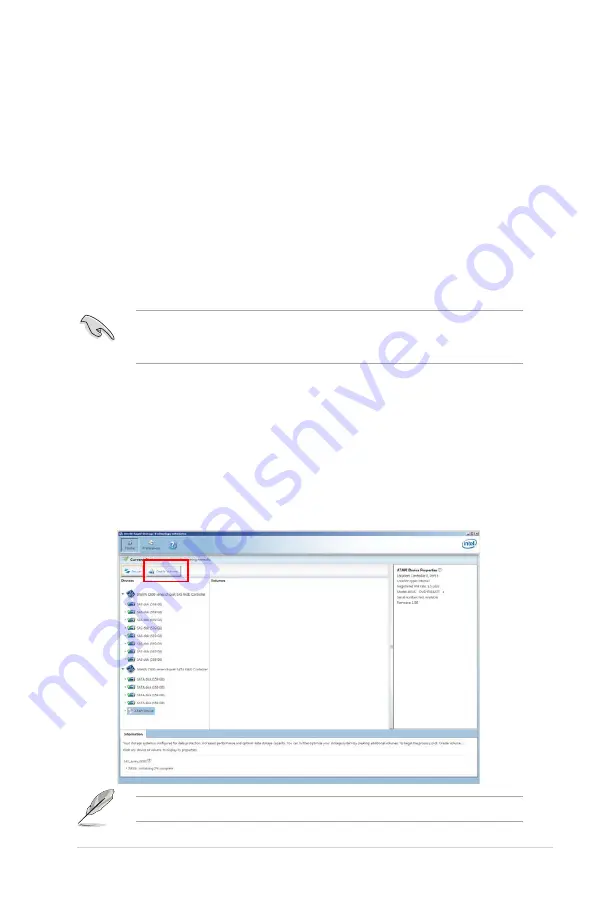
You can click
Rescan
to re-scan any attached hard disks.
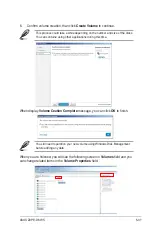
1. Turn on the system to windows desktop.
2. Click the
Intel
®
Rapid Storage Technology enterprise
icon to display the
main menu.
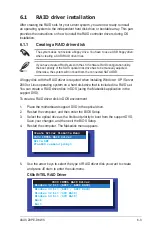
Your storage system is configured for data protection, increased performance and
optimal data storage capacity. You can further optimize your storage system by
creating additional volumes.
To enter the Intel
®
Rapid Storage Technology enterprise utility under Windows
operating system:
You need to manually install the Intel
®
Rapid Storage Technology enterprise
utility on a Windows
®
operating system. Please refer to the installation
instructions in Chapter 6.
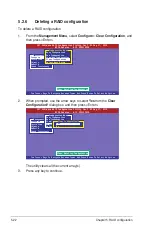
Содержание Z9PE-D8 WS
Страница 1: ...Motherboard Z9PE D8 WS ...
Страница 15: ...1 Product introduction This chapter describes the motherboard features and the new technologies it supports ...
Страница 22: ...1 8 Chapter 1 Product introduction ...
Страница 27: ...ASUS Z9PE D8 WS 2 5 2 2 3 Motherboard layout Z9PE D8 WS ...
Страница 51: ...ASUS Z9PE D8 WS 2 29 2 9 Connectors 2 9 1 Rear panel connectors ...
Страница 63: ...ASUS Z9PE D8 WS 2 41 17 ASMB6 header ASMB6 This connector supports the ASUS Server Management Board 6 series ...
Страница 64: ...2 42 Chapter 2 Hardware information ...
Страница 65: ...3 Chapter 3 Powering up This chapter describes the power up sequence and ways of shutting down the system ...
Страница 66: ...ASUS Z9PE D8 WS Chapter summary 3 3 1 Starting up for the first time 3 3 3 2 Powering off the computer 3 4 ...
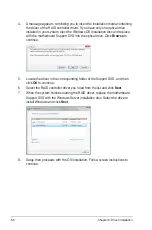
Страница 195: ...ASUS Z9PE D8 WS 6 29 9 Click Finish to complete the installation ...
Страница 198: ...6 32 Chapter 6 Driver installation 6 Click Finish to complete the installation and exit the wizard ...
Страница 201: ...ASUS Z9PE D8 WS 6 35 7 Click Install to begin installation 8 Click Finish to complete the installation ...
Страница 222: ...Appendix summary A ASUS Z9PE D8 WS A 1 Z9PE D8 WS block diagram A 3 ...
Страница 223: ...ASUS Z9PE D8 WS A 3 A 1 Z9PE D8 WS block diagram ...
Страница 224: ...A 4 Appendix A Reference information ...


