


6-14
Chapter 6: RAID Configuration
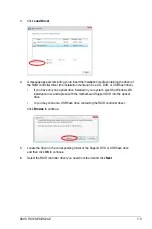
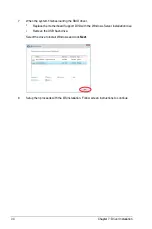
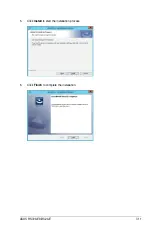
6.
Confirm the volume creation, than click
Create Volume
to continue.
This process could take a while depending on the number and size of the disks. You can
continue using other applications during this time.
7.
Wait until the process is completed, then click
OK
when prompted.
You still need to partition your new volume using Windows Disk Management before adding
any data.
The RAID set is displayed in the
Volumes
list and you can change the settings in
Volume
Properties
.
Содержание RS720-E9-RS24-E
Страница 1: ...2U Rackmount Server User Guide RS720 E9 RS24 E ...
Страница 10: ...x ...
Страница 24: ...Chapter 1 Product Introduction 1 14 ...
Страница 64: ...Chapter 2 Hardware Information 2 40 ...
Страница 69: ...3 5 ASUS RS720 E9 RS24 E 3 3 Rail kit dimensions 589mm 43 6mm 900mm 43 6mm ...
Страница 70: ...Chapter 3 Installation Options 3 6 ...
Страница 72: ...Chapter 4 Motherboard Information 4 2 4 1 Motherboard layout ...
Страница 96: ...Chapter 4 Motherboard Information 4 26 ...
Страница 140: ...5 44 Chapter 5 BIOS Setup ...
Страница 158: ...6 18 Chapter 6 RAID Configuration ...
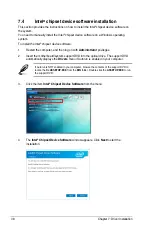
Страница 169: ...ASUS RS720 E9 RS24 E 7 11 6 Click Finish to complete the installation 5 Click Install to start the installation process ...
Страница 173: ...Appendix Appendix This appendix includes additional information that you may refer to when configuring the motherboard ...
Страница 180: ...A 8 Appendix ...