7
English
5.
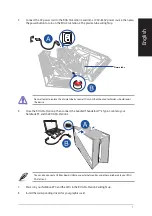
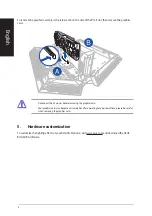
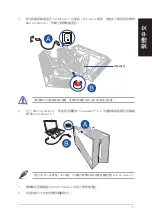
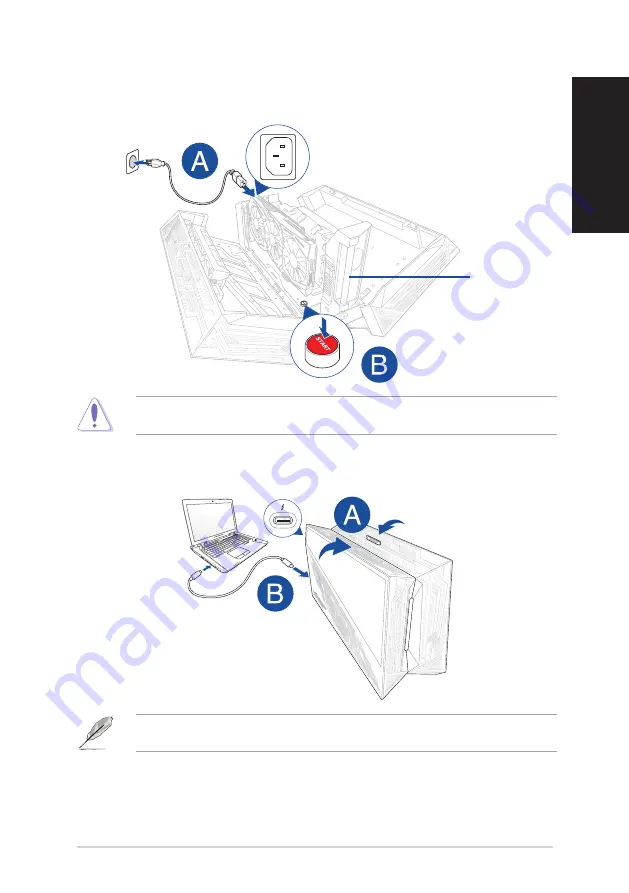
Connect the AC power cord to the ROG XG-Station 2 and into a 100V~240V power source, then press
the power button to turn on the ROG XG-Station 2. The plasma tube will light up.
6.
Close the ROG XG-Station 2, then connect the bundled Thunderbolt™ 3 Type-C cable to your
Notebook PC and the ROG XG-Station 2.
Never attempt to replace the plasma tube by yourself. Only ASUS-authorized technicians should repair
the device.
You can also connect a USB keyboard, USB mouse, external monitor, and other peripherals to your ROG
XG-Station 2.
Plasma tube
7.
Power on your Notebook PC and the LEDs in the ROG XG-Station 2 will light up.
8.
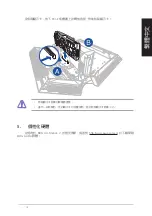
Install the corresponding drivers for your graphics card.
Содержание ROG XG-Station 2
Страница 1: ...Q12047 First Edition November 2016 ROG XG Station 2 Quick Start Guide ...
Страница 12: ...12 4 將之前移除的螺絲鎖回以固定金屬架 然後將電源線插入顯示卡電源插槽 3 將顯示卡對準并插入 PCI E 插槽 繁體中文 ...
Страница 18: ...18 4 將之前移除的螺絲鎖回以固定金屬架 然後將電源線插入顯卡電源插槽 3 將顯卡對準并插入 PCI E 插槽 簡體中文 ...
Страница 102: ...102 4 先ほど取り外したネジでグラフィックスカードを固定し グラフィックスカードに補助電源ケーブル を接続します 3 本製品のPCI Express スロッ トにグラフィックスカードを取り付けます 日 本 語 ...
Страница 108: ...108 4 앞서 제거했던 나사를 이용해서 금속 브래킷을 고정한 다음 전원 케이블을 그래픽 카드에 연결합니다 3 그래픽 카드를 PCI E 슬롯에 맞춰서 끼웁니다 한국어 ...
Страница 111: ......
Страница 112: ...15060 88800000 ...


