


ASUS TS100-E4/PI2
5-5
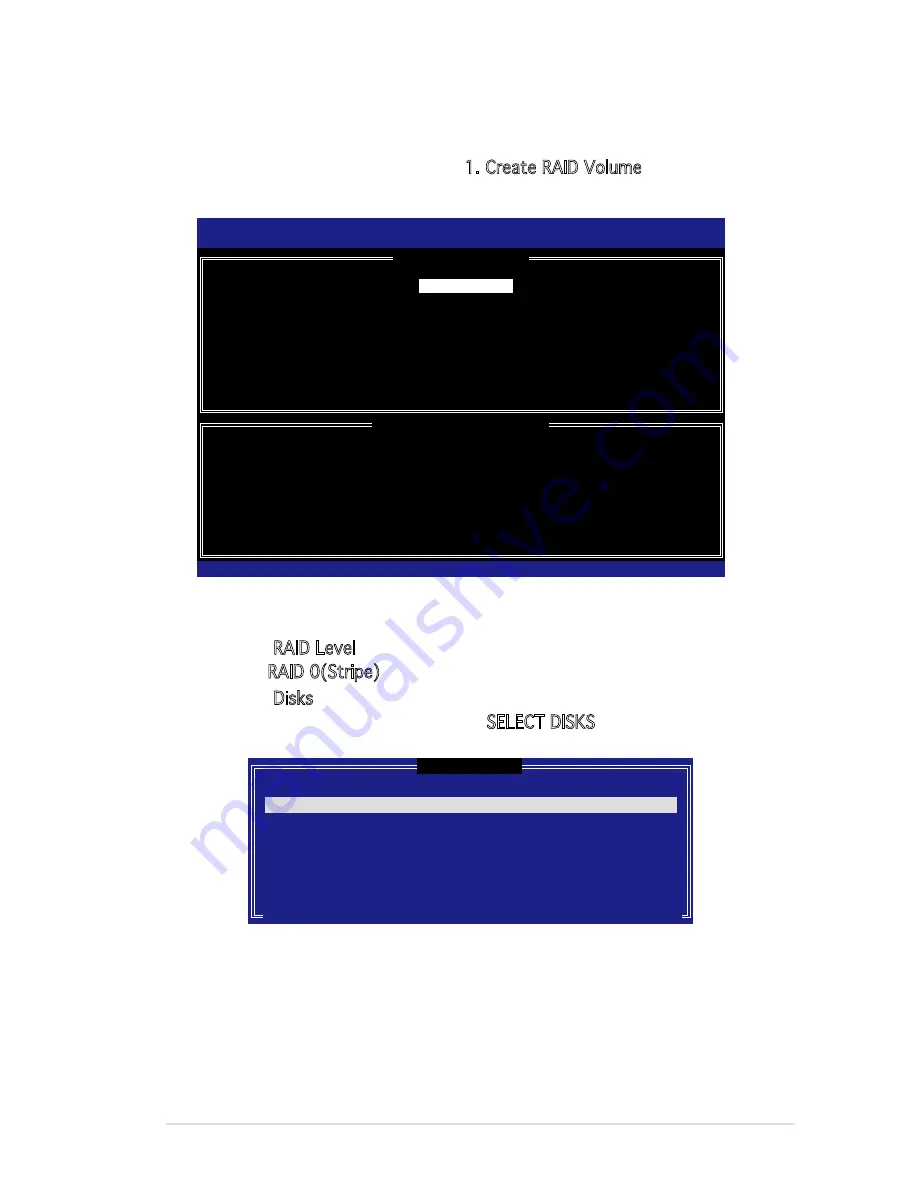
5.2.1 Creating a RAID 0 set (striped)
To create a RAID 0 set:
1. From the utility main menu, select 1. Create RAID Volume, then press
<Enter>. This screen appears.
2. Enter a name for the RAID 0 set, then press <Enter>.
3. When the RAID Level item is highlighted, press the up/down arrow key
to select RAID 0(Stripe), then press <Enter>.
4. When the Disks item is highlighted, press <Enter> to select the hard
disk drives to configure as RAID. This
SELECT DISKS screen appears.
Intel(R) Matrix Storage Manager Option ROM v5.0.0.1032 ICH7R wRAID5
Copyright(C) 2003-05 Intel Corporation. All Rights Reserved.
[
CREATE ARRAY MENU
]
[
DISK/VOLUME INFORMATION
]
Enter a string between 1 and 16 characters in length that can be used
to uniquely identify the RAID volume. This name is case sensitive and
cannot contain special characters.
[
↑↓
]-Change [TAB]-Next [ESC]-Previous Menu [Enter]-Select
Name:
RAID Level:
Disks:
Strip Size:
Capacity:
Volume0
RAID0(Stripe)
Select Disks
128KB
0.0 GB
Create Volume
[
SELECT DISKS
]
[
↑↓
]-Previous/Next [SPACE]-Selects [ENTER]-Selection Complete
Port Drive Model Serial # Size Status
0 XXXXXXXXXXXX XXXXXXXX XX.XGB Non-RAID Disk
1 XXXXXXXXXXXX XXXXXXXX XX.XGB Non-RAID Disk
2 XXXXXXXXXXXX XXXXXXXX XX.XGB Non-RAID Disk
3 XXXXXXXXXXXX XXXXXXXX XX.XGB Non-RAID Disk
Select 2 to 4 disks to use in creating the volume.
5. Use the up/down arrow key to highlight a drive, then press <Space> to
select. A small triangle marks the selected drive. Press <Enter> after
completing your selection.
Содержание Pedestal Server TS100-E4/PI2
Страница 1: ...TS100 E4 PI2 Pedestal Server User Guide ...
Страница 18: ...Chapter 1 Product introduction 1 ...
Страница 62: ...3 20 Chapter 3 Motherboard Information ...
Страница 152: ...6 18 Chapter 6 Driver installation ...
Страница 153: ...The Appendix describes the CPU features that the motherboard supports Appendix Reference Info ...
Страница 156: ...A Appendix CPU features A 3 Block diagram ...


