background image

ASUS M4A88T-I Deluxe 

2-27

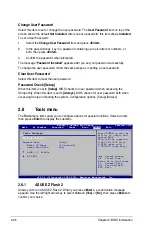
2.8.2 

Express Gate [Auto]

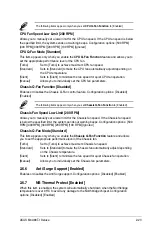
Enables or disables the ASUS Express Gate feature. ASUS Express Gate is a unique  

instant-on environment that provides quick access to the Internet and Skype.  

Configuration options: [Disabled] [Enabled] [Auto]

Enter OS Timer [10 Seconds]

Sets countdown duration that the system waits at the Express Gate’s first screen 

before starting Windows or other installed OS. Choose [Prompt User] to stay at the first 

screen of Express Gate for user action. Configuration options: [Prompt User] 


[1 second] [3 seconds] [5 seconds] [10 seconds] [15 seconds] [20 seconds]  

[30 seconds]

Reset User Data [No]

Allows you to clear Express Gate’s user data. Configuration options: [No] [Reset]

When setting this item to 

[Reset]

, ensure to save the setting to the BIOS so that the 

user data will be cleared the next time you enter the Express Gate. User data includes 

the Express Gate’s settings as well as any personal information stored by the web 

browser (bookmarks, cookies, browsing history, etc.). This is useful in the rare case 

where corrupt settings prevent the Express Gate environment from launching properly.

The first time wizard will run again when you enter the Express Gate environment after 

clearing its settings.

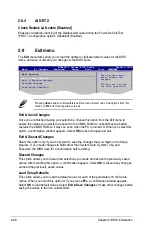
2.8.3 

ASUS O.C. Profile

This item allows you to store or load multiple BIOS settings. 

Add Your CMOS Profile

Allows you to save the current BIOS file to the BIOS Flash. In the Name sub-item, key in 

your profile name and press <Enter>, and then choose a profile number to save your CMOS 

settings in the 

Save to

 sub-item.

Load CMOS Profiles.

Allows you to load the previous BIOS settings saved in the BIOS Flash. Press <Enter> to 

load the file.

Start O.C. Profile

Allows you to run the utility to save and load CMOS. Press <Enter> to run the utility.

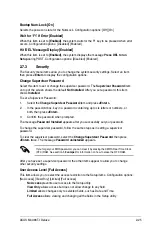
•  This function can support devices such as a USB flash disk with FAT 32/16 format and 

single partition only.

•  DO NOT shut down or reset the system while updating the BIOS to prevent the system 

boot failure!

•  We recommend that you update the BIOS file only coming from the same memory/CPU 

configuration and BIOS version.

•  Only the CMO file can be loaded.

Содержание M4A88T-I DELUXE

Страница 1: ...Motherboard M4A88T I Deluxe ...

Страница 2: ...anation and to the owners benefit without intent to infringe Offer to Provide Source Code of Certain Software This product may contain copyrighted software that is licensed under the General Public License GPL and under the Lesser General Public License Version LGPL The GPL and LGPL licensed code in this product is distributed without any warranty Copies of these licenses are included in this prod...

Страница 3: ... 1 5 3 Motherboard layout 1 7 1 5 4 Layout contents 1 7 1 6 Central Processing Unit CPU 1 8 1 6 1 Installing the CPU 1 8 1 6 2 Installing the heatsink and fan 1 10 1 7 System memory 1 11 1 7 1 Overview 1 11 1 7 2 Memory configurations 1 12 1 7 3 Installing a DIMM 1 14 1 7 4 Removing a DIMM 1 14 1 8 Expansion slot 1 15 1 8 1 Installing an expansion card 1 15 1 8 2 Configuring an expansion card 1 15...

Страница 4: ... 2 9 2 2 5 Submenu items 2 9 2 2 6 Configuration fields 2 9 2 2 7 Pop up window 2 9 2 2 8 Scroll bar 2 9 2 2 9 General help 2 9 2 3 Main menu 2 10 2 3 1 System Time xx xx xx 2 10 2 3 2 System Date Day xx xx xxxx 2 10 2 3 3 SATA 1 SATA 2 SATA 3 E SATA 2 10 2 3 4 SATA Configuration 2 11 2 3 5 System Information 2 11 2 4 Ai Tweaker menu 2 12 2 4 1 CPU Level UP Auto 2 12 2 4 2 CPU OverClocking Auto 2 ...

Страница 5: ...Devices Configuration 2 19 2 5 4 PCIPnP 2 20 2 5 5 USB Configuration 2 20 2 6 Power menu 2 21 2 6 1 Suspend Mode Auto 2 21 2 6 2 ACPI 2 0 Support Enabled 2 21 2 6 3 ACPI APIC Support Enabled 2 22 2 6 4 APM Configuration 2 22 2 6 5 HW Monitor Configuration 2 22 2 6 6 Anti Surge Support Enabled 2 23 2 6 7 NB Thermal Protect Enabled 2 23 2 7 Boot menu 2 24 2 7 1 Boot Device Priority 2 24 2 7 2 Boot S...

Страница 6: ...t from that to which the receiver is connected Consult the dealer or an experienced radio TV technician for help Canadian Department of Communications Statement This digital apparatus does not exceed the Class B limits for radio noise emissions from digital apparatus set out in the Radio Interference Regulations of the Canadian Department of Communications This class B digital apparatus complies w...

Страница 7: ...peration safety Before installing the motherboard and adding devices on it carefully read all the manuals that came with the package Before using the product ensure that all cables are correctly connected and the power cables are not damaged If you detect any damage contact your dealer immediately To avoid short circuits keep paper clips screws and staples away from connectors slots sockets and ci...

Страница 8: ...uct and software updates 1 ASUS websites The ASUS website provides updated information on ASUS hardware and software products Refer to the ASUS contact information 2 Optional documentation Your product package may include optional documentation such as warranty flyers that may have been added by your dealer These documents are not part of the standard package Typography Bold text Indicates a menu ...

Страница 9: ...nd a maximum of 3GB system memory if you are using a Windows 32 bit operating system Graphics Integrated ATI Radeon HD 4250 GPU Dual independent displays support with HDMI and DVI Supports HDMI with max resolution up to 1920x1200 60Hz Supports DVI with max resolution up to 2560x1600 60Hz Supports Microsoft DirectX 10 1 OpenGL 2 0 Shader Model 4 1 Hardware Decode Acceleration for H 264 VC 1 and MPE...

Страница 10: ...ile ASUS CrashFree BIOS 3 ASUS EZ Flash 2 ASUS MyLogo 2 When you enable the Core Unlocker feature some CPU s TDP Thermal Design Power may be higher than the maximum 95W TDP that this motherboard supports This CPU is not supported by this model will show on the POST screen ASUS exclusive overclocking features Precision Tweaker 2 vCore Adjustable CPU voltage at 0 00625V increment vDIMM 64 step DRAM ...

Страница 11: ... connector 1 x Chassis intrusion connector 1 x Core Unlocker switch 1 x Turbo Key II switch 1 x MemOK button 1 x Front panel audio connector 1 x Clear COMS jumper 1 x System panel connector 1 x 24 pin EATX power connector 1 x 4 pin ATX 12V power connector BIOS 16Mb Flash ROM AMI BIOS PnP DMI 2 0 WfM 2 0 ACPI 2 0a SM BIOS 2 5 Manageability WOL by PME PXE Accessories 2 x Wi Fi antennas 2 x Serial AT...

Страница 12: ...xii ...
Страница 13: ...elivers a host of new features and latest technologies making it another standout in the long line of ASUS quality motherboards Before you start installing the motherboard and hardware devices on it check the items in your package with the list below AMD Phenom II Athlon II Sempron 100 series CPU support This motherboard supports AMD Socket AM3 multi core processors with unique L3 cache and delive...

Страница 14: ... and is also backward compatible with USB 2 0 components HDMI support HDMI High Definition Multimedia Interface is a set of digital video standards that deliver multi channel digital audio and uncompressed digital video for full HD 1080p visuals through a single cable Supporting HDCP copy protection such as HD DVD and Blu ray discs HDMI provides you with the highest quality home theater experience...

Страница 15: ...o deliver multiple overclocking profiles also provides rapid and stable system level upgrades TurboV EVO The ultimate O C processor satisfies every level of overclockers from die hard enthusiasts to beginners Auto tuning intelligently pushes the system to the fastest clock speeds while maintaining stability Turbo Key boosts performance with just one touch while TurboV offers more options to advanc...

Страница 16: ...s and adjusts the power consumption in real time Fan Xpert ASUS Fan Xpert intelligently allows you to adjust the CPU and chassis fan speeds according to different ambient temperatures caused by different climate conditions in different geographic regions and your PC s loading The built in variety of useful profiles offer flexible controls of fan speed to achieve a quiet and cool environment ASUS E...

Страница 17: ...g environment friendly and recyclable products packaging to safeguard consumers health while minimizing the impact on the environment 1 4 Before you proceed Take note of the following precautions before you install motherboard components or change any motherboard settings Unplug the power cord from the wall socket before touching any component Before handling components use a grounded wrist strap ...

Страница 18: ...tion The edge with external ports goes to the rear part of the chassis as indicated in the image below DO NOT overtighten the screws Doing so can damage the motherboard 1 5 2 Screw holes Place four screws into the holes indicated by circles to secure the motherboard to the chassis Place this side towards the rear of the chassis Chapter 1 Product introduction 1 6 ...

Страница 19: ...15 System panel connector 10 1 pin F_PANEL 1 22 7 Core Unlocker switch CORE_UNLOCKER 1 23 16 USB connector 10 1 pin USB78 1 19 8 Core Unlocker LED O2LED1 1 26 17 Front panel audio connector 10 1 pin AAFP 1 22 9 DRAM LED DRAM_LED 1 26 M4A88T I DELUXE USB78 USB910_WFG AAFP CHA_FAN TURBO_KEY_II CORE_UNLOCKER CPU_FAN Lithium Cell CMOS Power ICS 9LPRS477 RTL 8112L UPD720200F1 ALC 889 Super I O 16Mb BIO...

Страница 20: ...cket such that the CPU corner with the gold triangle matches the socket corner with a small triangle 4 Carefully insert the CPU into the socket until it fits in place The CPU fits only in one correct orientation DO NOT force the CPU into the socket to prevent bending the pins and damaging the CPU Gold triangle Small triangle The AM3 socket has a different pinout from the AM2 AM2 socket Ensure that...

Страница 21: ...he heatsink package You can also refer to section 1 6 2 Installing heatsink and fan for instructions 7 Connect the CPU fan cable to the CPU_FAN connector on the motherboard DO NOT forget to connect the CPU fan connector Hardware monitoring errors can occur if you fail to plug this connector M4A88T I DELUXE M4A88T I DELUXE CPU fan connector CPU_FAN CPU FAN PWM CPU FAN IN CPU FAN PWR GND ASUS M4A88T...

Страница 22: ...therboard components If you purchased a separate CPU heatsink and fan assembly ensure that a Thermal Interface Material is properly applied to the CPU heatsink or CPU before you install the heatsink and fan assembly CPU Fan CPU Heatsink Retention bracket Retention bracket lock Retention Module Base Your boxed CPU heatsink and fan assembly should come with installation instructions for the CPU heat...

Страница 23: ...oard labeled CPU_FAN DO NOT forget to connect the CPU fan connector Hardware monitoring errors can occur if you fail to plug this connector 1 7 System memory 1 7 1 Overview This motherboard comes with two Double Data Rate 3 DDR3 Small Outline Dual Inline Memory Modules SO DIMM sockets A DDR3 module has the same physical dimensions as a DDR2 DIMM but is notched differently to prevent installation o...

Страница 24: ...s Mb chips or less M4A88T I Deluxe Motherboard Qualified Vendors Lists QVL DDR3 1333MHz capability The default memory operation frequency is dependent on its Serial Presence Detect SPD which is the standard way of accessing information from a memory module Under the default state some memory modules for overclocking may operate at a lower frequency than the vendor marked value To operate at the ve...

Страница 25: ...l A B Apacer AS02GFA06C7NBGC 2GB DS Apacer AM5D5808DE JSCG0944D G SKILL F3 8500CL7D 4GBSQ 2GB DS G SKILL D3 128M8GE91003 H27E84 G SKILL F3 8500CL7S 2GBSQ 2GB DS G SKILL D3 128M8GE91003 H27E84 Hynix HMT112S6BFR6C G7 1GB DS Hynix 0 Hynix HMT112S6BFR6C G7 1GB DS Hynix H5TQ1G63BFAG7C 012A Hynix HMT125S6TFR8C G7 2GB DS Hynix 0 Kingston KVR1066D3S7 2G 2GB DS Elpida J1108BABG DJ E MICRON MT16JSF25664HZ 1...

Страница 26: ...notch so that it fits in only one direction DO NOT force a DIMM into a socket in the wrong direction to avoid damaging the DIMM 3 Firmly insert the DIMM into the socket until the retaining clips snap back in place and the DIMM is properly seated Locked Retaining Clip 3 1 7 4 Removing a DIMM To remove a DIMM 1 Simultaneously press the retaining clips outward to unlock the DIMM 2 Remove the DIMM fro...

Страница 27: ...ard connector with the slot and press firmly until the card is completely seated on the slot 5 Secure the card to the chassis with the screw you removed earlier 6 Replace the system cover When using PCI cards on shared slots ensure that the drivers support Share IRQ or that the cards do not need IRQ assignments Otherwise conflicts will arise between the two PCI groups making the system unstable an...

Страница 28: ...ult to pins 2 3 Keep the cap on pins 2 3 for about 5 10 seconds then move the cap back to pins 1 2 3 Plug the power cord and turn ON the computer 4 Hold down the Del key during the boot process and enter BIOS setup to reenter data If the steps above do not help remove the onboard battery and move the jumper again to clear the CMOS RTC RAM data After clearing the CMOS reinstall the battery You do n...

Страница 29: ... connection LAN port SPEED LED ACT LINK LED 5 13 14 15 16 11 6 7 10 1 2 4 8 9 3 12 Under Windows 7 OS to achieve the complete Bluetooth functions download the latest Bluetooth driver from the ASUS support wedsite at http support asus com Bluetooth Electrical Specification Bluetooth specification V 2 1 compliant Transmission rate up to 3 Mbps Working distance up to 10 meters Intergrated 32 bit CPU ...

Страница 30: ... HD DVD Blu ray and other protected content 16 USB 2 0 ports 5 and 6 These two 4 pin Universal Serial Bus USB ports are for USB 2 0 devices 6 Line In port light blue This port connects to the tape CD DVD player or other audio sources 7 Line Out port lime This port connects to a headphone or a speaker In the 4 6 and 8 channel configurations the function of this port becomes Front Speaker Out Refer ...

Страница 31: ...2 Internal connectors M4A88T I DELUXE M4A88T I DELUXE fan connectors CHA_FAN Rotation 12V GND CPU_FAN CPU FAN PWM CPU FAN IN CPU FAN PWR GND 2 USB connector 10 1 pin USB78 This connector is for USB 2 0 ports Connect the USB module cable to this connector then install the module to a slot opening at the back of the system chassis This USB connector complies with USB 2 0 specification that supports ...

Страница 32: ...ower is inadequate DO NOT forget to connect the 4 pin ATX 12V power plug Otherwise the system will not boot up We recommend that you use a PSU with higher power output when configuring a system with more power consuming devices or when you intend to install additional devices The system may become unstable or may not boot up if the power is inadequate If you are uncertain about the minimum power s...

Страница 33: ...lug and NCQ set the SATA Port1 Port4 item in the BIOS to AHCI See section 2 3 4 SATA Configuration for details SATA1 GND RSATA_RXN1 RSATA_RXP1 GND RSATA_TXN1 RSATA_TXP1 GND SATA2 GND RSATA_RXN2 RSATA_RXP2 GND RSATA_TXN2 RSATA_TXP2 GND SATA3 GND RSATA_RXN3 RSATA_RXP3 GND RSATA_TXN3 RSATA_TXP3 GND M4A88T I DELUXE M4A88T I DELUXE SATA connectors M4A88T I DELUXE M4A88T I DELUXE Chassis intrusion conne...

Страница 34: ...WR BTN GND PWR PLED PLED Reset Ground HD_LED HD_LED F_PANEL PWR LED HD_LED RESET We recommend that you connect a high definition front panel audio module to this connector to avail of the motherboard high definition audio capability If you want to connect a high definition front panel audio module to this connector set the Front Panel Select item in the BIOS to HD Audio See section 2 5 3 Onboard D...

Страница 35: ...rd LEDs for the exact location of the O2LED1 LED You may also press 4 during the Power On Self Test POST or enable the ASUS Core Unlocker item in the BIOS menu to activate the Core Unlocker function The system will use the last setting you have made If you clear the CMOS or load the BIOS setup defaults the ASUS Core Unlocker item in the BIOS menu follows the current setting of the Core Unlocker sw...

Страница 36: ...ases indicating different test processes Due to memory tuning requirement the system automatically reboots when each timing set is tested If the installed DIMMs still fail to boot after the whole tuning process the DRAM_LED lights continuously Replace the DIMMs with ones recommended in the Memory QVL Qualified Vendors Lists in this user manual or on the ASUS website at www asus com If you turn off...

Страница 37: ...clear the CMOS or load the BIOS setup defaults the related overclocking items in the BIOS menu follow the current setting of the Turbo Key II switch If you change the switch setting to Enabled under the OS environment the Turbo Key II function will be activated after the next system bootup You may use the TurboV Auto Tuning overclock in the BIOS setup program and enable the Turbo Key II function a...

Страница 38: ...US Core Unlocker item in the BIOS menu is set to Disabled M4A88T I DELUXE M4A88T I DELUXE DRAM LED O2LED1 M4A88T I DELUXE M4A88T I DELUXE Core Unlocker LED 1 12 Onboard LEDs 1 Standby Power LED The motherboard comes with a standby power LED that lights up to indicate that the system is ON in sleep mode or in soft off mode This is a reminder that you should shut down the system and unplug the power...

Страница 39: ...4 Turbo Key II LED The Turbo Key II LED lights when the Turbo Key II switch is turned to Enable O2LED2 M4A88T I DELUXE M4A88T I DELUXE Turbo Key II LED ASUS M4A88T I Deluxe 1 27 ...

Страница 40: ...ions and utilities that you can install to avail all motherboard features The contents of the Support DVD are subject to change at any time without notice Visit the ASUS website at www asus com for updates To run the Support DVD Place the Support DVD into the optical drive If Autorun is enabled in your computer the DVD automatically displays the Specials screen which contains the unique features o...

Страница 41: ...vironment Installing ASUS Update To install ASUS Update 1 Place the support DVD into the optical drive The Drivers menu appears 2 Click the Utilities tab then click ASUS Update 3 Follow the onscreen instructions to complete the installation Quit all Windows applications before you update the BIOS using this utility Updating the BIOS To update the BIOS 1 From the Windows desktop click Start Program...

Страница 42: ...OS setup program Go to the Tools menu to select EZ Flash 2 and press Enter to enable it Press Tab to switch between drives until the correct BIOS file is found 2 1 2 ASUS EZ Flash 2 The ASUS EZ Flash 2 feature allows you to update the BIOS without using an OS based utility Before you start using this utility download the latest BIOS file from the ASUS website at www asus com 2 When the correct BIO...

Страница 43: ... com The removable devices that ASUS CrashFree BIOS 3 supports vary with motherboard models For motherboards without the floppy connector prepare a USB flash disk before using this utility Recovering the BIOS To recover the BIOS 1 Turn on the system 2 Insert the support DVD to the optical drive or the removable device that contains the BIOS file to the USB port or to the floppy disk drive if suppo...

Страница 44: ...XXXXXXXXXXX USB XXXXXXXXXXXXXXXXX Network XXXXXXXXXXXXX 2 1 4 ASUS BIOS Updater The ASUS BIOS Updater allows you to update BIOS in DOS environment This utility also allows you to copy the current BIOS file that you can use as a backup when the BIOS fails or gets corrupted during the updating process The succeeding utility screens are for reference only The actual utility screen displays may not be...

Страница 45: ...known VER Unknown DATE Unknown BIOS backup is done Press any key to continue D bupdater oOLDBIOS1 rom Filename Extension Backing up the current BIOS To backup the current BIOS file using the BIOS Updater Ensure that the USB flash drive is not write protected and has enough free space to save the file 1 At the FreeDOS prompt type bupdater o filename and press Enter The filename is any user assigned...

Страница 46: ...ing the BIOS file if you have disconnected them Updating the BIOS file To update the BIOS file using BIOS Updater 1 At the FreeDOS prompt type bupdater pc g and press Enter ASUSTek BIOS Updater for DOS V1 18 09 11 19 Current ROM Update ROM A Note Enter Select or Load Tab Switch V Drive Info Up Down Home End Move B Backup Esc Exit M4A88TID ROM 2097152 2010 01 11 17 30 48 PATH A BOARD M4A88T I Delux...

Страница 47: ...f you failed to enter BIOS Setup using the first two options Using the power button reset button or the Ctrl Alt Del keys to force reset from a running operating system can cause damage to your data or system We recommend that you always shut down the system properly from the operating system The default BIOS settings for this motherboard apply to most conditions to ensure optimum performance If t...

Страница 48: ...ted 2 2 3 Navigation keys At the bottom right corner of a menu screen are the navigation keys for that particular menu Use the navigation keys to select items in the menu and change the settings Menu items Select Screen Select Item Change Field Tab Select Field F1 General Help F10 Save and Exit ESC Exit v02 61 C Copyright 1985 2010 American Megatrends Inc M4A88T I Deluxe BIOS Setup Main Ai Tweaker...

Страница 49: ...to display a pop up window with the configuration options for that item 2 2 8 Scroll bar A scroll bar appears on the right side of a menu screen when there are items that do not fit on the screen Press the Up Down arrow keys or Page Up Page Down keys to display the other items on the screen 2 2 9 General help At the top right corner of the menu screen is a brief description of the selected item Po...

Страница 50: ...ystem LBA Large Mode Auto Enables or disables the LBA mode Setting this item to Auto enables the LBA mode if the device supports this mode and if the device was not previously formatted with LBA mode disabled Configuration options Disabled Auto Block Multi Sector Transfer M Auto Enables or disables data multi sectors transfers When this item is set to Auto the data transfer from and to the device ...

Страница 51: ...TA Channel to Enabled SATA Port1 Port4 IDE Allows you to set the SATA configuration IDE Set to IDE when you want to use the Serial ATA hard disk drives as Parallel ATA physical storage devices RAID Set to RAID when you want to create a RAID configuration from the SATA hard disk drives AHCI Set to AHCI when you want the SATA hard disk drives to use the AHCI Advanced Host Controller Interface The AH...

Страница 52: ... the settings in detail set CPU Overclocking to Manual after selecting a CPU level Configuration options Auto Phenom II 955 Phenom II 3 4G Phenom II 3 6G The configuration options vary depending on the CPU model you install on the motherboard The CPU Level UP function support depends on CPU types v02 61 C Copyright 1985 2010 American Megatrends Inc M4A88T I Deluxe BIOS Setup Main Ai Tweaker Advanc...

Страница 53: ...es range from 100MHz to 150MHz Overclock Options Auto This item appears only when you set the CPU OverClocking item to Overclock Profile and allows you to select an overclocking profile Configuration options Auto Overclock 2 Overclock 5 Overclock 8 Overclock 10 2 4 3 CPU Ratio Auto Allows you to set the ratio between the CPU Core Clock and the FSB Frequency Use the and keys to adjust the ratio The...

Страница 54: ...d or set the Enhanced iGPU SpeedStep item to Manual Allows you to set the GPU Engine Clock Use the and keys to adjust the value You can also key in the desired value using the numeric keypad The values range from 200MHz to 2000MHz GPU Power Saving Mode Disabled Enable this item to reduce the iGPU power consumption when the system is idle Select Disabled to disable this function 2 4 8 OC Tuner Util...

Страница 55: ...E to WRITE Timing Auto Configuration options Auto 3 CLK 10 CLK DRAM READ to READ Timing Auto Configuration options Auto 3 CLK 10 CLK DRAM REF Cycle Time Auto Configuration options Auto 90ns 110ns 160ns 300ns 350ns DRAM Refresh Rate Auto Configuration options Auto Every 7 8ms Every 3 9ms DRAM Command Rate Auto Configuration options Auto 1T 2T 2 4 10 DRAM Driving Configuration The configuration opti...

Страница 56: ... allows you to set the CPU Offset voltage The values range from 0 006250V to 0 500000V with a 0 006250V interval CPU NB Offset Voltage Auto This item appears only when you set the CPU NB Voltage Mode item to Offset and allows you to set the CPU NB Offset voltage The values range from 0 006250V to 0 500000V with a 0 006250V interval CPU Voltage Auto This item appears only when you set the CPU NB Vo...

Страница 57: ...field values can cause the system to malfunction 2 5 1 CPU Configuration The items in this menu show the CPU related information that the BIOS automatically detects GART Error Reporting Disabled This option should remain disabled for the normal operation The driver developer may enable it for testing purpose Configuration options Disabled Enabled Microcode Updation Enabled Enables or disables Micr...

Страница 58: ... disable this function Configuration options Enabled Disabled CPU Core Activation Auto Allows you to set the active CPU cores Configuration options Auto Manual The following items appear only when you set CPU Core Activation to Manual 2nd Core On Enables or disables the second CPU core Configuration options On Off 3rd Core On Enables or disables the third CPU core Configuration options On Off 4th ...

Страница 59: ... This item appears only when you set the Internal Graphics Mode item to UMA Configuration options Auto 32MB 64MB 128MB 256MB 512MB 1024MB The 512MB option only appears when you install 1GB or higher capacity DIMMs The 1024MB option only appears when you install 2GB or higher capacity DIMMs Surround View Auto If you set the PCI Express device as the primary display and enable this item you may use ...

Страница 60: ...ler legacy mode is enabled If no USB device is detected the legacy USB support is disabled Configuration options Disabled Enabled Auto USB 2 0 Controller Mode HiSpeed Configures the USB 2 0 controller in HiSpeed 480Mbps mode or FullSpeed 12Mbps mode Configuration options FullSpeed HiSpeed Plug And Play O S No When this item is set to No BIOS configures all the devices in the system When this item ...

Страница 61: ... Enabled Enables or disables the Advanced Configuration and Power Interface ACPI 2 0 support Configuration options Disabled Enabled 2 6 Power menu The Power menu items allow you to change the settings for the Advanced Configuration and Power Interface ACPI and the Advanced Power Management APM Select an item then press Enter to display the configuration options Select Screen Select Item Change Opt...

Страница 62: ...board Disabled Enables or disables PS 2 Keyboard to generate a wake event Configuration options Disabled Space Bar Power Key Ctrl Esc Power on From S5 By RTC Alarm Disabled Enables or disables RTC to generate a wake event Configuration options Disabled Enabled 2 6 5 HW Monitor Configuration CPU MB Temperature xxxºC xxxºF or Ignored The onboard hardware monitor automatically detects and displays th...

Страница 63: ...appear only when you set Chassis Q Fan Function to Enabled Chassis Fan Speed Low Limit 200 RPM Allows you to manually set a lower limit for the Chassis fan speed If the Chassis fan speed is below the specified limit the system sends out warning beeps Configuration options 500 RPM 400 RPM 300 RPM 200 RPM 100 RPM Ignored Chassis Q Fan Mode Standard This item appears only when you enable the Chassis ...

Страница 64: ... of device items that appears on the screen depends on the number of devices installed in the system Configuration options Removable Dev Hard Drive ATAPI CD ROM Disabled To select the boot device during system startup press F8 when ASUS Logo appears To access Windows OS in Safe Mode do any of the following Press F5 when ASUS Logo appears Press F8 after POST 2 7 2 Boot Settings Configuration Quick ...

Страница 65: ...word box key in a password containing up to six letters or numbers or both then press Enter 3 Confirm the password when prompted The message Password Installed appears after you successfully set your password To change the supervisor password follow the same steps as in setting a supervisor password To clear the supervisor password select the Change Supervisor Password then press Enter twice The m...

Страница 66: ...ility When this item is set to Always BIOS checks for user password both when accessing Setup and booting the system Configuration options Setup Always 2 8 Tools menu The Tools menu items allow you to configure options for special functions Select an item then press Enter to display the submenu 2 8 1 ASUS EZ Flash 2 Allows you to run ASUS EZ Flash 2 When you press Enter a confirmation message appe...

Страница 67: ...er bookmarks cookies browsing history etc This is useful in the rare case where corrupt settings prevent the Express Gate environment from launching properly The first time wizard will run again when you enter the Express Gate environment after clearing its settings 2 8 3 ASUS O C Profile This item allows you to store or load multiple BIOS settings Add Your CMOS Profile Allows you to save the curr...

Страница 68: ... discard any changes and load the previously saved values Load Setup Defaults This option allows you to load the default values for each of the parameters on the Setup menus When you select this option or if you press F5 a confirmation window appears Select OK to load default values Select Exit Save Changes or make other changes before saving the values to the non volatile RAM 2 9 Exit menu The Ex...

Страница 69: ...510 739 3777 Fax 1 510 608 4555 Web site usa asus com Technical Support Telephone 1 812 282 2787 Support fax 1 812 284 0883 Online support support asus com ASUS COMPUTER GmbH Germany and Austria Address Harkort Str 21 23 D 40880 Ratingen Germany Fax 49 2102 959911 Web site www asus de Online contact www asus de sales Technical Support Telephone Component 49 1805 010923 Telephone System Notebook Ee...

Страница 70: ... 2 V1 2 2 2007 06 EN 302 326 3 V1 3 1 2007 09 2006 95 EC LVD Directive EN 60950 1 2001 A11 2004 EN 60950 1 2006 EN60065 2002 A1 2006 EN 60950 1 2006 A11 2009 2005 32 EC EuP Directive Regulation EC No 1275 2008 EN 62301 2005 Regulation EC No 278 2009 EN 62301 2005 CE marking Declaration Date May 17 2010 Year to begin affixing CE marking 2010 Position CEO Name Jerry Shen Signature __________ EC conf...

Отзывы: