A S U S R S 1 6 0 - E 3 / P S 4
A S U S R S 1 6 0 - E 3 / P S 4
A S U S R S 1 6 0 - E 3 / P S 4
A S U S R S 1 6 0 - E 3 / P S 4
A S U S R S 1 6 0 - E 3 / P S 4
6 - 9
6 - 9
6 - 9
6 - 9
6 - 9
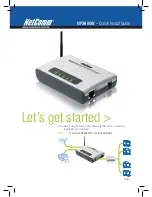
10. The screen displays the information on the created RAID set.
Press <Esc> to exit the utility.
8.
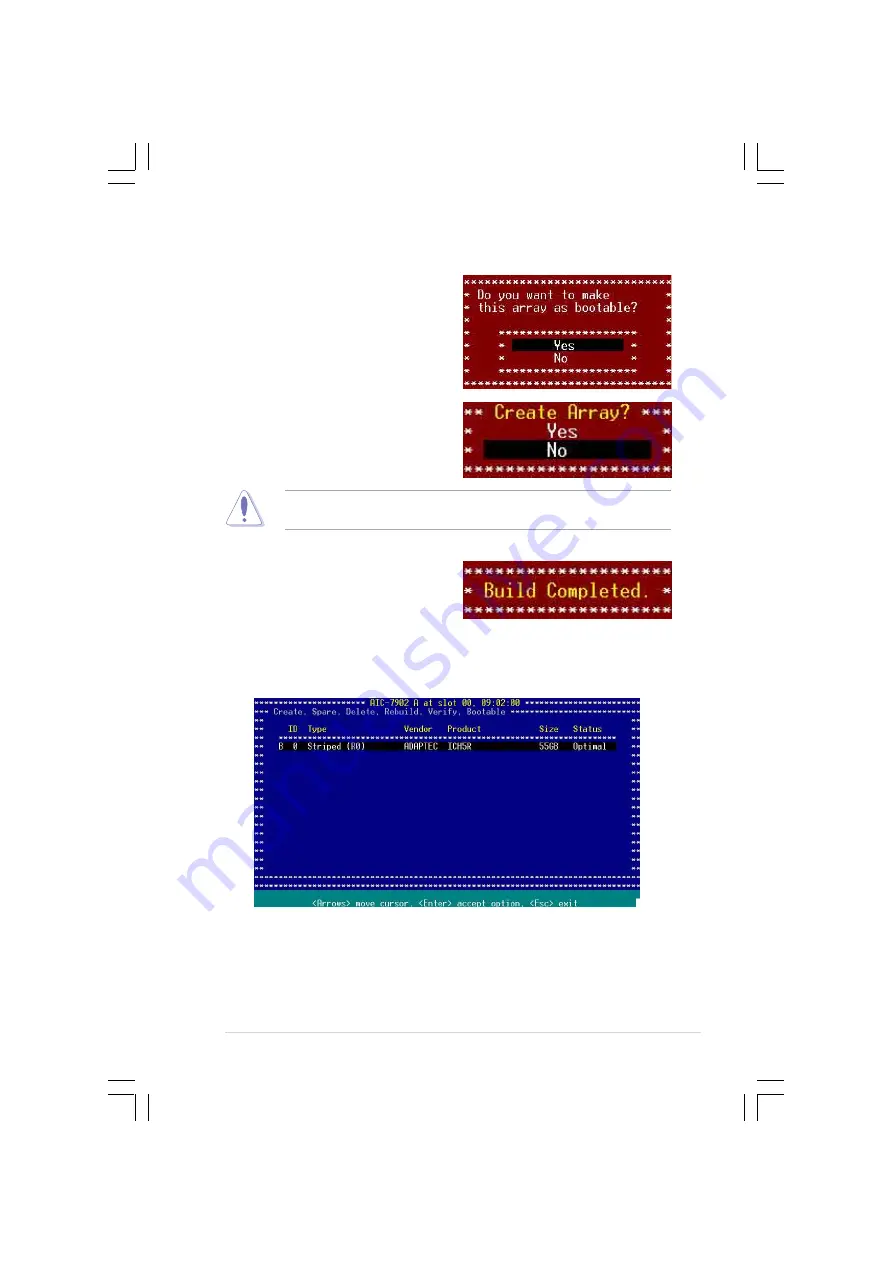
If you want to make the array
bootable, select Y e s
Y e s
Y e s
Y e s
Y e s from the
menu, then press <Enter>.
9.
When prompted to create the
RAID 0 set, select <Yes>, then
press <Enter>.
A B u i l d C o m p l e t e
B u i l d C o m p l e t e
B u i l d C o m p l e t e
B u i l d C o m p l e t e
B u i l d C o m p l e t e message
appears to indicate that you have
successfully created the RAID 0
set.
The utility erases all data from the selected hard disk drives. Make sure
to backup all important data before creating a RAID set.


