background image

22

Utility

1. Self Rejection, Rejection

This function is used to prevent double triggering and cross talk (mixed input signals between the jacks) between each of 
the pads.  Press the [UTILITY] button to enter the Utility Mode, the LCD will display: 

1.1 Self Rejection (SelfRej) 

Prevents double triggering from occurring between the pad assigned to the UT PAD IN. After an event is detected, fur-
ther events will be automatically muted for a certain length of time. Larger values will have longer times. Turn the Data 
Dial to select the pad (0-9). 

1.2 Rejection (Rej) 

Prevents cross talk from occurring between the pads assigned to the UT PAD IN. Events triggered by other pads that are 
of a lower than the input value set here, will no be delivered for a set length of time. Press the [SELECT] button, then 
turn the Data Dial to select the pad (0-9). 

1.3 UT PAD IN 

Turn the Data Dial to select the drum pad number. 

2. Gain, Minimum Velocity 

This function sets the input sensitivity (Gain) and velocity range (Minimum Velocity) for each pad. In the Utility Mode, 
press the [PAGE+] button to select the gain/velocity setting display shown below: 

2.1 Gain 

Adjusts the input gain level for the pad assigned. Entering a larger value here allows smaller input levels to sound the 
voice. Turn the Data Dial to select the gain level (0-99) 

2.2 Minimum Velocity (Mvel) 

Sets the MIDI Velocity that is transmitted when the pad is hit the weakest. Large values will be produced even if the pad 
is hit softly. However, this will result in a narrower volume range, making it difficult to adequately produce wider dynamic 
levels. Press the [SELECT] button, then turn the Data Dial to select the velocity level (1-27). 

2.3 UT PAD IN 

Turn the Data Dial to select the drum pad number. 

Содержание AXE580DS

Страница 1: ...1 Instruction Manual Astro AXS580DS ...

Страница 2: ...uring electric storms Ɣ Avoid plugging the AC adaptor into the same AC outlet as an appliance with high power con sumption such as electric heaters or an oven Also avoid using multi plug adaptors since these can result in slower performance operation er rors and possibly damage Turn Power OFF When Mak ing Connections Ɣ To avoid damaging to the AXE800DM and other devices that may be connected to it...

Страница 3: ...3 Contents ...

Страница 4: ...ITS 8 PAD ASSIGN 9 DRUM OFF 10 TEMPO TAP 11 SRART STOP 12 MAIN VOLUME 13 AUX VOLUME 14 ACCOMP 15 PAGE 16 SAVE ENTER SELECT 17 CLICK 18 RECORD 19 DEMO 20 PHONES JACK 1 MIDI IN OUT JACK 2 TRIGGER INPUT 3 AUX IN JACK 4 AUX OUT JACK 5 MIDI IN OUT JACK 2 TRIGGER INPUT Controls ...

Страница 5: ...5 Setting Up ...

Страница 6: ...T jack on the external MIDI device Ɣ Connecting a CD Player etc AUX IN jack The audio output from a CD player connected to the Aux IN jack on the rear panel can be mixed with the audio output of the AXE800DM This function is convenient when you want to play along with a favorite song The volume of the exter nal signal is adjusted with the AUX VOLUME slider on the face of the AXE800DM Ɣ Connecting ...

Страница 7: ...connect the power adaptor to the DC IN jack on the rear panel Before switching the power ON x To Protec the speakers amplifier and the AXE800DM from damage slide the master volume slider to the minimum volume level before switching the power ON x Make sure the power is switched OFF on all external devices connected to the AXE800DM Adter the AXE800DM power is switched ON switch the other device s p...

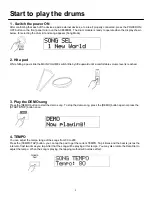
Страница 8: ...ttle by little upward until a comfortable volume level is reached 3 Play the DEMO song Press the DEMO button to start the demo song To stop the demo song press the DEMO button again or press the START STOP button once 4 TEMPO You can adjust the tempo range of the songs from 30 to 280 Press the TEMPO TAP button you can tap the pad to get the current TEMPO Tap 4 times and the beat is just as the int...

Страница 9: ...the display below will be shown with the kit Flashing Turn the Data Dial to select the Drum Kit Number 6 Click Press the CLICK button to start the metronome To turn off the metronome press the CLICK button again Please read the Utility section in this manual for instructions on how to adjust the parameters for the metronome ...

Страница 10: ... or ACCCOMP to display the current accompany volume level Using the same display press the ACCOMP or ACCCOMP button to adjust the accompany volume 4 Changing the Song s Tempo Press the TEMPO TAP button to display the tempo setting Turn the Data Dial to set the tempo 30 280 Press the SONG button to return the Song Mode display 5 Mute a Drum Voice Press the DRUM OFF button a sign will appear on the ...

Страница 11: ... press the CLICK Button again 7 Change the Drum Kit Press the KIT button to select a different drum kit with the selected song Then turn the Data Dial to select the drum kit number 1 30 When a song is started the kit number will shift to its default automatically If you want to use another kit you can only change it when the song is playing ...

Страница 12: ... 2 of the user song to track 1 2 1 In the Song Mode press the PAGE button to select the Merge Track Model setting display shown below 2 2 Press the SAVE ENTER button and the confirmation display shown below will appear 2 3 Press the SAVE ENTER button again to confirm Complete will appear then the display will return to Song mode Press the SONG button to cancel the merge track operation and return ...

Страница 13: ...the Song Mode press the PAGE button to select the quantize setting display shown below Turn the Data Dial to select the quantize value 1 4 quarter note 1 16 sixteenth note 1 8 eighth note 1 24 sixteenth note triplet 1 12 eighth note triplet 4 2 Press the SELECT button When the track indicator flashes on display turn the Data Dial to assigns the track 1 or 2 to be quantized 4 3 Press the SAVE ENTER...

Страница 14: ... is not available when a song is playing and the display will return to Song Mode display 6 Song Copy This function copies the preset song to the user song 6 1 In the song mode press the PAGE button to select the Song copy setting display shown below Turn the Data Dial to assign the preset song No 1 50 6 2 Press the SAVE ENTER button and the confirmation display shown below will appear 6 3 Press t...

Страница 15: ... below 7 2 Press the SAVE ENTER button and the confirmation display shown below will appear 7 3 Press the SAVE ENTER button again to confirm Complete will appear then the display will return to Song Mode Press the SONG button to cancel the Delete Song operation and return to the Song Mode The Delete Song operation is not available when a song is playing and the display will return to Song mode ...

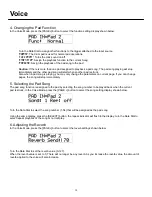
Страница 16: ... Voice Press the SELECT button the voice number indicator will flash on the display Turn Data Dial to select the drum voice category 1 3 Selecting a Drum for the Input Source Press the SELECT button the voice input source indicator will flash on the display Turn the Data Dial to select the input source that is connected to the trigger input jack selected The value V 1 indicates that the layer numb...

Страница 17: ...e Changing the volume of the drum voice when the pad is hit In the Voice Mode press the PAGE button to select the volume setting display shown display Turn the Data Dial to set the volume level 0 127 3 2 Changing the PAN Position The pan setting can move the position of the currently selected drum voice within the stereo filed Use the same display press the SELECT button the Pan indicator flashes ...

Страница 18: ... current page If you can change pages the song will stop immediately 5 Selecting the Pad Song The pad song function is assigned to the pad by selecting the song number to be played back when the current pad is struck In the Voice Mode press the PAGE button to select the song setting display shown below Turn the Data Dial to select the song number 1 54 that will be assigned as the pad song Using th...

Страница 19: ... display shown below Turn the Data Dial to set the destination pad Pad 1 7 Pedal Open Closed 7 1 When the destination pad is selected press the SAVE ENTER button and the confirmation display shown below will appear 7 2Press the SAVE ENTER button again to confirm Press the VOICE button to cancel the copy operation and return to the Voice Mode display ...

Страница 20: ...user songs no 51 54 can be used for recording User songs that have been previously recorded to may not be selected for recording TR The Tracks in the user song is empty TR 1 Track 1 already has recorded data TR 2 Track 2 already has recorded data TR 1 2 Both track 1 2 already have recorded data 2 Set the Track Press the PAGE button the display shown below Then turn the Data Dial to select a track ...

Страница 21: ... and the START STOP button is pressed the error message shown below will appear 5 Playback to the Song After you have recorded a performance you can press the START STOP button to playback the recorded performance Playback stops when the START STOP button is pressed again or the song will stop when it reaches the end ...

Страница 22: ...ress the SELECT button then turn the Data Dial to select the pad 0 9 1 3 UT PAD IN Turn the Data Dial to select the drum pad number 2 Gain Minimum Velocity This function sets the input sensitivity Gain and velocity range Minimum Velocity for each pad In the Utility Mode press the PAGE button to select the gain velocity setting display shown below 2 1 Gain Adjusts the input gain level for the pad a...

Страница 23: ...n that allows the currently selected drum kit number to be increased or decreased by hitting the specified pad In the Utility Mode press the PAGE button to select the assigned order setting display shown below 4 1 Assign Order Turn the Data Dial to assign increment Inc or Decrement Dec 4 2 UT PAD IN Turn the Data Dial to select the drum pad number 5 Equalizer In the Utility Mode press the PAGE but...

Страница 24: ...troller too connected to the drum brain You will not be able to produce voices or transmit MIDI data The sequencer and tone generator will function normally In the Utility Mode press the PAGE button to select the trigger bypass setting display shown below Turn the Data Dial to set the value On Bypasses the trigger does not receive Off The trigger input functions normally receives trigger 8 Factory...

Страница 25: ...elect the voice 10 Click Tune This function sets the pitch of the click voice In the Utility Mode press the PAGE button to select the click tune setting display shown below 10 1 Tune Coarse Tune C The Click Voice will be tuned in increments for a half step Turn the Data Dial to set the tune coarse value 24 to 0 to 24 10 2 Tune Fine Tune F The Click Voice will be tuned in increments of about 1 17 c...

Страница 26: ... s ability to transmit or receive system real time message start continue stop In the Utility Mode press the PAGE button to select the system real time setting display shown below Turn the Data Dial to set the value On Transmits and receives the system real time messages Off Does not transmit and receives system real time messages 14 Reverb Type Reverb Time This function sets the reverb effect on ...

Страница 27: ... the AXE800DM s tone generator This will cause no sound produced by the AXE800DM s tone generator The AXE800DM s will continue to send MIDI signals from the MIDI out only On Normal operation MIDI signals will be transmitted to the AXE800DM s tone generator as well as the MIDI OUT jacks 17 Program Change In the Utility Mode press the PAGE button to select the program change setting display shown be...

Страница 28: ...the Data Dial to select the voice number You can assign the voice by turning the Data Dial or by tapping the pad This means when you hit the pad the voice will change Continue to hit the pad until you reach the voice you desired 3 Save the user Drum Kit 3 1 Press the SAVE ENTER button and the LCD display shown below will appear 3 2 Turn the Data Dial to set the drum kit number 21 30 you will be sa...

Страница 29: ...29 Preset Drum Kit List ...

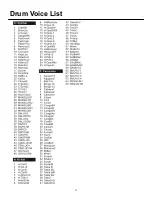
Страница 30: ...30 Drum Voice List ...

Страница 31: ...31 Drum Voice List ...

Страница 32: ...32 Song List ...

Страница 33: ...33 Specifications ...

Отзывы: