


31
Workflow When Using APCC & the AP V2 Driver with Third-Party Software
(examples:
Starry Night™
,
MaxIm DL™
,
Sequence Generator Pro™
, etc.)
(
TheSkyX
™
1.
Be sure that you first install the current ASCOM Platform and AP V2 ASCOM Driver. Having all software and drivers
current is important in order to avoid connectivity issues.
a)
ASCOM Platform 6.4SP1 or newer - install first
http://ascom-standards.org/index.htm
Click on the download button and install the full down-
load. Once the download is complete you are done.
There are no settings to make.
b) Astro-Physics V2 ASCOM Driver - install second
http://www.gralak.com/apdriver
Detailed information regarding setting up the AP V2 ASCOM Driver are found on page 24. Please check fre-
quently to ensure that you are using the current version of this driver. Important updates and bug-fixes are made
periodically to ensure that your mount functions safely.
c) Astro-Physics Command Center (APCC) - install third
APCC Installation and Getting Started Quick Guide
(PDF) located in the same section of our
website as the APCC downloads files. We suggest that you download this PDF and the full manual for future refer
-
ence.
Pro Tip:
Clicking on the “?” in the upper right corner of each window in all the screens found in both the AP V2
Driver and APCC will immediately jump you to that specific section of the Help Menu!
2. Open the AP V2 Driver's Setup Telescope and enter the required settings.
Important:
When using the AP V2 Driver with APCC, you will need to change some settings in the driver’s Setup
Telescope. The box APCC Virtual Port will need to be checked and a high number COM port (for example COM21)
will need to be chosen so that it does not conflict with real COM ports. This will be a Virtual COM port. You will need
to create a Virtual port in APCC that corresponds with the chosen number. Detailed information is found in the APCC
Help Menu.
3. Install your third-party software.
4. Locate the Telescope Chooser or Settings in the third-party control software - all ASCOM compliant software will have a
chooser or settings drop down menu.
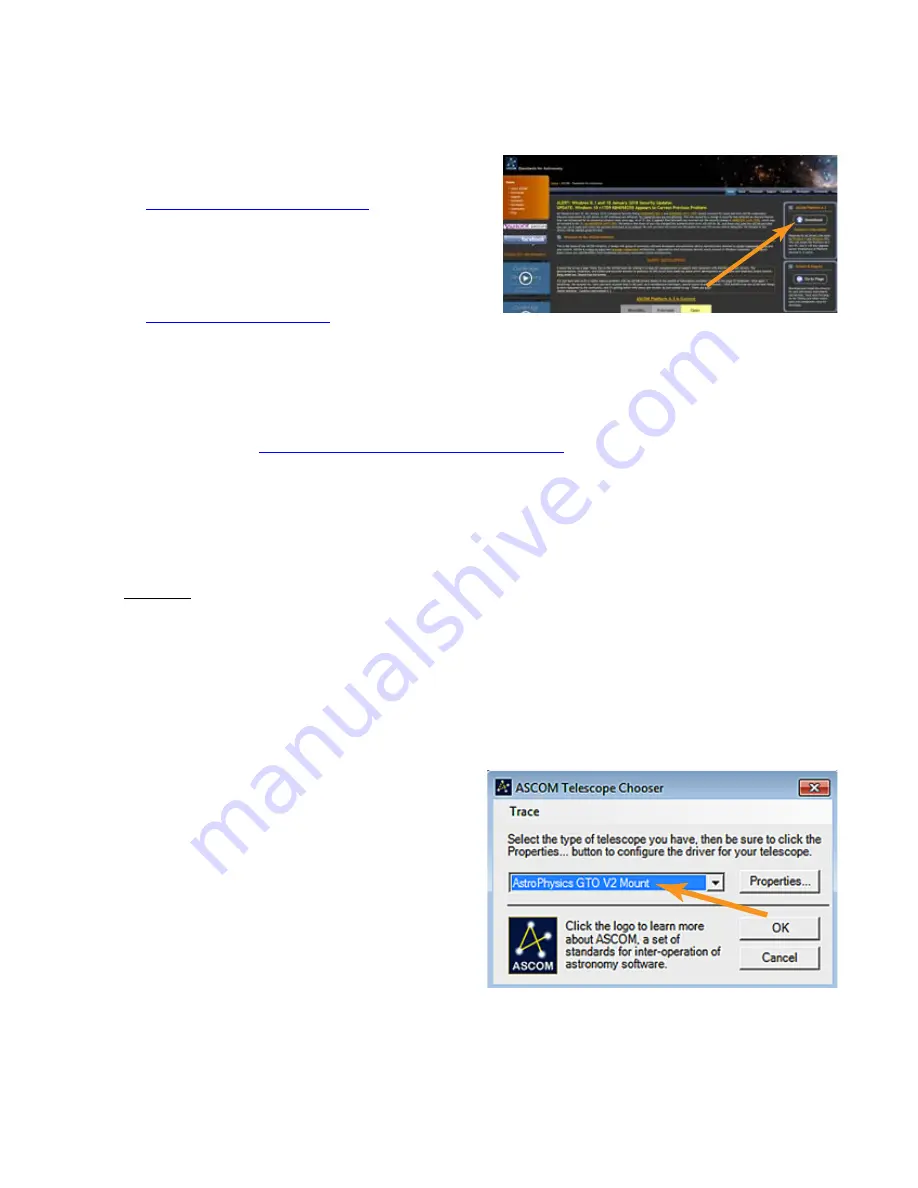
5. Select the AP V2 Driver. The driver will be called Astro-
Physics GTO V2 Mount.
See image at right.
Once you select it, you may be asked to click Properties...
If you click Properties... you will be shown the AP V2
Driver’s Setup Telescope window that you filled out earlier.
You can review it if you wish. Then click OK once or twice
and you are done.
The Astro-Physics V2 ASCOM Driver is a hub through
which all third-party ASCOM compliant software can be
connected. Planetarium, camera control and focusing
software, etc. can be connected to it and, operated simul-
taneously.
6. Polar align and power up the mount.
7. Start APCC and have it connect to the mount. APCC will be the software that initializes the mount with the settings that
you have set in APCC. It will also start the AP V2 Driver if you have it set to auto-connect.
8. Start your third-party software and connect it to the mount. You are ready to enjoy the evening.
9.
After finishing your night’s observing (or day’s solar observing) park the mount to your chosen park position.


