50
Premmia GX Series
Installing a 5.25” Drive
1. Follow the instructions on page 38 to remove the system cover.
2. Remove the drive from its protective wrapper and place it on an anti-static surface.
3. Set any drive jumpers or switches according to the manufacturer’s instructions.
4. If you are installing a 3.5” drive, mount it in a 5.25” drive carrier.
5. Install a slide rail on the right side of the device (or drive carrier, if the device is
mounted in a drive carrier). If you are replacing a drive, use the slide rail from the
drive you removed. If you are installing a drive in a bay that was empty, use one of
the slide rails included with your computer
6. If you are installing the drive into a bay that was empty, you may need to remove
the EMI filler on the front panel of the cabinet and the plastic bezel insert on the
front bezel.
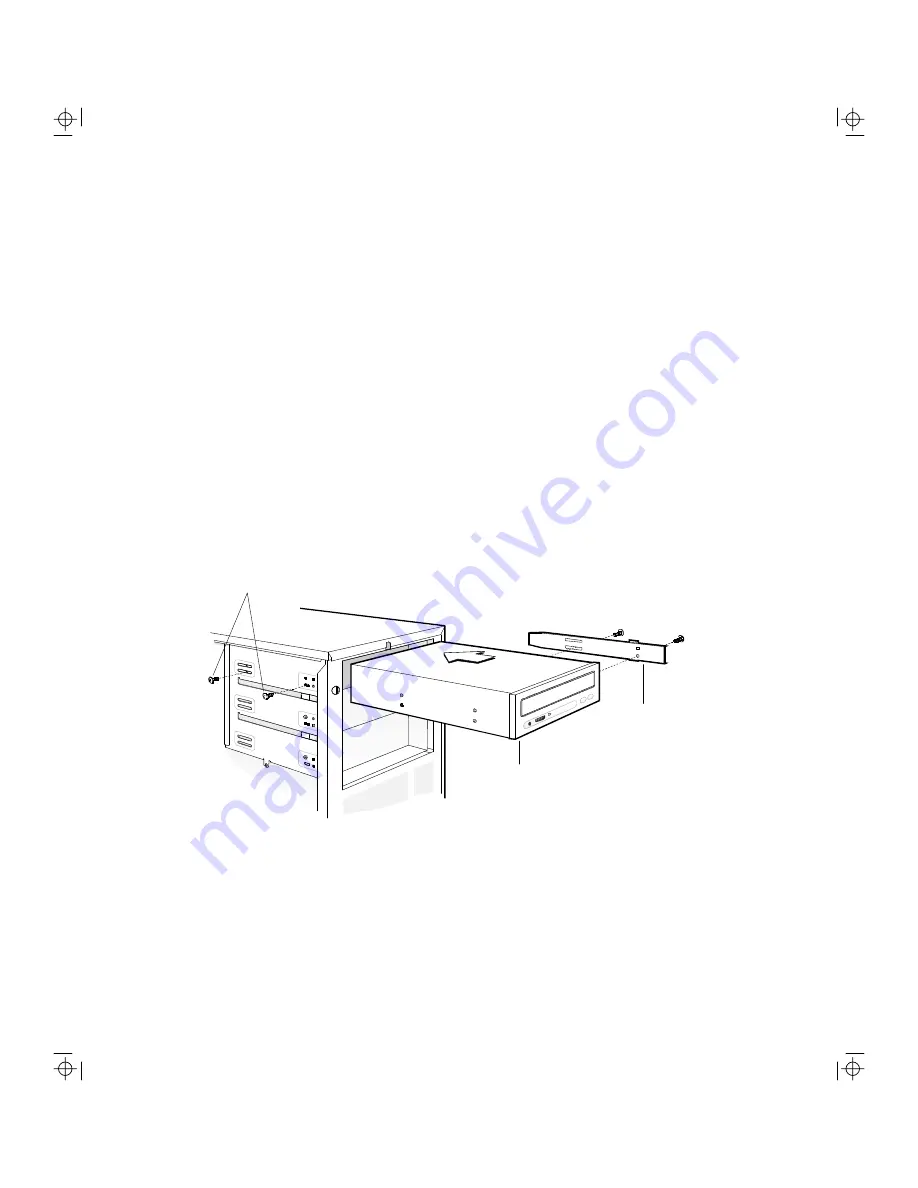
7. Align the slide rail with the slots in the side of the bay, then slide the drive into
place. The holes on the left side of the drive should line up with the screw holes on
the mounting bracket.
Mounting bracket screws
CD-ROM drive
Slide rail
8. Insert and tighten two screws on the left side of the mounting bracket to secure the
drive.
9. Attach the cables to the drives in the carrier.
10. Follow the instructions on page 38 to replace the system cover.
Содержание Premmia GX Series
Страница 1: ...User Guide Premmia GX Series ...
Страница 8: ...8 Premmia GX Series ...
Страница 11: ...Premmia GX Series 11 A B C D G F E ...
Страница 40: ...40 Premmia GX Series jumper ...
Страница 44: ...44 Premmia GX Series C D E B A ...
Страница 87: ...Premmia GX Series 87 ...
Страница 88: ...88 Premmia GX Series ...


