background image

P/N

-

-

Rev D

YRL SLKFTSINSTL FUL

1

®

FAILURE TO FOLLOW THESE INSTRUCTIONS COULD RESULT IN DAMAGE TO

THE PRODUCT AND VOID THE FACTORY WARRANTY

Yale Assure Lock

®

®

SL

Key Free Touchscreen Deadbolt

Installation and Programming Instructions

(

256/

456)

YRD

YRD

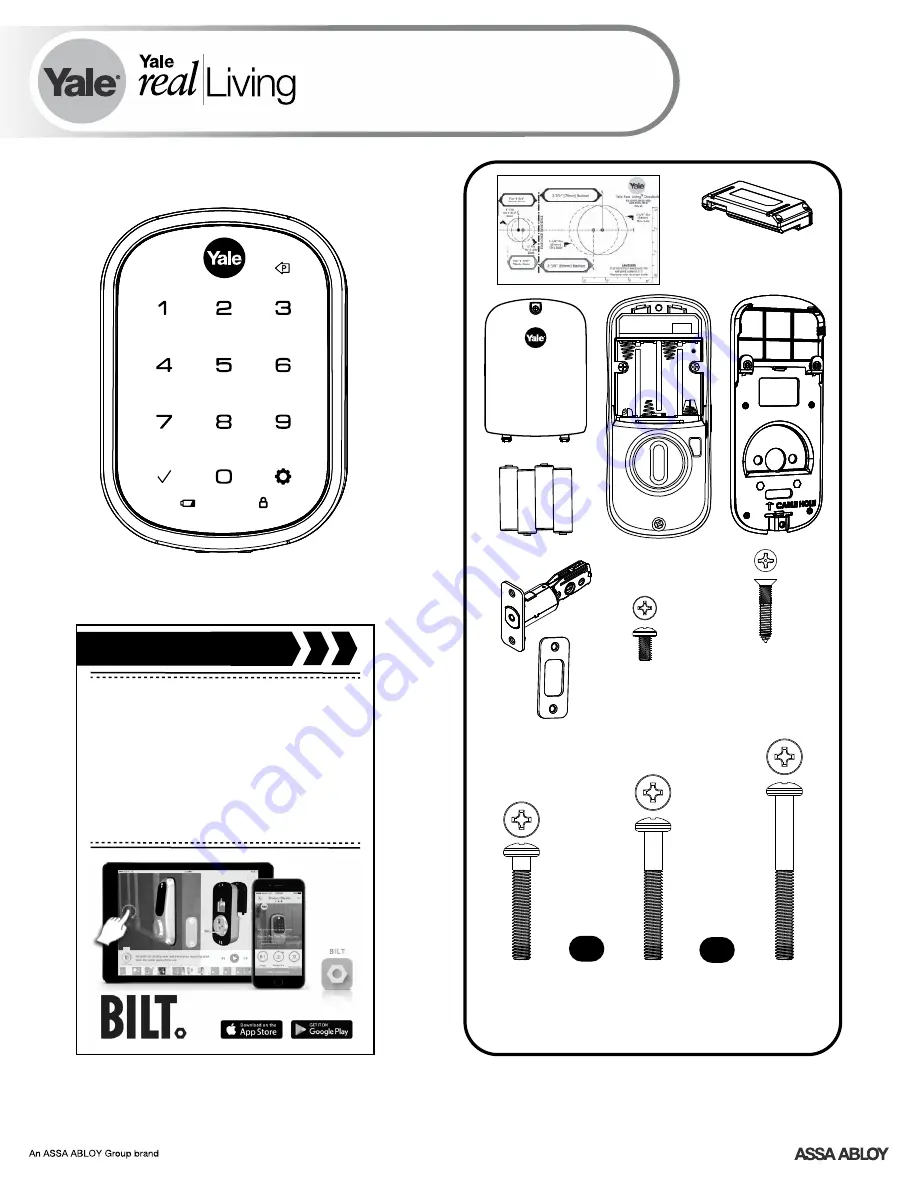
x4

x2 Silver

x3

#8-32 x 5/16"

Machine screws

#7 wood & #8-32

machine x 20mm

Combination screws

M6x55mm

PPHMS
(2-1/4" )

Optional

Network Module

OR

x2 Black

M6x44mm

PPHMS

(Standard 1-3/4"  - 2" )

OR

x2 Gold

M6x36mm

PPHMS
(1-3/8" )

Before you begin

for step-by-step installation

instructions & to register

your product

DOWNLOAD

THE BILT APP

Содержание YRD256

Страница 1: ...Deadbolt Installation and Programming Instructions 256 456 YRD YRD x4 x2 Silver x3 8 32 x 5 16 Machine screws 7 wood 8 32 machine x 20mm Combination screws M6x55mm PPHMS 2 1 4 Optional Network Module OR x2 Black M6x44mm PPHMS Standard 1 3 4 2 OR x2 Gold M6x36mm PPHMS 1 3 8 Before you begin for step by step installation instructions to register your product DOWNLOAD THE BILT APP ...

Страница 2: ...P N Rev D YRL SLKFTSINSTL FUL 2 Preparing Door Refer to template for correct door prep ...

Страница 3: ...ev D YRL SLKFTSINSTL FUL 3 O x4 1 d faut e 2 3 8 position 2 3 4 position Installing Latch Strike Plate Press Pull optional Bolt must be in retracted unlocked position Note horizontal orientation of mechanism ...

Страница 4: ...P N Rev D YRL SLKFTSINSTL FUL 4 2 Installing Touchscreen Escutcheon Outside of Door Inside of Door Bolt must be in retracted unlocked position Note horizontal orientation of mechanism ...

Страница 5: ...P N Rev D YRL SLKFTSINSTL FUL 5 x2 3 Installing Interior Mounting Plate Loosen screw to remove cover Choose through bolt appropriate for your door thickness ...

Страница 6: ...4 Attaching the Cable Assembly P N Rev D YRL SLKFTSINSTL FUL 6 ...

Страница 7: ...P N Rev D YRL SLKFTSINSTL FUL 7 x3 5 Installing Interior Escutcheon ...

Страница 8: ...P N Rev D YRL SLKFTSINSTL FUL 8 Testing Operation Bolt must be in retracted unlocked position before installing batteries 3 ...

Страница 9: ...L 9 6 Installing Batteries Handing the Lock Welcome to Yale Real Living Lock automatically adjusts for proper handing 7 Batteries must be removed prior to removing and or inserting network module Installing Optional Network Module ...

Страница 10: ...TL FUL 10 8 Installing Cover Tighten screw to replace cover Congratulations you ve installed the Yale Assure Lock SL Key Free Touchscreen Deadbolt YRD YRD 256 456 Continue to Programming Instructions to customize your product ...

Страница 11: ... Codes 250 with Z Wave Plus or ZigBee network module Max User Codes 25 without network module or with iM1 network module Max User Codes 12 with Bluetooth Lock Activation Speaker P Key Return to Previous Low Battery Indicator Lockout Mode Failsafe 9 volt Battery Connection Use Alkaline battery Exterior Escutcheon P N Rev D YRL SLKFTSINSTL FUL ...

Страница 12: ...tallation or after PIN resetting the lock to factory default Programming and use of lock is not possible until this step has been successfully completed Press Press Register Master Code Press the gear key to continue Enter a 4 to 8 digit code followed by PIN the gear key Registered P N Rev D YRL SLKFTSINSTL FUL ...

Страница 13: ...ave Plus or ZigBee network module Max user codes 25 without network module or with iM1 network module Max user codes 12 with Bluetooth Press Adding more User Codes Enter 4 8 digit code PIN Press To end programming Enter 4 8 digit code PIN Press code flashes Press Menu Mode enter number press the gear key to continue P N Rev D YRL SLKFTSINSTL FUL ...

Страница 14: ...P N Rev D YRL SLKFTSINSTL FUL 14 3 Unlocking Door with Code PIN PIN Code Management With Network Module Up to 250 Users Duplicate if necessary User Name PIN Code Code Chart Enter Code PIN Press ...

Страница 15: ... The reset button see image at right is located beside the cable connector PCB 4 While pressing the reset button minimum of 3 seconds reinstall batteries Release reset button 5 Replace battery cover Upon reset Master Code creation is the only option PIN available and must be performed prior to any other programming of the lock Registration required Wrong Code Entry Limit 5 Times One Touch Locking ...

Страница 16: ...lock the lock Network Module Setting With the optional Network Module installed this setting becomes available thru the Main Menu 7 and allows the lock to connect with a network controller One Touch Locking When the latch is retracted activating the keypad will extend the latch during Automatic Re lock duration or when Automatic Re lock is disabled When One Touch Re lock is in use any valid code w...

Страница 17: ...s function appears only with Bluetooth version installed Complete Privacy Button Setting Enable Disable Handing the Lock Preforms automatic handing of the lock Advanced Lock Settings Automatic Re lock Disable 30 sec Inside Indicator Light One Touch Locking Enable Disable Enable Continue 60 sec 3 min 2 min Disable U Continue Complete Continue Complete 1 Touch screen with back of hand or palm to act...

Страница 18: ...d when pressed Check batteries are installed and oriented correctly polarity in the battery case Check batteries are in good condition replace batteries if discharged Check to see if touchscreen harness is fully connected and not pinched Batteries may be completely discharged Batteries do not have enough power Replace batteries Check the door gaps for any foreign objects between door and frame Che...

Страница 19: ...o small or misaligned d Verify keypad wire harness is routed under the bolt see Fig A e Verify bolt is installed with correct side up Fig A Keypad numerics are scrolling Remove interior escutcheon and check to ensure that the wire harness lies flat against the back recessed area and is properly routed along the side of the escutcheon and tucked under the plastic cable guide Figure A Door is bindin...

Страница 20: ...rient or relocate the receiving antenna Increase the separation between the equipment and receiver Connect the equipment into an outlet on a circuit different from that to which the receiver is connected Consult the dealer or an experienced radio technician for help TV Industry Canada This Class A digital apparatus meets all requirements of the Canadian Interference Causing Equipment Regulations C...

Страница 21: ...ion Mode Enter the 4 8 digit Master code followed by the key PIN Press the key followed by the key Press the key followed by the key To Unenroll Remove the Module Exclusion Mode Enter the 4 8 digit Master code followed by the key PIN Press the key followed by the key Press the key followed by the key Factory Reset If No Controller See the Lock Installation Manual Please use this procedure only whe...

Страница 22: ...que d interférence aux autres utilisateurs le type d antenne et son gain doivent être choisies de façon que la puissance isotrope rayonnée équivalente ne dépasse pas ce qui est PIRE nécessaire pour une communication réussie Section 7 1 3 of RSS GEN This Device complies with Industry Canada License exempt standard s RSS Operation is subject to the following two conditions 1 this device may not caus...

Страница 23: ...rated nodes within the network will act as repeaters regardless of vendor to increase reliability of the network To Enroll the Module Inclusion Mode Enter the 4 8 digit Master code followed by the key PIN Press the key followed by the key Press the key followed by the key To Unenroll the Module Exclusion Mode Enter the 4 8 digit Master code followed by the key PIN Press the key followed by the key...

Страница 24: ...ice may not cause interference and 2 this device must accept any interference including interference that may cause undesired operation of the device Le présent appareil est conforme aux d Industrie CNR Canada applicables aux appareils radio exempts de licence L exploitation est autorisée aux deux conditions suivantes 1 l appareil ne doit pas produire de brouillage et 2 l utilisateur de l appareil...

Страница 25: ...move and or insert Network Module Reinstall batteries and battery cover Enrolling the iM1 Network Module The Yale iM1 Network Module must be used with a Yale Assure Lock or Yale nexTouch Lock and cannot be used in conjunction with any other Yale Network Module To Enroll the Module Enter the 4 8 digit Master code followed by the key PIN Press the key followed by the key Press the key followed by th...

Страница 26: ...compliance with safety and regulatory standards Please note that the use of this accessory with iPod iPhone or iPad may affect wireless performance 1 After following the steps listed on other side of page for enrolling the module download the Yale Secure app from the App Store 2 Ensure Bluetooth is enabled on your iPhone iPad or iPod touch and that you re within a foot of your Yale lock 3 Open the...

Отзывы: