IN4-MORTISEINSTF20_TRI REV 18A 2/22/18
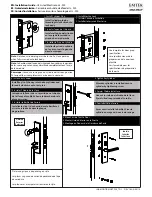
7. Tighten Inside Lever or Knob
7. Apretar Manija/Pomo Interior
7. Serrer la Béquille ou Bouton interne
6. Install Trim Plate
6. Instalar Placa Decorativa
6. Installer la Plaque de Garniture
Tighten Lever with 3/32 Hex
wrench (provided).
Apretar la manija con una llave
hexagonal de 3/32 (incluida).
Fixer la béquille avec une clé
hexagonale 3/32 (fournie).
See template for
door jamb prep
specifications
Ver especificaciones
de la preparación de
la jamba de la puerta
en plantilla
Voir le modèle pour
les spécifications
de préparation du
montant de porte
Locked
Bloqueado
Verrouillé
Unlocked
Desbloqueado
Déverrouillé
9. Passage/Privacy Lock
9. Bloqueo de Pestillo
9. Clé Autorisée/de Passage
Instructions to reverse swing •
Instrucciones para Invertir el Sentido de Apertura • Instructions Pour Inverser le sens d’ouverture
8. Install Door Jamb
8. Instalar la Jamba de la Puerta
8. Installer le Montant de Porte
1. Remove dowel screw. (Replace after reversing swing)
1. Retirar el tornillo de pasador. (Sustituir tras invertir el sentido)
1. Retirer la vis de cheville. (Remplacer après avoir inversé le sens d’ouverture)
2. Pull out and rotate Latch bolt to reverse its direction.
2. Extraer y girar el cerrojo para invertir el sentido de apertura.
2. Sortir et tourner le pêne pour inverser son sens d’ouverture.
EN: Installation Guide - UL Listed Mortise Lock - F20
ES: Guía de instalación - Cerradura embutida, clasificada UL - F20
FR: Guide d’installation - Serrure à mortaise homologuée UL - F20
In
Dentro
Po
In
Dentro
Po


