47
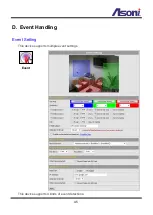
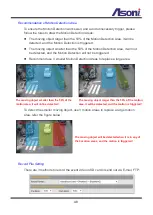
“Set Area” row, and then use mouse to drag the area on the video.
Adjust the Sensitivity:
To adjust the sensitivity of detection, select the level from the
pull-down list.
Activate Motion Detection:
To activate the motion detection, enable the
[Detect
Area]
check box
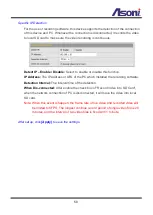
Actions when Motion Detection is Trigger:
Select what actions will be taken once
the motion detection is triggered in each area.
E-mail: When the motion detection is triggered in this area, send the recorded
video or snapshot to the specific mail address.
FTP: When the motion detection is triggered in this area, send the recorded
video or snapshot to the specific FTP site.
Save to Samba: When the motion detection is triggered in this area, send the
recorded video or snapshot to the Samba network storage.
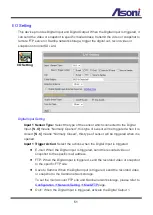
To set the mail account FTP site and Samba network storage, please refer to
Out1: When the motion detection is triggered in this area, turn on the Digital
Output 1.
Save to SD Card: When the motion detection is triggered in this area, record
the video or snapshot into the local SD card.
Log:
If “Save to SD Card” option has been selected for action, you can determine
whether send a message to the specific mail address FTP site or Samba network
storage.
E-Mail Subject:
The subject of the E-mail will be sent.
Detection Interval:
This option provides two functions:
The interval time between multiple detections. For example, if the time set to
10 seconds, when the motion detection is triggered at time 10H:05M:10S, the
next detection will be accepted after 10H:05M:20S. The detections between
10H:05M:10S to 10H:05M:19S will not be accepted.
If the “Out” is selected for the action, the Interval means “Digital Output On”
period. For example, if Interval set to 20 seconds, when the motion detection
is triggered, the Digital Output will be “On” and lasting for 20 seconds, and
then “Off” automatically.
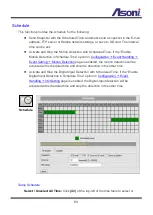
Enable Motion Detection in Schedule Time:
Enable this option will automatic
activate the motion detection with scheduled time and stop the detection in the other
time. Please refer to
Содержание CAM649MA
Страница 12: ...11 B Monitor Setting 1 Right Click on the desktop Select Properties 2 Change color quality to Highest 32bit ...
Страница 16: ...15 1 2 3 4 5 When popup the following dialogue box click Yes ...
Страница 32: ...31 After set up click Apply to save the settings ...
Страница 36: ...35 C Network Setting Network Setting Network Setting ...


