


Operating Manual - digiMIX18 Digital Mixer
24
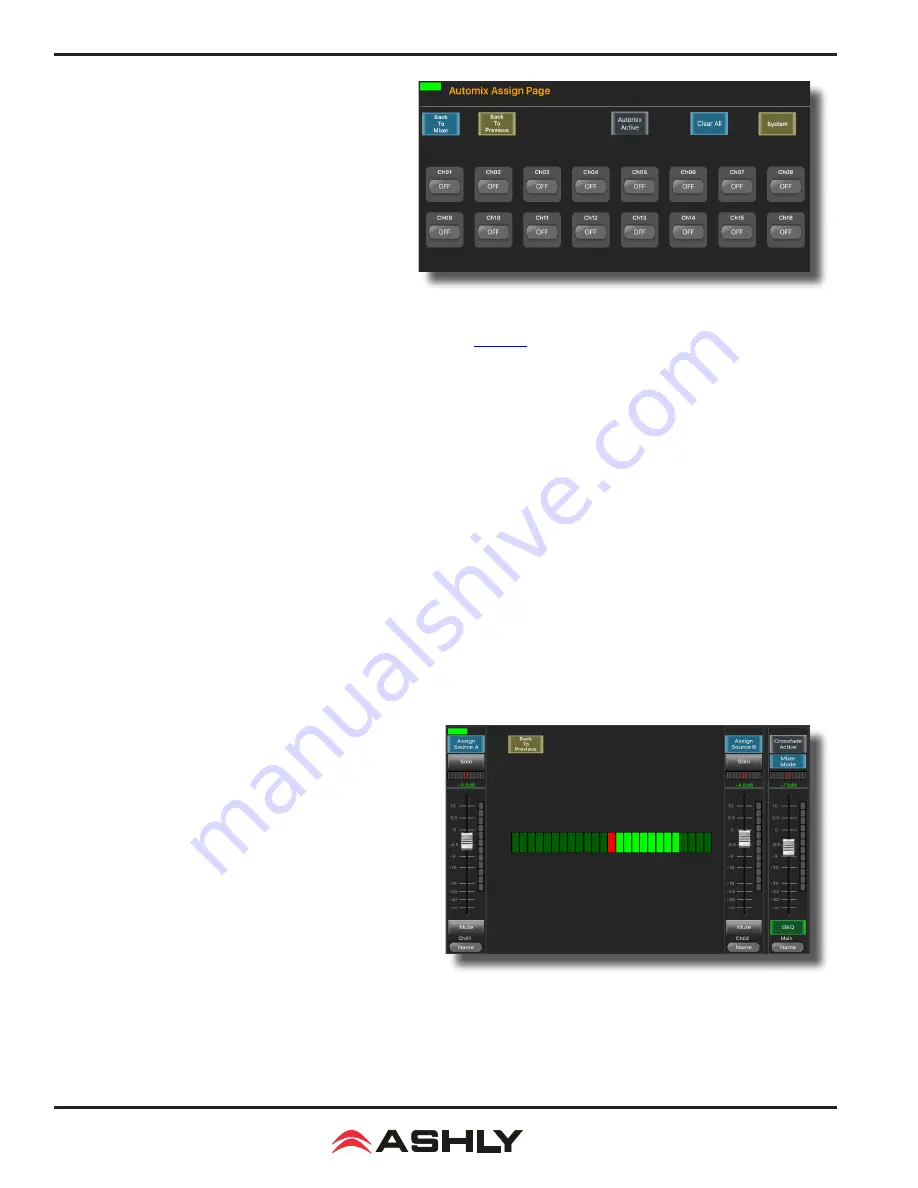
6.5 Automix Assign
The automixer is used to automate the mixing of multiple speech
(not music) microphones to follow the dynamic nature of speech
dialog and attenuate idle microphones. Press the Automix button
below the touchscreen to assign inputs and activate the automixer.
Ashly Auto Mixer Technology
The automixer function is a "gain-sharing" type which
automatically makes smooth gain transitions on all assigned
automixer input channels to achieve a constant total system
gain. This gain-sharing method of automixing has been found
to be superior to gating automixers.
Input channels 1-16 can be individually enabled for the
automix. Enabled inputs must all be assigned to the main L/R output (
sec. 2.39
). Channels which are enabled for automix will
contribute to the automatic adjustment of other automix channel gains. Likewise, their channel level will be dynamically affected
by the signal level present on other automix channels. Manual mixer channels (those not enabled for automix) can still be mixed
in with automix channels, controlled by their fader setting. The fader on automix channels still controls the input level before
automatic mixing takes place so that more of the system gain can be applied to one channel versus another.
Automixer Setup
The following procedure is recommended for setting up most multi-microphone speech applications. The live mixing environment must
already be set up, with all mics wired to the mixer, assigned in the digiMIX18 to the main L/R outputs, placed where they will be used, mic
input gain controls set properly, and amplifiers/speakers all set up.
1) Start with all mixer faders off. From the System menu, press the shortcut button for <Automix Assign>.
2) Assign the desired input channels to the automixer. Make sure the <Automix Active> button is pressed.
3) Select one of the assigned primary speech channels, or one which is centrally located. Slowly increase the fader for this one
channel just until feedback starts, then lower the fader 3 dB to stay comfortably below feedback. This sets the total automixer
system gain.
4) Now select and increase the other assigned input channel faders to the same position as the first channel used in step 3. The
system will not feedback because the automixer will slowly attenuate the active channels as more channels are turned-on to
maintain a constant total system gain as set in step 3.
5) During the speech event, individual channel faders can still be raised or lowered to adjust for the weakness or strength of the
respective talkers even while the automixer is active.
6.6 Crossfade Mode
Crossfade Mode allows the operator to easily fade back and forth
between two assigned channels (or two stereo linked channel pairs)
using either the Pan control or touchscreen crossfader control.
Crossfade Mode setup:
1) From the system menu, press the shortcut button for Crossfade
Mode.
2) Assign <Source A> and <Source B> channels.
3) Press the <Crossfade Active> button.
4) Crossfade Mode is now operating. The pan/touchscreen
control will fade between the two assigned channels.
5) To return to mixer mode, press the touchscreen <Mixer Mode> button, or toggle through mixer and crossfade modes using
the Mixer/Long Faders button next to the pan control.
When operating in normal mixer mode, the pan or touchscreen crossfade control always fades the selected channel right or left
as expected. When in crossfade mode with crossfade active, the control only fades between the two assigned source signals.
6.5: Automix Assign
6.6: Crossfade Mode


