background image

ISTRUZIONI DI MONTAGGIO 

ASSEMBLY INSTRUCTIONS                                           

VASCA 

/BATHTUB

HERMITAGE


Fig. 12

A

Fig. 13

GRANDE

PICCOLA

Fig. 14

Fig. 15

Serrare il dado E  di collegamento fra la parte E e il


tubo D.
Serrare  definitivamente  anche il dado D1

Screw the nut (E) joining the element (E) and the
pipe (D) . Lastly , screw the nut (D1)


Posizionare  la  vasca  dove andra installata 
Segnare con una matita i fori a terra per i fissaggi
Effettuare i fori per i tasselli  scelti (non in dotazione)
Infilare i tasselli in sede ,cablare il sifone della vasca
allo scaricoa terra e fissare la vasca insereo le viti nei 
tasselli precedentemente instalati.

Position the bathtub in the right place. Use a pencil to
mark the fixing points on the floor then make the holes
for the plugs (not included). Insert the plugs in their 
slots, connect the bathtub siphon to the floor drain and
finally fix the bathtub by screwing the screws into the 
plugs previously inserted.

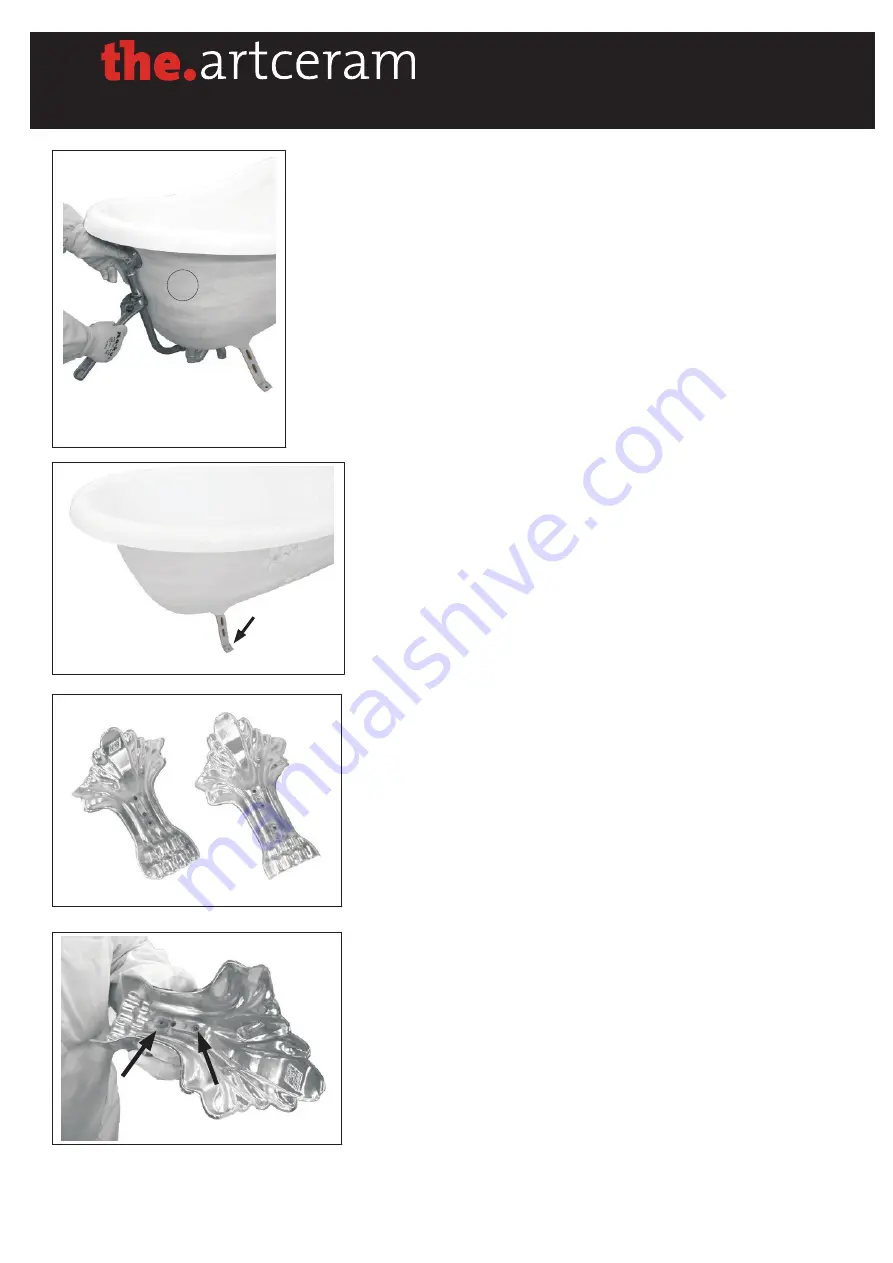
Prendere le quattro zampe di finitura . 
Notare che la coppia più piccola andrà messa 
sulla staffa vicino alla scorico .

Take the four accessory feet and make sure to position 
the two smaller ones near the bracket placed by the
drain.


Per il montaggio delle zampe considerare i fori più 
distanti , come segnato in foto 15

When fixing the feet , make sure to take into 
consideration the farthest holes (see illustrtion n 15)


Содержание HERMITAGE

Страница 1: ...STRUZIONI DI MONTAGGIO ASSEMBLY INSTRUCTIONS UVASCA BATHTUB HERMITAGE Via Monsignor Tenderini snc 01033 Civita Castellana Vt Italy t 39 0761 599499 f 39 0761 514232 e INFO ARTCERAM IT w WWW ARTCERAM I...

Страница 2: ...A A1 B D D1 E E1 G D1 ISTRUZIONI DI MONTAGGIO ASSEMBLY INSTRUCTIONS VASCA BATHTUB HERMITAGE...

Страница 3: ...he bracket has to be properly adjusted to fit the marks on the bathtub La staffa A pi piccola di quella B va montata sul lato dello scarico ATTENZIONE la parte piana della staffa leggermente curvata a...

Страница 4: ...uter part of the bathtub drain hole and then screw on the element B from the inside Avvitare il sifone alla parte A dello scarico e serrare il dado Screw the siphon to the element of the drain A and t...

Страница 5: ...e on the washer slot E1 Posizionare la guarnizione Position the washer E1 and then apply some silicone E1 e siliconare Infilare la parte E dello scarico sul tubo D e accostarla alla vasca in corrispon...

Страница 6: ...viti nei tasselli precedentemente instalati Position the bathtub in the right place Use a pencil to mark the fixing points on the floor then make the holes for the plugs not included Insert the plugs...

Страница 7: ...nuts up to the centre of the bolts and then place the flat washers Infilare la zampa sulla staffa e verificare la corretta posizione sulla vasca e sul pavimento Eventualmente sfilare la zampa e regola...

Отзывы: