


PiCUS TreeQinetic Manual
27
5.4.2 Page
– Info
This page contains information about this app and a link to the website of argus electronic
gmbh.
5.5 Tab
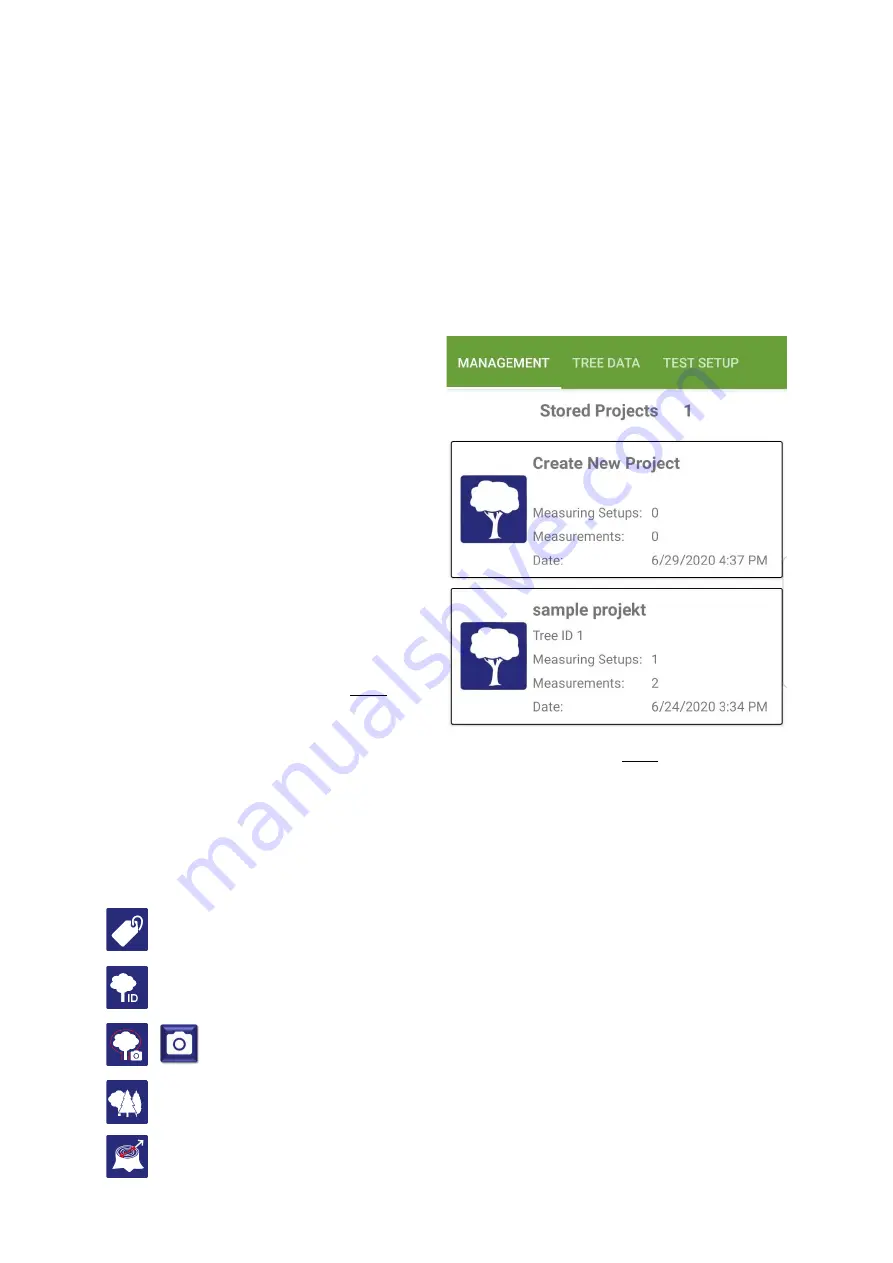
– Project
5.5.1 Page
– Management
This page manages all projects saved in this mobile device.
1. Number of saved projects
2. List of saved projects
For each saved project a group of
detail information is displayed:
a. Project name
b. Tree number
c. Number of setups within the
project
d. Number of measurements
conducted within the project
e. Date and time of the creation
of the project
•
Create a new project by tapping on
the first list entry
Create New Project
→
the view automatically switches to
the next page
Tree Data
•
Open a saved project by tapping on
one of the other list entries
→
the view automatically switches to the next page
Tree data
•
Delete a saved project via the context menu of the respective list entry
5.5.2 Page
– Tree Data
On this page all relevant data about the project and the tree to be examined are entered or
displayed after loading a project.
Give your project a name by which you can identify it again later.
Enter the identification number of the tree to be examined, e.g. the cadastral ID, tree
number or arbotag.
Use this button to take crown projection photos of the tree, which are
automatically saved in the project.
In the upper line, select the genus of the tree to be examined from the list. In the
bottom line, you then add the tree species.
Enter the diameter of the tree in the pulling direction, at 1 m height, in [cm].
1.
2.
a.
b.
c.
d.
e.


