Argus DC-5150 Скачать руководство пользователя страница 15

A

djusting the c

a

mer

a

 setting

s using the c

a

mer

a

 buttons

User Manual

12

Adjusting the camera settings using the camera buttons

You can use adjust the camera settings to take better pictures.

Using the digital zoom

The camera has an 8× digital zoom, allowing you to take enlarge 
the subject without moving closer.

1. Turn the camera on. Make sure the camera is in Picture or 

Video mode.

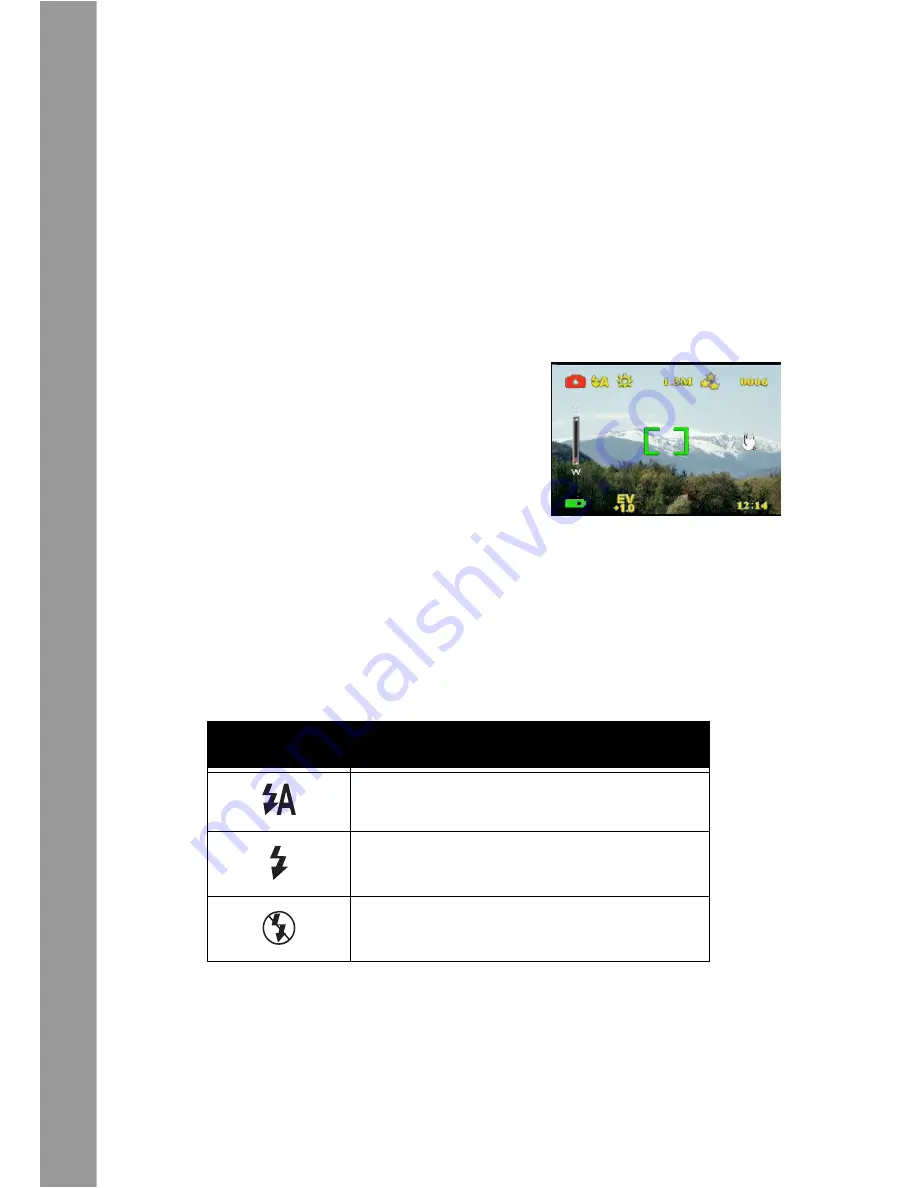
2. Frame the picture using the LCD.
3. Press the 

Zoom in

 button to 

increase the zoom and take a 
close up picture of the subject 
with more detail. Press the 

Zoom out 

button to decrease 

the zoom and take a wider pic-
ture with less detail.

4. Press the 

Shutter

 button to 

take the picture.

Using the flash

The flash has three settings for different lighting conditions. Move 
the 5-way button left repeatedly to cycle through the different flash 
settings.

Icon

Description

Flash is fired automatically if required.

Flash is enabled.

Flash is disabled.

Содержание DC-5150

Страница 1: ...User Manual ...

Страница 2: ...ges or videos Selecting the camera mode 11 Taking pictures 11 Adjusting the camera settings using the camera buttons 12 Using the digital zoom 12 Using the flash 12 Using the self timer 13 Taking sequences 13 Changing the focus setting 14 Recording videos 14 Adjusting the camera settings using the menus 15 Using the scene settings 15 Setting the resolution 16 Setting the date stamp 16 Setting the ...

Страница 3: ... Formatting the memory 26 Playing games on the camera screen 27 Reviewing photos or movie clips Zooming in 30 Deleting files 31 Protecting files 31 Editing images 32 Resizing images 32 Rotating images 32 Cropping files 33 Deleting a voice memo 34 Using the slideshow function 35 Setting the starting point 35 Setting the slideshow interval 36 Setting the direction 36 Repeating the slideshow 37 Start...

Страница 4: ... or TV Connecting to a PC 41 Installing the software 41 Changing the USB setting 42 Connecting the USB cable 42 Connecting to a TV 43 Setting the output mode 43 Viewing images on the TV 44 Appendix Specifications 45 Error Messages 46 ...

Страница 5: ...o record movies and has an 8 digital zoom Features Compact stylish design Digital zoom 8 5 0 megapixel high resolution CMOS 2592 1944 pixels Maximum resolution 12 megapixels 4032 x 3024 pixels extrapolated resolution Video capture resolution of 320 240 30 fps 640x480 24fps Convenient 1 5 inch LCD Voice memo Supports SD card media Built in 32 MB memory Self timer mode Continuous shooting mode USB 2...

Страница 6: ...iately Retain the packaging in case you need to ship the digital camera in the future Digital camera Hand strap Quick start guide User manual on CD AA batteries 2 USB cable CD ROM including drivers and software Audio Video cable Camera overview Familiarize yourself with the controls of the digital camera with the illustrations below Front view Lens Flash LED MIcrophone ...

Страница 7: ...duction 3 Camera overview Rear View Side Views Zoom buttons Voice button LCD Menu button Zoom buttons Zoom buttons 5 way button LCD button Mode button Focus button Right Left TV output jack USB port Hand strap eyelet ...

Страница 8: ...Camera overview User Manual 4 Top View Bottom View Shutter button Power button Speaker Battery SD card compartment Tripod mount ...

Страница 9: ...of the hand strap through the short loop 3 Pull the long loop tight Inserting the batteries 1 Slide the battery memory card cover on the underside of the camera in the direction of the arrow 2 Open the cover 3 Insert the batteries into the compartment observing correct polarity 4 Close the cover and snap it into place in the direction of the arrow OPE N OPE N ...

Страница 10: ...side of the camera in the direction of the arrow 2 Open the cover 3 Insert the SD card into the slot with the label facing the same direction as the front of the camera until it clicks into place Note SD cards can only be inserted facing one direction If the card does not enter the slot easily do not force it Make sure the card is facing the correction direction 4 Close the cover then snap it into...

Страница 11: ...ndicate camera settings Changing LCD settings The LCD starts in normal setting In Picture or Video mode Press the LCD button once to turn on the red fram ing grid Press the LCD button again to turn off the framing grid and icons Press the LCD button again to turn off the LCD Press the LCD button again turn the LCD on and display the icons In Playback mode Press the LCD button to turn off the icons...

Страница 12: ...ber of pictures you can take on the current memory Indicates that there is insufficient light to prevent blurring Current time Image quality Resolution Flash icon Picture mode icon Scene setting icon Zoom Battery status icon EV adjust setting Focus bracket Current file number total files Resolution Battery status icon File type Protection icon DPOF icon ...

Страница 13: ...Chapter 2 Getting Started 9 Using the LCD display Video mode Video mode icon Zoom Battery status icon Video resolution Video length Recording icon Current time Focus bracket ...

Страница 14: ...se the third mode Playback mode to view pictures and videos and listen to audio Use the Mode switch to change modes Move the switch to the left to select Video mode Move the switch to the center to select Playback mode Move the switch to the right to select Picture mode Taking pictures 1 Turn the camera on Make sure the camera is in Picture mode 2 Frame the picture using the LCD 3 Press the Shutte...

Страница 15: ...Picture or Video mode 2 Frame the picture using the LCD 3 Press the Zoom in button to increase the zoom and take a close up picture of the subject with more detail Press the Zoom out button to decrease the zoom and take a wider pic ture with less detail 4 Press the Shutter button to take the picture Using the flash The flash has three settings for different lighting conditions Move the 5 way butto...

Страница 16: ...e self timer with a two sec ond delay The icon appears Press the Right arrow again to set the delay to 10 seconds The icon appears 5 Press the Shutter button The counter begins counting down on the LCD The LED on the front of the camera flashes once a second to count down Note To cancel the self timer press the Right button until no icon is displayed Taking sequences You can take sequences of pict...

Страница 17: ... switch Recording videos 1 Turn the camera on Make sure the camera is in Video mode 2 Frame the picture using the LCD 3 Press the Shutter button The video begins to record 4 Press the Shutter button when you have finished to stop recording Icon Description Adjusts the focus setting for subjects close to the lens Adjusts the focus setting for subjects distant from the lens ...

Страница 18: ...ng to the light environment in which you are taking pictures To set the scene do the following 1 Turn on the camera and switch to picture mode 2 Press Menu 3 Move the 5 way button left or right to navigate to the Capture menu Video menu in Video mode 4 Move the 5 way button up or down to highlight the Scene submenu 5 Move the 5 way button right to open the Scene menu 6 Move the 5 way button up or ...

Страница 19: ...he 5 way button right to open the Resolution submenu 6 Move the 5 way button up or down to select from the scene options 5 0M 3 1M 1 3M VGA 7 Press OK when finished Setting the date stamp The date stamp menu enables you to imprint the time and the date on the image To set the date stamp do the following 1 Turn on the camera and switch to picture mode 2 Press Menu 3 Move the 5 way button left or ri...

Страница 20: ... preset white balance setting to suit the lighting conditions in which the picture is taken 1 Turn on the camera and switch to picture mode 2 Press Menu 3 Move the 5 way button left or right to navigate to the Capture menu 4 Move the 5 way button up or down to highlight the White balance submenu 5 Move the 5 way button right to open the White balance submenu 6 Move the 5 way button up or down to s...

Страница 21: ...alue will over expose a shot while setting a lower value will under expose a shot Exposure can be adjusted from 2 0 to 2 0 The value is shown on the LCD display To change the EV compen sation value do the following 1 Turn on the camera and switch to picture mode 2 Press Menu 3 Move the 5 way button left or right to navigate to the Capture menu 4 Move the 5 way button up or down to highlight the EV...

Страница 22: ...on the camera and switch to picture mode 2 Press Menu 3 Move the 5 way button left or right to navigate to the Capture menu 4 Move the 5 way button up or down to highlight the Encircled exposure submenu 5 Move the 5 way button right to open the Encircled exposure submenu 6 Move the 5 way button up or down to select one of the following values 0 3EV 0 5EV 1 0EV 7 Press OK when finished ...

Страница 23: ...the 5 way button left or right to navigate to the Capture menu Video menu in Video mode 4 Move the 5 way button up or down to highlight the Image quality submenu in the picture mode or Video Quality submenu in the video mode 5 Move the 5 way button up or down to select from the quality options Picture mode Basic 1 16 Better 1 12 Best 1 8 Video mode CIF 20fps CIF 30fps VGA 15fps VGA 24fps 6 Press O...

Страница 24: ...5 way button right to open the Sound effect submenu 6 Move the 5 way button up or down to select On to enable the sound effect or Off to disable the sound effect 7 Press OK when finished Setting the welcome picture Use the following procedure to specify the welcome picture shown when the camera is turned on 1 Turn on the camera and switch to picture mode 2 Press Menu 3 Move the 5 way button left o...

Страница 25: ...e mode 2 Press Menu 3 Move the 5 way button left or right to navigate to the Setup menu 4 Move the 5 way button up or down to highlight the Date and time submenu 5 Move the 5 way button right to open the Date and time submenu 6 Move the 5 way button left or right to move between the various date yy mm dd and time hh mm fields 7 Move the 5 way button up or down to change the various date and time f...

Страница 26: ...ere you are using the camera This prevents lights flickering when taking pictures or video 1 Turn on the camera and switch to picture mode 2 Press Menu 3 Move the 5 way button left or right to navigate to the Setup menu 4 Move the 5 way button up or down to highlight the Frequency submenu 5 Move the 5 way button right to open the Frequency submenu 6 Move the 5 way button up or down to select 50Hz ...

Страница 27: ... 5 way button up or down to highlight the Auto power off submenu 5 Move the 5 way button right to open the Auto power off submenu 6 Move the 5 way button up or down to select from one of the following options 1 minute 2 minutes 5 minutes Never 7 Press OK when finished Setting the language To set the menu language do the following 1 Turn on the camera and switch to picture mode 2 Press Menu 3 Move ...

Страница 28: ... the camera 6 Move the 5 way button up or down to select from one of the following options English German French Italian Spanish Dutch Czech Polish Russian Traditional Chinese Simplified Chinese Korean Japanese Bulgarian Portuguese 7 Press OK when finished ...

Страница 29: ...d Formatting the memory Use the following procedure to format the camera s memory 1 Turn on the camera and switch to picture mode 2 Press Menu 3 Move the 5 way button left or right to navigate to the Setup menu 4 Move the 5 way button up or down to highlight the Format submenu 5 Move the 5 way button right to open the Format submenu 6 Move the 5 way button up or down to select Confirm to format th...

Страница 30: ...e camera buttons and LCD screen To select a game do the following 1 Turn on the camera and switch to picture mode 2 Press Menu 3 Move the 5 way button left or right to navigate to the Games menu 4 Move the 5 way button up or down to highlight one of the following games Magic beads Lucky 777 Lottery 5 Move the 5 way button right to select the game and start playing 6 Press Menu to stop the game at ...

Страница 31: ...switch to playback mode The LCD screen displays the most recent image If the most recent file is a video clip it displays the first frame of the movie clip on the screen No image is displayed if the most recent file is an audio file Mode switch Image file Video file Audio file ...

Страница 32: ...e by pressing the Voice button Press the button again to stop recording To play back the voice memo press the OK button To learn about deleting the voice memo see Deleting a voice memo on page 34 Zooming in You can use the digital zoom feature to zoom in and examine the fine details of the picture Press the Zoom in button to magnify the image and the Zoom out button to decrease the zoom ratio The ...

Страница 33: ...ed file Cancel cancels the delete operation 4 Press OK to confirm the operation The selected files are deleted Protecting files To lock images or audio video clips in order to prevent them from being deleted accidentally do the following 1 In playback mode use the 5 way button to browse to the image or audio video clip that you want to protect 2 Move the 5 way button up to display the Protect menu...

Страница 34: ...to the Edit menu 4 Move the 5 way button up or down to highlight the Resize submenu 5 Move the 5 way button right to open the Resize submenu 6 Move the 5 way button up or down to select from the resize options VGA 1 3M 3 1M or 5 0M 7 Press OK when finished Rotating images To rotate an image do the following 1 In playback mode use the 5 way button to browse to the image that you want to rotate 2 Pr...

Страница 35: ...on to browse to the image that you want to crop 2 Press Menu 3 Move the 5 way button left or right to navigate to the Edit menu 4 Move the 5 way button up or down to highlight the Crop submenu 5 Move the 5 way button right to open the Crop submenu 6 Move the 5 way button up or down to select one of the following options 4 3 3 2 7 Move the 5 way button right to start cropping 8 The cropping window ...

Страница 36: ...he 5 way button to browse to the desired image with a voice memo 2 Press Menu 3 Move the 5 way button left or right to navigate to the Edit menu 4 Move the 5 way button up or down to highlight the Voice Memo submenu 5 Move the 5 way button to open the Voice memo submenu 6 Select Delete to delete the voice memo attached to the image or select Cancel to cancel the operation 7 Press OK when finished ...

Страница 37: ...w The first frame of the video clips are displayed during the slide show Refer to the following sections to set up a slide show Setting the starting point To specify the starting point of the slide show do the following 1 Press Menu 2 Move the 5 way button left or right to navigate to the Slide menu 3 Move the 5 way button up or down to highlight the Show submenu 4 Move the 5 way button right to o...

Страница 38: ...enu 5 Move the 5 way button up or down to select one of the following options for the interval 1 sec 3 sec 5 sec 6 Press OK when finished Setting the direction To specify the order in which the slide show displays the images do the following 1 Press Menu 2 Move the 5 way button left or right to navigate to the Slide menu 3 Move the 5 way button up or down to highlight the Direction submenu 4 Move ...

Страница 39: ...n the Repeat submenu 5 Move the 5 way button up or down to select Yes to repeat the slideshow or No to display the slide show only once 6 Press OK when finished Starting the slideshow After setting up the slide show you are now ready to start the slide show To start the slide show do the following 1 Press Menu 2 Move the 5 way button left or right to navigate to the Slide menu 3 Move the 5 way but...

Страница 40: ... image 1 In playback mode use the 5 way button to browse to the desired image 2 Press Menu 3 Move the 5 way button left or right to navigate to the Print menu 4 Move the 5 way button up or down to highlight the DPOF submenu 5 Move the 5 way button right to open the DPOF submenu 6 Use the 5 way button to select Cur rent to set the DPOF information for the current image or Reset to clear the DPOF in...

Страница 41: ... to navigate to the Print menu 4 Move the 5 way button down to highlight the Direct Print submenu 5 Move the 5 way button right to open the Direct Print submenu 6 Use the 5 way button to select Current to print the current image or Cancel to cancel the operation 7 Press OK 8 Use the 5 way button to select the Copies option and set the number of copies to be printed by moving the button left or rig...

Страница 42: ...ng the software The software CD provided with the digital camera contains the soft ware driver required to use the camera as a web camera and to transfer data from it It also contains various software applications to help you view and edit your digital photos and videos To install the software do the following 1 Insert the CD into your PC s CD drive The CD menu is displayed 2 Select one of the fol...

Страница 43: ...or right to navigate to the Setup menu 3 Move the 5 way button up or down to highlight the USB submenu 4 Move the 5 way button right to open the USB submenu 5 Move the 5 way button up or down to select one of the following options Storage PC camera 6 Press OK when finished Connecting the USB cable To connect the camera to the PC do the following 1 Turn on the camera 2 Connect the digital camera to...

Страница 44: ... you need to set the TV out put mode and make sure it matches that of your TV to set the TV output mode do the following 1 In picture mode press Menu to dis play the menu 2 Move the 5 way button left or right to navigate to the Setup menu 3 Move the 5 way button up or down to highlight the TV out submenu 4 Move the 5 way button right to open the TV out submenu 5 Move the 5 way button up or down to...

Страница 45: ...era on and set it to playback mode using the mode switch 2 Connect the TV out jack on your digital camera to the audio video input ports on your TV using the AV cable provided The LCD screen turns off 3 Use the procedures described in Reviewing photos or movie clips on page 29 to play back the files on your camera Audio Video ...

Страница 46: ...ixels 2592 1944 pixels 12 megapixels Shutter speed 1 6 1 1000 second Zoom 8 digital zoom LCD 1 5 inch TFT Internal memory 32 MB SDRAM Supported media Secure Digital card Format Image Video Audio JPEG EXIF 2 1 DPOF AVI CIF WAV Connections USB 2 0 TV Audio Video out Power 2 AA batteries Weight 85 g ...

Страница 47: ...Card Error The card maybe damaged The card may require formatting Format the card Insert another card Picture Error The picture cannot be viewed with the camera View the image on a computer If the picture cannot be viewed the file may be damaged No picture No files exist in the memory or on the card Take pictures or video Insert another card Card Setup The card is not formatted Format the card Bat...

Отзывы: