


8. Cut the covering from the aileron servo openings from corner to corner and iron
down inside the openings. Connect servo wire extensions to your servos and secure
the connections with the supplied clips, your own clips, or tape. Feed the servo
wires into the wing and out the root. Install the servos and screw firmly in place.
9. Use your radio to set the centers of each servo and then assemble and adjust the
length of each control rod. The servo arm should be as close to perpendicular to the
control rod as possible while the aileron is at neutral. Double check all screws, bolts
and nuts to assure proper installation and operation without binding.Once satisfied,
permanently attach the ball link to the servo arm with the supplied screw and nut.
9.Check the final radio operation of the ailerons and make sure there is no binding or
servo fighting of each other. Also check to make sure all linkage bolts and nuts are
secure.
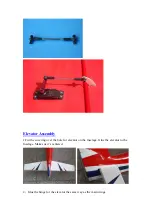
(Below long ALU arm is not included)
Содержание SBACH300 20CC V2
Страница 6: ...Flat nylon hinges for better flying strength High quality 2 5mm ball links assemblys ...
Страница 9: ...Canopy quick release mechanism ...
Страница 10: ...It can also be powered by gas engine ...
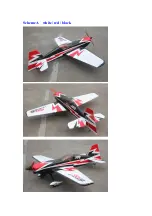
Страница 11: ...Scheme A white red black ...
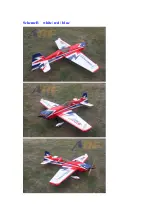
Страница 12: ...Scheme B white red blue ...
Страница 13: ......
Страница 17: ...Make sure to sand the horns to keep its strength ...
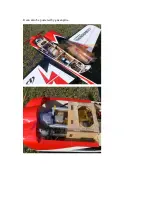
Страница 34: ...5 Fix the battery with Velcro 6 The following pictures show how to install gas engine ...
Страница 39: ...Wingbag for 20CC Not Included ...
Страница 40: ...3in C F Spinner with Alu base for electric Not Included ...
Страница 41: ...3in C F spinner for Nitro Gas Not Included ...
Страница 42: ......