


7
8
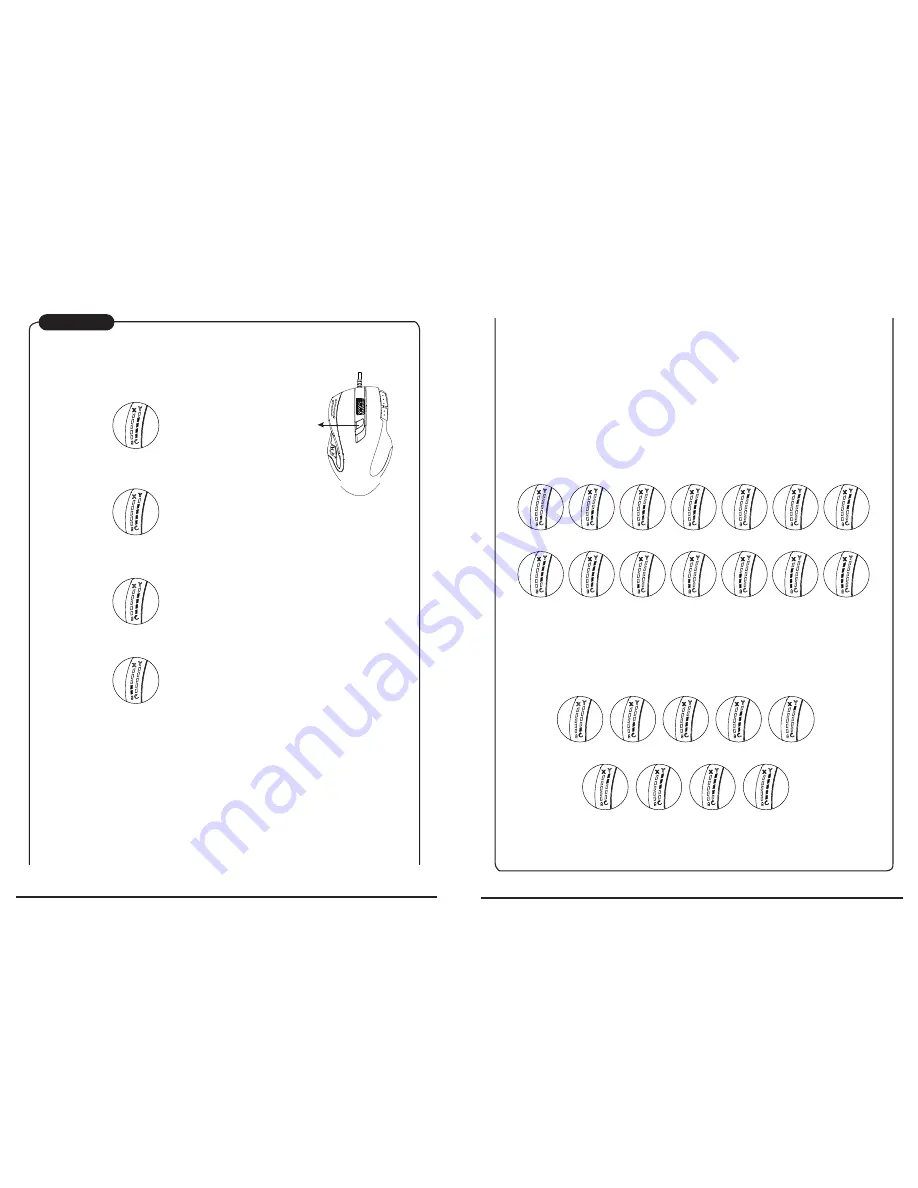
Dpi Setting
A. Status inspection :
To click F.S. (function setting) button is the way to switch setting mode.
1. X axis - DPI status : click F.S. once, the X axis LED will
light on and indicate the X axis resolution is.
2. Y axis - DPI status : click F.S. twice, the Y axis LED will
light on and indicate the Y axis resolution is.
3. Wheel count calculation status : click F.S. 3rd time, the wheel scrolling image graph will light
on and indicate how many count of wheel scrolling is.
4. Residual battery power : click F.S. 4rd time, at the same time the battery icon will light on.
B. How to Set up :
press and hold F.S. button for 3-sec. to enter set up mode. The setting sequence is : X axis dpi
setting >> Y axis dpi setting >> wheel count setting
1. X axis setting :
press and hold F.S for 3-sec. to enter X axis dpi setting mode, the X axis image graph will
flash. The LED will indicate the currect resolution, and can be adjusted by wheel scrolling up
or down to increase or decrease dpi. Each of squares on behalf of 100 dpi. Scrolling up one
count means to increase 100 dpi; contrarily, scroll down one count to decrease 100 dpi.
Below shows how to reconize dpi level. The dpi range is from 100 dpi to 5600 dpi maximum,
with 57 levels. After setting, press F.S. for 3-sec. to save into memory and drop out of the
setting mode.
Functional
Setting button
2. Y axis setting :
press and hold F.S for 3-sec. is X axis dpi setting mode and then click F.S. to enter Y axis
setting mode, the Y axis image graph will flash. The LED will indicate how resolution is
resolution , and can be adjusted by wheel scrolling up or down to increase or decrease dpi.
Each of squares on behalf of 100 dpi. Scrolling up one count means to increase 100 dpi;
contrarily, scroll down one count to decrease 100 dpi. Below shows how to reconize dpi
level. The dpi range is from 100 dpi to 5,600 dpi maximum with 57 levels. After setting,
press and hold F.S. for 3-sec. to save into memory and drop out of the setting mode.
Remark :
100 dpi ~ 400 dpi : LED down >>> up (1st to 4th LED light on)
500 dpi : the 5th LED light on only
600 dpi ~ 900 dpi : LED up >>> down (5th LED to 1st LED light on)
1000 dpi ~ 5000 dpi : LED down >>> up (1st to 5th LED light on)
100 dpi
200 dpi
300 dpi
400 dpi
500 dpi
600 dpi
700 dpi
900 dpi
1000 dpi
2000 dpi
3000 dpi
4000 dpi
5000 dpi
800 dpi
Count 8
Count 9
Count 1
Count 2
Count 3
Count 4
Count 5
Count 6
Count 7
3. Scrolling count setting :
Press F.S. for 3-sec. and click F.S. twice to enter count calculation mode, the arrow image
arrow image will flash, and show the current count number. Adjust count calculation by
scrolling wheel, scroll up to increase the count, and scroll down to decrease the count
oppositely. Press F.S.for 3-sec. to save into memory and drop out setting mode.
Содержание L901LR
Страница 1: ...2 4G WIRELESS WIRED L901LR...


