background image

User’s Manual


 A

REBO

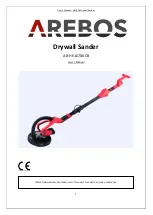
S Drywall Sander 


10 


SANDING OF GYPSUM JOINTS 


The Drywall Sander has a special sanding head: the head can rotate in multiple directions, 

allowing the abrasive pad to adjust to the work surface. This enables the operator to sand 
the top, middle and bottom of a wall or ceiling joint without changing its position. 

1.


Turn the vacuum cleaner switch to the ON position. 

CAUTION: 

Wear an approved respirator for mist and dust. 

2.


Turn the wall sander switch to the ON position. 

3.


Place the wall sander slightly against the work surface (apply a slight pressure to align the 

sanding head with the work surface). 

4.


Apply additional pressure to push the abrasive pad towards the working surface, while 

moving the sander creating an overlapping pattern to smooth the drywall to the edges. 
Apply ONLY enough pressure to keep the abrasive pad flat against the working surface. 
Excessive pressure can cause unacceptable micro scratches and damage the uniformity of 
the working surface. 
The sander must always be in motion when the abrasive pad is in contact with the working 
surface. Use a steady, sweeping motion. Stopping the Sander (on the working surface), or 
moving the sander may cause unacceptable micro scratches and affect the uniformity of the 
working surface. 


NOTE: 

Do not allow the rotating abrasive pad to come into contact with sharp protrusions. 

Contact with protruding objects (nails, screws, electrical boxes, etc.) can severely damage the 
abrasive pad. 

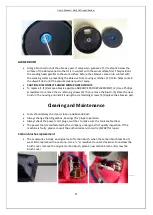
ABRASIVE PAD REPLACEMENT 


CAUTION:

 DISCONNECT SANDER FROM POWER SOURCE. 


Grasp the abrasive belt and strap support (tighten the plate on the bracket) to prevent 

rotation. 


Rotate the inserted retaining nut counter-clockwise and remove it. 


Lift the large metal washer and the abrasive pad. 

 
NOTE: 

When the abrasive pad is removed from the sander, the abrasive rear disc is exposed. This 

rear disc is also covered with an abrasive material. 


This abrasive material is ONLY used to prevent "slippage" between the rear disc and the back 

abrasive plate foam. It is NOT suitable for use as an abrasive sander. NEVER USE THE SANDER 
WITHOUT PROPER ABRASIVE PAD INSTALLED (to prevent severe damage to the work). 


Position the new abrasive pad on the rear disc, making sure that the center hole in the 

abrasive disc is in the middle of the rear abrasive disc. 


Position the large metal washer of the retaining nut on the sander. 


Rotate the retaining nut clockwise and tighten by hand (while holding the abrasive pad).  


The output shaft is inserted into the adhesive disc center with an angle wrench and turned 

clockwise into the hex hole. At the same time, the hands hold the adhesive disc grinding. 


Содержание AR-HE-LS700C8

Страница 1: ...User s Manual AREBOS Drywall Sander 1 Drywall Sander AR HE LS700C8 User s Manual Please follow all security measures in this user s manual to ensure a secure use...

Страница 2: ...ces such as pipes radiators ranges and refrigerators There is an increased risk of electric shock if your body is earthed or grounded Do not expose power tools to rain or wet conditions Water entering...

Страница 3: ...breakage of parts and any other condition that may affect the power tools operation If damaged have the power tool repaired before use Many accidents are caused by poorly maintained power tools Keep c...

Страница 4: ...accessory may contact hidden wiring or its own cord Cutting accessory contacting a live wire may make exposed metal parts of the power tool live and could give the operator an electric shock Position...

Страница 5: ...and snaps of the accessory Corners edges or sharp twists tend to hang the rotating accessory and cause loss of control or kickback Do not attach a saw chain blade wood carving saw chain or toothed saw...

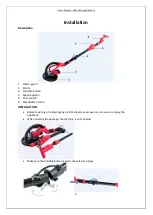
Страница 6: ...Foldable button 4 Speed adjuster 5 Push switch 6 Extendable handle INSTALLATION Before repairing or replacing any electrical parts or accessories be sure to unplug the appliance When opening the pack...

Страница 7: ...ander provides superior finish and is faster than conventional finishing methods for both new construction and renovation work Clean up time is minimized by using an external dust bag attached to the...

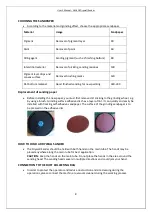
Страница 8: ...rinding wheel e g by using a brush Grinding surface adhesive disc has a layer of lint It can quickly and easily be installed with flocking self adhesive sandpaper The surface of the grinding sandpaper...

Страница 9: ...the switch will be stopped SANDING WHEEL SPEED REGULATION The Drywall Sander is equipped with variable speed control The speed is adjusted by turning the control knob The control knob goes from MIN t...

Страница 10: ...ches and affect the uniformity of the working surface NOTE Do not allow the rotating abrasive pad to come into contact with sharp protrusions Contact with protruding objects nails screws electrical bo...

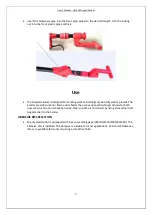
Страница 11: ...crews 3 Then remove the brush 4 Place the new brush in the housing and install it using the six retaining screws 5 Replace the abrasive pad Cleaning and Maintenance Tools should always be clean clean...

Страница 12: ...d in accordance with a standard test method and may be used for comparing one tool with another The declared vibration total value may also be used in a preliminary assessment of exposure Warning The...

Страница 13: ...s of the local waste disposal Meaning of the dustbin Protect our environment electrical appliances do not belong in household waste Use the provided for the disposal of electrical equipment collection...

Страница 14: ...Directive 2011 65 EU Also meets the following standards EN60745 1 2009 A11 2010 EN60745 2 3 2011 A12 2014 EN55014 1 2006 A2 2011 EN55014 2 1997 A1 2009 A2 2008 EN61000 3 2 2014 EN61000 3 3 2013 EN6232...

Отзывы: