background image

23 


A CD loaded with the Other option is given track names track1, track2 and so on.  
Once loading has started the progress is displayed. You can listen to music while the CD loads 
although loading will slow down a bit because the system is doing two things at once.  
You stop a CD loading by ejecting the CD or by pressing and holding the Play/Stop key.  


Plays the CD from track 1.  
If the CD has just been inserted you may be asked to pick a name from the album database -so you 
can see the track names as it plays. You can play the CD from the remote by pressing CD then Play.  


Copies the entire CD to the USB device.  
Strictly speaking the CD is compressed to MP3 as it is transferred to the USB device.  
If the CD has just been inserted you will be asked to pick a name from the album database - see load 
CD to HDD. The music is sent to the target directory on the USB device.  
Note MP3 encoding makes this process slower than loading to HDD and will slow down further if 
you play music at the same time.  


Loads one track from the CD to the internal hard disk.  
This is identical to loading the entire CD but with an additional track selection step.  


Содержание INCANTARE Music Station

Страница 1: ...USER S MANUAL incantare MusicStation Version 06 2009 You can download the latest version of this manual from the arcus website at www arcus HighEnd de ...

Страница 2: ... by your trust in our products Your arcus team CONTENTS Section Page 1 Safety Information 01 2 Legal Notice on Copyright 03 3 Scope of Delivery 03 4 Environmental Protection 04 Information 5 Operating Elements on the 05 Front 6 Installation 06 7 Remote Control 08 8 General Information 09 Section Page 9 Quick Start 11 10 Menue system 12 11 Trouble Shooting 32 12 Terms and Conditions of 34 Guarantee...

Страница 3: ...onia benzene or abrasive products as these products may damage the device The mains plug must be pulled out before the device is cleaned To clean only use a soft dry cloth to wipe the surfaces of the device Heat Do not expose the device to direct sunlight Take care to ensure that the device is not exposed to any direct sources of heat such as heating or an open fire Ensure that the ventilation sli...

Страница 4: ...reached room temperature and any condensation that may have formed has evaporated The plug should be pulled out of the socket if the device is not in use for a while Before operating the device again ensure that there are no short circuits at the connection points and that all connections are properly attached The user should carry out no works on this device other than the measures described in t...

Страница 5: ...rom the Internet Please make sure that the files are properly licensed i e that the provider also has rights to the respective titles If you are not the originator yourself or you have not been grated the appropriate rights of use by the originator or rights holder you should note that if you infringe on this right there is a risk that beneficial owners may take action against this possible crimin...

Страница 6: ...normal household waste at the end of its useful life but must be handed in at a collection point for the recycling of electrical and electronic devices The symbol on the product in the user s manual or on the packaging recalls this fact The materials can be used again according to their description By reusing recycling materials or using spent devices in any other form you make an important contri...

Страница 7: ...aying currently displayed track album or playlist Press and hold to Stop everything Music playback CD loading USB transfer Recording Eject Key Eject CD Delete track from playlist 2 USB Port Compatible with USB mass storage class devices including most MP3 players MP3 mobile phones USB memory and USB hard disk drives USB 2 0 Full Speed 12Mbits sec 3 CD Slot Insert CD gently until it is pulled insid...

Страница 8: ...ly ratings can be obtained from your local electricity provider Only use the supplied mains cable or a derivative of identical construction The mains socket should be located in the vicinity of the device and within reach of the mains cable AVOID a situation where you have to stretch the mains cable in order to reach the socket Arrange the cable of the Muiscstation so that it cannot be tripped ove...

Страница 9: ...s ON the unit is connected with the electricity mains 5 Power Supply Input Cord The mains cable is inserted here 6 Speaker The loudspeaker is connected to these terminals Please take care to ensure that the loudspeaker does not fall lower than a minimum impedance of 4 ohm Also ensure that there is no short circuit at this port so that no damage results for the output stage Connecting the loudspeak...

Страница 10: ...mode plays just the start of each track Random turns random mode on and off First press shows the current state Subsequent presses changes the mode Random Mode plays tracks in a random order Random Mode is turned off when an album is played HDD USB selects music from the hard disk and the attached USB device Track search will scan both Random mode will embrace both sources CD selects music from CD...

Страница 11: ...list MuiscStation lets you compile lists of tracks called playlists You might compile a playlist for a special occasion or to create a mood You can send all the tracks in a playlist to an MP3 player To make life simple there are seven playlists named after the colours of the rainbow red orange yellow green blue indigo violet The playlists are linked to seven number keys on the remote control Press...

Страница 12: ...ified by the pattern of track lengths measured to the nearest 75th of a second This pattern is a kind of fingerprint used to find the details in the album database Often several CDs share the same fingerprint so you have to pick the right details when loading a CD On occasions a music publisher releases different recordings of a CD so the fingerprint on your CD does not match the details in the da...

Страница 13: ... the source information is removed from the display You don t have to do anything special to turn it back on just press a button the hard disk starts automatically How to Load a CD onto the Hard Disk Insert the CD Push the knob to select Load CD to HD Turn the knob to find the album name then push How to find and play a track by name Push the knob to start the menu system Turn the knob to select T...

Страница 14: ...el or the remote Press and hold the back button if you want to exit the menu system completely You can often access functions in several ways It helps to know that you can jump to the album menu from the track menu or pick a track from the album menu The Track search function is found in the main menu and is also started by the Find key on the remote Track Search searches the hard disk and or the ...

Страница 15: ...nt to play the track shown press the Play Stop button on the front panel or the remote If you want to do something else with the track like transfer it to the USB then push the main control knob or OK on the remote This goes to the track menu The back key takes you back to step 1 The Album search function is found in the main menu Album search is almost identical to track search except that arcus ...

Страница 16: ... by turning the main control knob or using the up down keys on the remote The History will record tracks from the internal disk or the USB device but not tracks played from a CD Tracks are only recorded once in the history so if you replay a track don t expect to see it appear many times Browse albums in the main menu lets you scroll through the albums stored on the internal disk Albums are stored...

Страница 17: ...t and copy to usb An important option in the track menu is the album menu option This allows you to select the album containing the current track the current album This option starts the CD Menu which lets you play load to hard disk rip to USB update the album database and play specific CD tracks This option starts the USB Menu which lets you play load to hard disk transfer to USB backup restore a...

Страница 18: ...trol press the Aux key then press the Rec key This option displays a summary of the hard disk usage including number of tracks and albums number of mp3 encoded tracks disk space used and available space This option deletes the selected track You will be asked to confirm the deletion This option plays the selected track you can also press Play anytime in the Track menu This option adds the selected...

Страница 19: ... offers a bit more flexibility than the front panel Front Panel You add letters or delete at the cursor positioned at the end of the text Add letters by turning the main control knob to see the letters then push Press Back on the front panel to delete letters and press Next on the front panel when complete You cannot add capitals from the front panel Remote You can add or delete letters and move t...

Страница 20: ... This option transfers the selected track to the USB device You can also transfer the current track to the USB by pressing the Rip key on the remote Sometimes you may want to specify a target directory on the USB device For instance some mobile telephones will only play MP3s if they are in the correct directory like music or mp3 The target directory can be specified using the USB directory option ...

Страница 21: ... recording from the Aux input Once you have completed a number of related recordings say tracks from a vinyl album rename the recordings album to reflect the content See the description of rename track for details of this function This option is a special function used when the album database is updated There may be recently published CDs that you loaded that were not in the old album database but...

Страница 22: ...t Its quicker to play a playlist by pressing the corresponding number key on the remote twice The menu option allows you to do it from the front panel without the remote A playlist will loop back to the start after playing the last track and remains active until you press the zero key on the remote or press and hold Play Stop on the front panel This option transfers all the tracks on the selected ...

Страница 23: ...any times in different playlists it remains until another track is deleted or cut If you want a copy of a track you must cut it then immediately paste it back Changes to playlists are immediate you do not save the changes at the end like a PC application Position in playlist You can edit a playlist from the front panel or the remote Front Panel Turn the knob to see all the tracks in the playlist P...

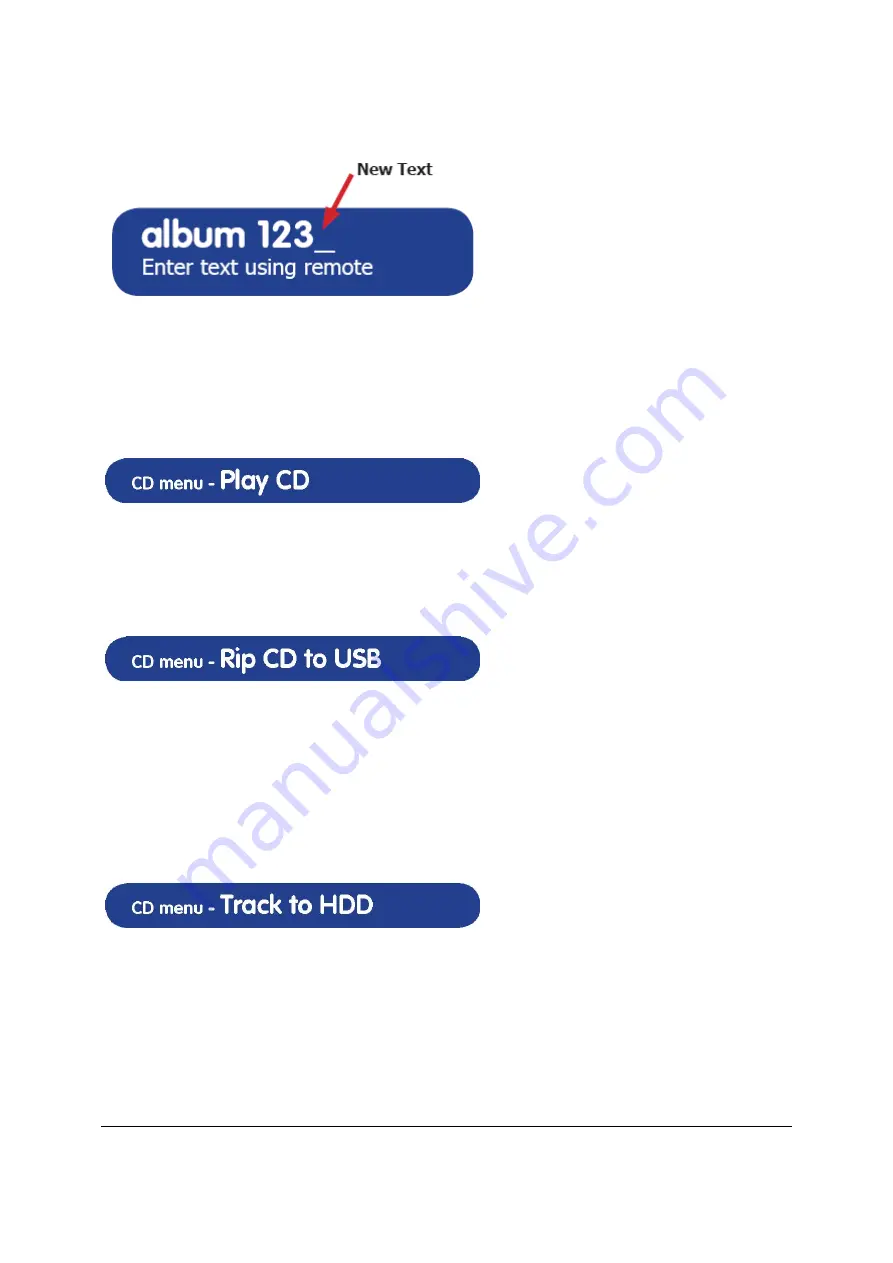
Страница 24: ...is to select a name from the album database candidate album name Loading starts when you push the main control knob or press OK to select the appropriate CD name If the suggested names do not match the CD select the last option Other last option You will then be presented with a temporary name for the CD something like album123 Its a good idea to edit this name to something more relevant so you ca...

Страница 25: ...so you can see the track names as it plays You can play the CD from the remote by pressing CD then Play Copies the entire CD to the USB device Strictly speaking the CD is compressed to MP3 as it is transferred to the USB device If the CD has just been inserted you will be asked to pick a name from the album database see load CD to HDD The music is sent to the target directory on the USB device Not...

Страница 26: ...to pick a name from the album database see load CD to HDD Track selection is shown above Installs a new album database from CD ROM Slow process 20 minutes The Album database is derived from a database known as CDDB that contains details on more than 2 million CDs The file on the CD ROM actually called SQDB is over 500 Mbytes and is decompressed as it is loaded Progress is displayed with snippets f...

Страница 27: ...ard drive formatted with FAT32 and with sufficient capacity You can find how much space is used by the music on the internal using Disk Stats in the Main menu Backup is time consuming but is incremental and is done in the background That means you can listen to music while doing a backup It also means you can interrupt a backup press and hold the play stop key and restart it later Incidentally if ...

Страница 28: ...nsfers to USB The options are 1 Automatic arcus MusicStation decides on the directory 2 Root the top level directory of the USB device 3 MP3 4 mobile audio audio subdirectory of mobile directory 5 music 6 other Choose the other option if you need to define a different directory You will then be allowed to edit the user defined target directory Text editing is described in Track rename but you will...

Страница 29: ...h album has the following entries in the file album name you can edit this album identifier do not edit number of tracks do not edit track names you can edit these Do not change the number of lines in the file and avoid punctuation marks in the names This is the complementary function to the export names function If you have changed any track or album names in the file arcus catalogue on the USB d...

Страница 30: ... the technically minded the Bass control uses a shelving filter with a corner frequency of 330Hz and 9 0dB to 9 0dB gain in 1 5dB steps Settings menu Treble Similar to Bass control but with a corner frequency of 3300Hz Adjust the hours minutes then seconds by rotating the main control knob or using up and down keys Push the knob or press OK to advance Press back to go back The Set time function us...

Страница 31: ...e sure its not too loud Adjust the level of MP3 compression or disable MP3 compression The choices are Most Compressed 128k bits sec Normal 192k bits sec High Quality 320k bits sec No Compression music not compressed Music is compressed after it has been loaded from CD and when the unit is in standby The compression level is therefore intended as a global setting as opposed to a track by track adj...

Страница 32: ... the display The Aux input is selected when you start the Recording Menu so you can monitor the auxiliary input on the speakers This option starts recording from the Aux input to a file with a name like Aux1 Aux2 etc in an album called Recordings You can also start a recording with the remote control by pressing Aux then Rec Recording continues up to a maximum time or stopped by the Stop Recording...

Страница 33: ...ge to have the loudest passage of music playing while you adjust the level Turn up the recording level until you begin to hear distortion then turn it back down a little so it is free from distortion You should not need to change this setting for a given input source a turntable or a tuner say This option lets you set the maximum time for recordings 0 99 minutes ...

Страница 34: ...ing even though the mains switch is activated Cause No mains supply Solution Make sure that the mains plug is correctly inserted in the socket Check whether the socket is conducting electricity Problem Display lights up but no sound is played back Cause Input connections are disrupted Solution 1 Turn off the device at the mains switch Make sure that all inputs and loudspeakers are correctly connec...

Страница 35: ...e does not react to commands from the remote control Cause Batteries are too weak Infrared sensor on the amplifier is obstructed Solution Change batteries in the remote control Remove object that is blocking the sensor ...

Страница 36: ...factory However should manufacturing and or material defects emerge during normal use we provide a 2 year guarantee on our products You can extend your guarantee for electronic components to 3 years and for loudspeakers to 5 years by sending in the guarantee card and or registering on our website www arcus HighEnd de The guarantee period commences from date of purchase The guarantee extension appl...

Страница 37: ...istortion factor 0 02 Channel separation 85 dB 1 kHz Signal to noise ratio 98 dBA Dynamics 105dB Audio inputs analogue 2 x Cinch Input impedance 47 kOhm Outputs 1x Cinch Preamp 1x Cinch Digital Weight 15 kg Dimensions WxHxD 220 x 88 x 380 mm Network voltages 110 230 Volt 50 60 Hz ...

Страница 38: ... to play the music signal naturally As long as your loudspeakers playback devices follow the same principle you will enjoy an outstanding sound experience at all times 15 IMPRINT Published by arcus GmbH Phone 49 0 700 60 77 77 77 Fax 49 0 700 61 77 77 77 E mail info arcus HighEnd de http www arcus HighEnd de Errors and omissions reserved arcus reserves the right to modify technical details without...

Отзывы: