


PhotoFantasy 2000 Quick Start Guide
6
5
PhotoFantasy 2000 Quick Start Guide
Additional Documentation
In addition to this Quick Start Guide, you can learn mo re about PhotoFantasy by
using online Help. Online Help provides easy-to-find information on specific
commands and features,and is most helpful when printed out. To access online Help,
click the “?” button at the top right corner of the screen. To use context-sensitive online
Help, right-click on any item on the screen and you will go dir ectly to that par ticular
topic in online Help.
For important notices about the program,please review the ReadMe file. It is located in
your Start Menu under Programs/ArcSoft PhotoFantasy/ReadMe.
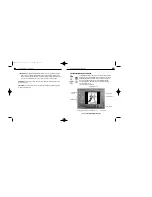
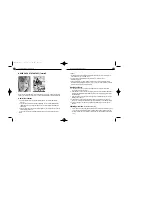
GETTING ACQUAINTED
Main Screen
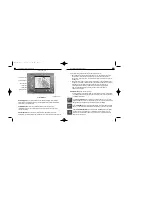
The Main Screen acts as your “homebase” in PhotoFantasy. It contains controls that allow
you to access the other program screens,as well as to make final adjustments and
enhancements to your photo fantasy. From the Main Screen, you can also save, print and
e-mail your finished photo fantasy. Please refer to Fig. 1 when reading this section.
Note: Upon starting PhotoFantasy, you may notice that only the Get Fantasy Button
is enabled in the Main Screen. This “start-up mode” is designed to
help guide you through the st eps of creating a photo fantasy, the first step being
“Select Your Fantasy”. Once this step is completed,the Get Photo Buttons will
appear on the Main Screen, prompting you to complete the second step, “Select
Your Photo”. Once this second step is completed,the rest of the Main Screen
options will become available.
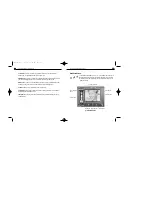
5. Once the installation completes,a prompt appears onscreen. Press Quit to finish
installation, or choose Continue to install the software in a second location.
Note
: Upon installation, your computer will automatically create a PhotoFantasy
2000 folder on the location you’ve specified.
To launch PhotoFantasy,
1. Double-click the Macintosh HD icon on your desktop.
2. In the Macintosh HD window, locate the PhotoFantasy 2000 folder, and double-click
to open it.
3. In the PhotoFantasy 2000 window, find the PhotoFantasy 2.0 icon and double-click it
to open the program.
4. Start working in PhotoFantasy 2000.Enjoy!
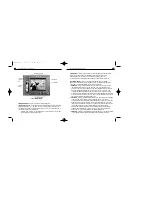
About This Guide
This guide is designed to get you quickly started in PhotoFantasy. The first section,
“Getting Acquainted”, introduces you to important terms,screens and controls. The next
section,“Making A PhotoFantasy”, is a quick tutorial that shows you how to make a
photo fantasy as well as create your own fantasy backgrounds.Step-by-step instructions,
pictures and helpful tips are provided throughout these two sections. This guide also
includes a section titled “More Fantasy Backgrounds” to offer you additional ArcSoft
fantasy collections.
PFANTASY.200 3/14/01 10:28 AM Page 7