background image

3

ERT_S series Ebbert Rivet Tools (HK1038

)


I. GENERAL SAFETY RULES:

1.  A half-hour long hands-on training session with qualified 

personnel is recommended before using Huck equipment.

2.  Huck equipment must be maintained in a safe working 

condition at all times. Tools and hoses should be inspected 

at the beginning of each shift/day for damage or wear. Any 

repair should be done by a qualified repairman trained on 

Huck procedures.

3.  For multiple hazards, read and understand the safety 

instructions before installing, operating, repairing, maintaining, 

changing accessories on, or working near the assembly power 

tool. Failure to do so can result in serious bodily injury.

4.  Only qualified and trained operators should install, adjust or 

use the assembly power tool.

5.  Do not modify this assembly power tool. This can reduce 

effectiveness of safety measures and increase operator risk.

6.  Do not discard safety instructions; give them to the operator.

7.  Do not use assembly power tool if it has been damaged.

8.  Tools shall be inspected periodically to verify all ratings 

and markings required, and listed in the manual, are legibly 

marked on the tool. The employer/operator shall contact 

the manufacturer to obtain replacement marking labels 

when necessary. Refer to assembly drawing and parts list for 

replacement.

9.  Tool is only to be used as stated in this manual. Any other use 

is prohibited.

10.  Read MSDS Specifications before servicing the tool. MSDS 

specifications are available from the product manufacturer 

or your Huck representative.

11.  Only genuine Huck parts shall be used for replacements or 

spares. Use of any other parts can result in tooling damage 

or personal injury.

12.  Never remove any safety guards or pintail deflectors.

13.  Never install a fastener in free air. Personal injury from 

fastener ejecting may occur.

14.  Where applicable, always clear spent pintail out of nose 

assembly before installing the next fastener.

15.  Check clearance between trigger and work piece to ensure 

there is no pinch point when tool is activated. Remote 

triggers are available for hydraulic tooling if pinch point is 

unavoidable.

16.  Do not abuse tool by dropping or using it as a hammer. Never 

use hydraulic or air lines as a handle or to bend or pry the 

tool. Reasonable care of installation tools by operators is an 

important factor in maintaining tool efficiency, eliminating 

downtime, and preventing an accident which may cause 

severe personal injury.

17.  Never place hands between nose assembly and work piece. 

Keep hands clear from front of tool.

18.  Tools with ejector rods should never be cycled without nose 

assembly installed.

19.  When two piece lock bolts are being used always make sure 

the collar orientation is correct. See fastener data sheet for 

correct positioning.

II. PROJECTILE HAZARDS:

1.  Risk of whipping compressed air hose if tool is pneudraulic 

or pneumatic.

2.  Disconnect the assembly power tool from energy source 

when changing inserted tools or accessories.

3.  Be aware that failure of the workpiece, accessories, or the 

inserted tool itself can generate high velocity projectiles.

4.  Always wear impact resistant eye protection during tool 

operation. The grade of protection required should be 

assessed for each use.

5.  The risk of others should also be assessed at this time.

6.  Ensure that the workpiece is securely fixed.

7.  Check that the means of protection from ejection of fastener 

or pintail is in place and operative.

8.  There is possibility of forcible ejection of pintails or spent 

mandrels from front of tool.

III. OPERATING HAZARDS:

1.  Use of tool can expose the operator’s hands to hazards 

including: crushing, impacts, cuts, abrasions and heat.  Wear 

suitable gloves to protect hands.

2.  Operators and maintenance personnel shall be physically able 

to handle the bulk, weight and power of the tool.

3.  Hold the tool correctly and be ready to counteract normal or 

sudden movements with both hands available.

4.  Maintain a balanced body position and secure footing.

5.  Release trigger or stop start device in case of interruption of 

energy supply.

6.  Use only fluids and lubricants recommended by the 

manufacturer.

7.  Avoid unsuitable postures, as it is likely for these not to allow 

counteracting of normal or unexpected tool movement.

8.  If the assembly power tool is fixed to a suspension device, 

make sure that fixation is secure.

9.  Beware of the risk of crushing or pinching if nose equipment 

is not fitted.

Continued on next page...

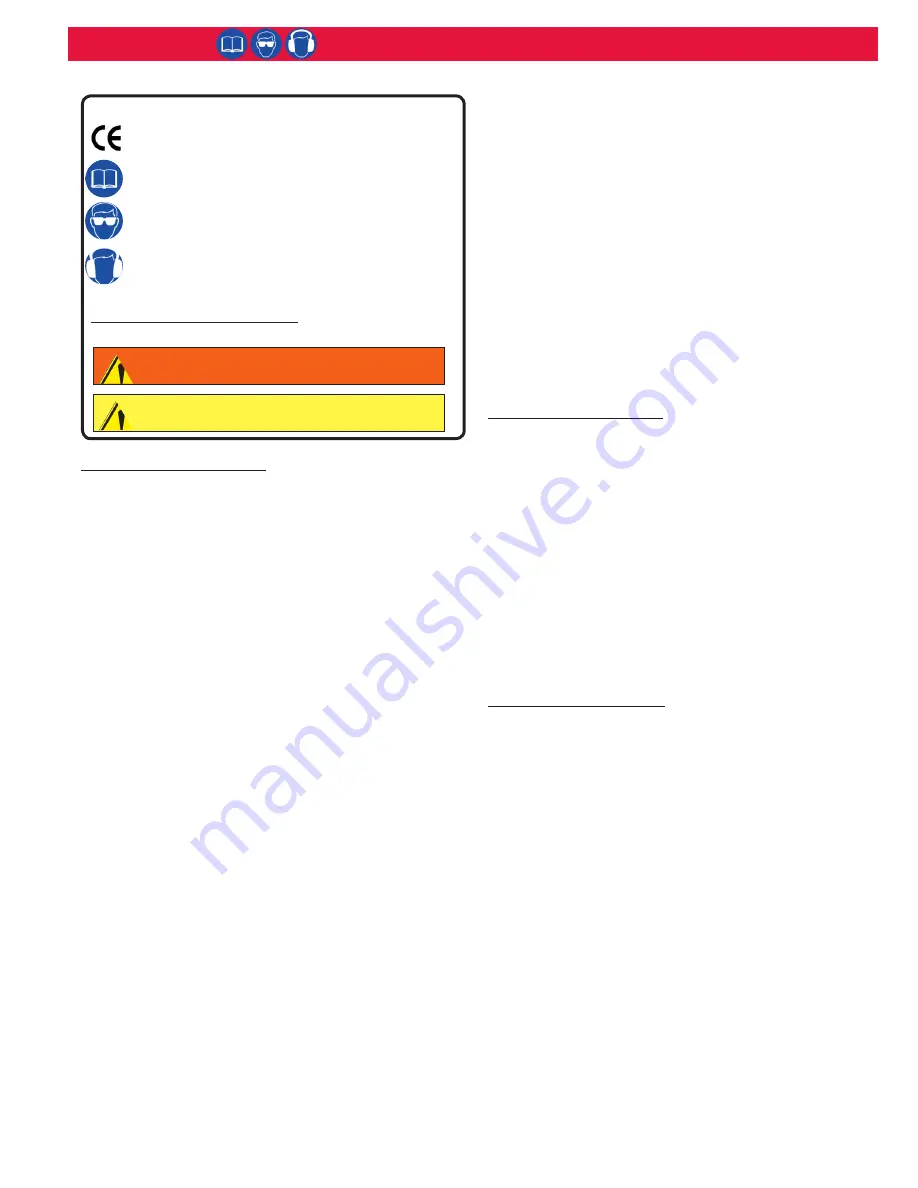
GLOSSARY OF TERMS AND SYMBOLS:
 

-  Product complies with requirements set forth by 

the relevant European directives.


-  Read manual prior to using this equipment.


-  Eye protection is required while using this 

equipment.


-  Hearing protection is required while using this 

equipment. 

Notes: are reminders of required procedures.

Bold, Italic type, and underline:

 emphasize a specific 

instruction.

WARNINGS: Must be understood to avoid 

severe personal injury.

CAUTIONS: Show conditions that will damage 

equipment or structure.

Safety Instructions

Содержание ERT1S

Страница 1: ... Instructions 3 4 General Information 5 Principle of Operation 5 Specifications 6 7 Disassembly and Assembly Instructions ERT1S ERT2S 8 9 Disassembly and Assembly Instructions ERT3S ERT4S 9 10 Rivet Tool Handle Function 11 Air Bleeding Instructions 11 Components Drawings 12 15 Optional Tool Configurations 16 17 Kits and Accessories 18 Troubleshooting 18 ...

Страница 2: ...2 ERT_S series Ebbert Rivet Tools HK1038 ...

Страница 3: ...d preventing an accident which may cause severe personal injury 17 Never place hands between nose assembly and work piece Keep hands clear from front of tool 18 Tools with ejector rods should never be cycled without nose assembly installed 19 When two piece lock bolts are being used always make sure the collar orientation is correct See fastener data sheet for correct positioning II PROJECTILE HAZ...

Страница 4: ...e controls to reduce the risk may include actions such as damping materials to prevent workpiece from ringing 3 Use hearing protection in accordance with employer s instructions and as required by occupational health and safety regulations 4 Operate and maintain tool as recommended in the instruction handbook to prevent an unnecessary increase in the noise level 5 Select maintain and replace the c...

Страница 5: ... the Red Air Line to the valve in the rivet tool handle When the tool trigger is pulled a trigger plunger unseats a valve ball and directs air from the tool handle back through the Green Air Line to the Four way Valve The Four way Valve is shifted directing air pressure through the Blue Air Line into the Power Booster As the Power Booster air piston advances hydraulic fluid is forced through the b...

Страница 6: ...ations Figure 1 Inches mm ERT1S WEIGHT 3 lbs 1 36 kg STROKE 0 75 in 19 05 mm RATED PULL FORCE 1 992 lbs FASTENER SIZES 3 32 through 3 16 Inches mm ERT2S WEIGHT 3 25 lbs 1 47 kg STROKE 0 9375 in 23 81 mm RATED PULL FORCE 4 330 lbs FASTENER SIZES 1 8 through 1 4 ...

Страница 7: ... Figure 1c Figure 1b Inches mm ERT3S WEIGHT 3 5 lbs 1 58 kg STROKE 0 75 in 19 05 mm RATED PULL FORCE 1 992 lbs FASTENER SIZES 3 32 through 3 16 Inches mm ERT4S WEIGHT 3 5 lbs 1 58 kg STROKE 0 9375 in 23 81 mm RATED PULL FORCE 4 330 lbs FASTENER SIZES 1 8 through 1 4 ...

Страница 8: ...ton and O ring Back up ring seal and piston rod wiper from piston rod guide NOTE When servicing the tool to this extent the piston rod wiper must be replaced 7 Remove the O ring from the end cap 8 Clean disassembled parts in cleaning solution While cleaning the piston ensure that the small hole in the V groove is open Figure 2 Assembly ERT1S ERT2S This procedure is for the re assembly of the ERT1S...

Страница 9: ...er End Cap Guide Tube Assembly ERT3S Handle Piston Seal Retainer Front Seal Retainer Piston Piston Rod Wiper End Cap Guide Tube Assembly ERT4S O Ring Back up Ring Figure 3 4 Reposition tool in vise with open front of cylinder pointing straight up Use option a or b to fill tool with hydraulic fluid a Gravity fill Connect hydraulic line to power unit and allow hydraulic fluid to flow from the higher...

Страница 10: ...the Model 300509 Bleed Pump Assembly pump from the hydraulic connector through the line filling the tool in the same manner and to the same level as above 5 ERT3S Slide the front seal retainer down using care to get it positioned straight in the cylinder The retainer does not easily slide into the cylinder it will be drawn into place later when the handle is secured ERT4S Making sure the cut out s...

Страница 11: ... Quad ring replacement On models ERT1S and ERT2S the handle is adjustable through a 20 degree arc This patented design allows relief to the wrist when work heights are high or low to the operator s normal body position Each tool is provided with a 5 32 hex ball driver for the handle adjustment By loosening the socket head screw located inside the handle the handle can be moved into the desired pos...

Страница 12: ... Guide Tube Assy 1 11 505475 Hose Adapter 1 12 300254 Guard 1 13 300059 Seal Plug 1 14 500776 O ring 1 15 507552 Spring 1 16 300039 Handle Bracket 1 17 507664 Ball 1 18 300108 Clamp Block 1 19 500064 Socket Head Screw 1 20 300257 Handle 1 21 500774 O ring 3 22 504350 Quad ring 2 23 300133 Valve Plunger 1 24 300253 Trigger 1 25 500623 Pin 1 26 300009 Cylinder 1 27 300014 Piston Rod Guide 1 28 50007...

Страница 13: ...racket 1 18 507664 Ball 1 19 300108 Clamp Block 1 20 500064 Socket Head Screw 9 21 300257 Handle 1 22 500774 O ring 3 23 504350 Quad ring 2 24 300133 Valve Plunger 1 25 300253 Trigger 1 26 500623 Pin 1 27 300001 Cylinder 1 28 500650 Retaining Ring 1 29 300025 Piston Rod Guide 1 30 300064 Screw Bearing Plate 2 31 500061 Socket Head Screw 4 32 507661 Self Tapping Screw 2 33 300059 Seal Plug 1 34 507...

Страница 14: ...1 13 300138 End Cap Guide Tube Assy 1 14 505475 Hose Adapter 1 15 300059 Seal Plug 1 16 500776 O ring 1 17 507552 Spring 1 18 507664 Ball 1 19 500774 O ring 3 20 504350 Quad ring 2 21 300146 Valve Plunger 1 22 500623 Pin 2 23 300256 Trigger 1 24 300064 Screw Bearing Plate 2 25 500064 Socket Head Screw 8 26 300126 Support Loop Assembly 1 27 500061 Socket Head Screw 4 28 300035 Valve Body 1 29 50766...

Страница 15: ...1 14 300002 Cylinder 1 15 300136 End Cap Guide Tube Assy 1 16 505475 Hose Adapter 1 17 300059 Seal Plug 1 18 500776 O ring 1 19 507552 Spring 1 20 507664 Ball 1 21 500774 O ring 3 22 504350 Quad ring 2 23 300146 Valve Plunger 1 24 500623 Pin 2 25 300256 Trigger 1 26 300064 Screw Bearing Plate 2 27 500064 Socket Head Screw 8 28 300126 Support Loop Assembly 1 29 500061 Socket Head Screw 4 30 300035 ...

Страница 16: ...e but with Energized Seals LE series NOTE Energized Seals keep the hydraulic seal tighter when the tool is under no load See Kits Accessories Without Handle but with Tool Head Assembly mounted on a Manifold Base MQ series NOTE The Manifold Base allows the tool to be directly mounted to an assembly machine This series also includes a Quick Disconnect for rapid tool removal and replacement Figure 9 ...

Страница 17: ...17 ERT_S series Ebbert Rivet Tools HK1038 Optional Tool Configurations continued Figure 11 Refer to ERT2S Parts List Figure 6 Refer to ERT1S Parts List Figure 5 Figure 12 ...

Страница 18: ... screw 3 Allow fluid to flow until it is free of bubbles If condition persists replace the seals b 1 Unhook RED air line from power unit 2 Attach Filler Bleed Pump Assembly to tool hydraulic hose 3 Remove bleed screw on Rivet Tool 4 Pump the Bleed Pump until bubbles quit coming out of the bleed port on the tool Always check the simplest possible cause such as a disconnected air hose of a malfuncti...

Страница 19: ...of a complete overhaul Determination is made on a case by case basis upon return of parts to Huck International Inc for evaluation Tooling Part s and Other Items not manufactured by Huck HUCK makes no warranty with respect to the tooling part s or other items manufactured by third parties HUCK expressly disclaims any warranty expressed or implied as to the condition design operation merchantabilit...

Страница 20: ...ations Unit C Stafford Park 7 Telford Shropshire England TF3 3BQ 01952 290011 FAX 0952 290459 Us Operations BP4 Clos D Asseville 95450 Us par Vigny France 33 1 30 27 9500 FAX 33 1 34 66 0600 AUSTRALIA Melbourne Operations 11508 Centre Road Clayton Victoria Australia 3168 03 764 5500 Toll Free 008 335 030 FAX 03 764 5510 Huck is Forever For the Long Haul The Future of Fastening Technology The Futur...

Отзывы: