Super Shuffle Operating Manual
11
11. Repeat steps 2-10 for the opposite side if necessary.
12. Plug the Super Shuffle back into the wall.
13. Align the lasers so that the game will function
properly.
14. Secure the laser adjustment plate.
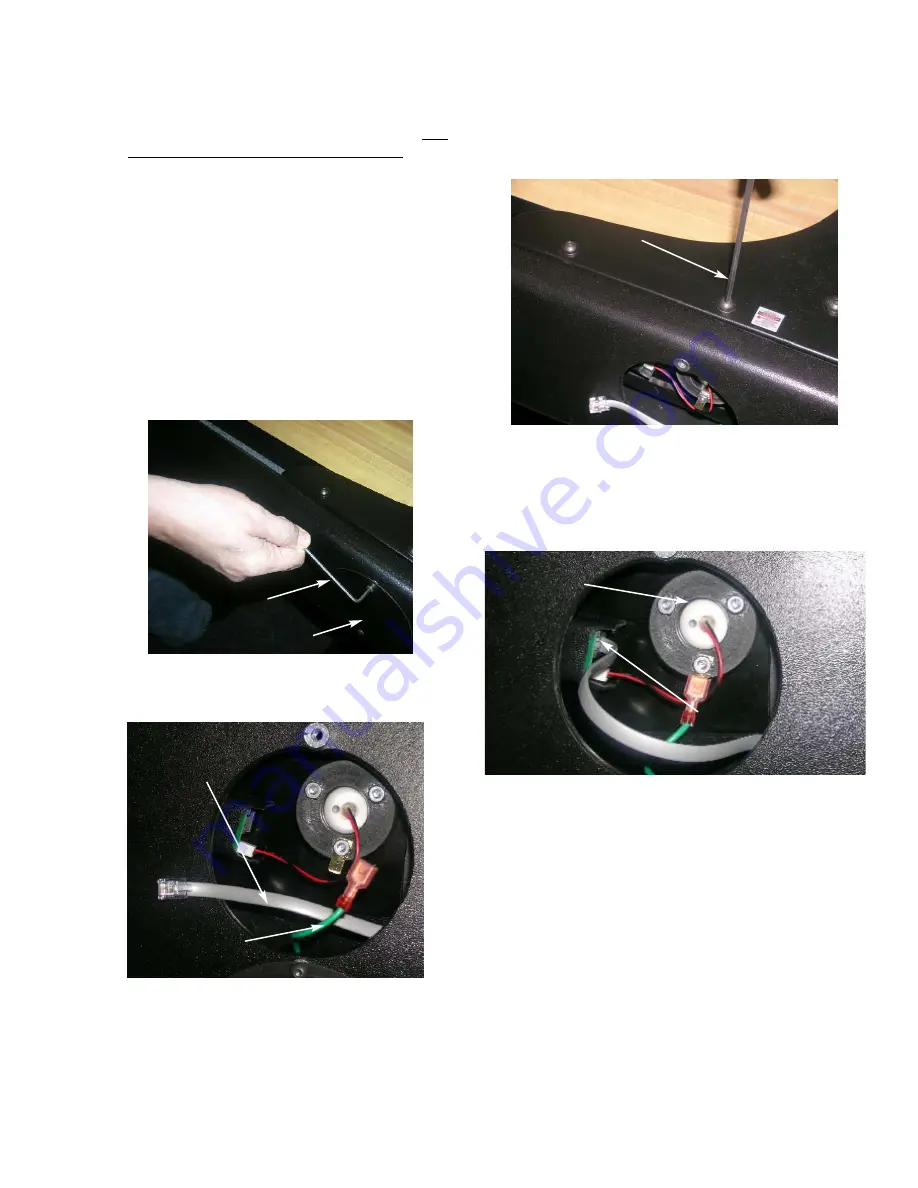
5. Unscrew the two screws, using a 5/32” or 4(mm) allen
wrench, from the top of the sensor module.
6. Remove the old sensor module.
a. The module will be a snug fit.
b. Gently wiggle the module back and forth to
loosen it.
7. Insert the new module. There are alignment pins in the
top of the sensor module. Use those to place the
sensor module in the correct position.
8. Replace and tighten the screws you removed in step 5.
9. Attach the green ground wire to the laser.
10. Plug in the communication cable into the laser port.
Green Ground Wire
Laser Communication Cable
5/32 Allen Wrench
Laser Ball
Communications Port
7. Remove the second half of the bracket. Take note of
how the bracket came out, you will have to put the
new one in the same way.
8. Install the new bracket and laser.
Once the nuts are
snug, give each one a quarter turn to tighten. DO
NOT OVER TIGHTEN THE BRACKETS.
Tightening them more will only damage the bracket.
9. Plug the Super Shuffle back in and turn on the game.
10.Go into Instructions from the main menu. This will
turn the lasers on for three (3) minutes.
11.Adjust the lasers as needed.
7.3 Replacing the Sensor Module
The Sensor Module of the Super Shuffle includes the
laser and the sensor.
1. Unplug the Super Shuffle from the wall.
2. Remove the top allen screw, using the 1/8 allen
wrench (3mm), from the Sensor adjustment plate.
Laser Adjustment Plate
1/8 Allen Wrench
3. Disconnect the green ground wire from the laser.
4. Disconnect the communication cable from the sensor
port.
Содержание Super Shuffle
Страница 21: ...Super Shuffle Operating Manual 17...
Страница 22: ...18 Super Shuffle Operating Manual...


