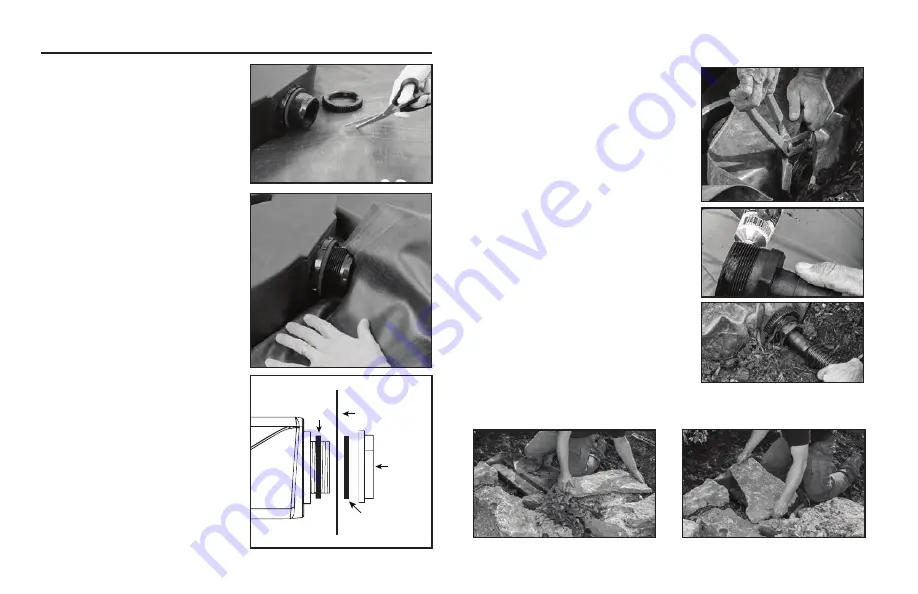
Liner
Retaining
nut
Outer
rubber
gasket
Inner
rubber
gasket
• Remove the retaining nut
and trim a hole in the liner
approximately 1/8 inch inside
of the score mark.
• Remove the outer rubber
gasket from the Waterfall
Spillway fitting. Insert the
hole in the liner over the
Waterfall Spillway bulkhead.
The liner should fit snug
around base of the Waterfall
Spillway fitting.
• Place the second rubber
gasket onto the fitting.
Note: The liner should be
located between both rubber
gaskets.
• Place retaining nut on
Waterfall Spillway and hand
tighten. The fitting is reverse
threaded, refer to the arrow
located on the retaining nut
for proper direction. Use
channel locks to tighten
down the retaining nut an
STEP 14
CONT...
additional ¼ to ½ turn past
hand tight being careful to not
over tighten retaining nut, which
could possibly crack the plastic
fittings.
• Install the MPT barb fitting
into the back of the Waterfall
Spillway. To provide a water
tight seal, use the included
silicone sealant on the threads
of the fitting. Be careful not to
over tighten pipe fitting, which
could possibly crack the plastic
fittings.
The Waterfall Spillway is now
ready for the pipe to be installed
and secured in place with a
hose clamp.
• Disguise the Waterfall Spillway using boulders, logs,
gravel, soil, or other creative landscape material.
18
www.aquascapeinc.com
Содержание DIY Waterfall Kit
Страница 1: ...DIY Waterfall Kit INSTRUCTION MANUAL ...
Страница 21: ...STEP 20 ENJOY 21 CAN 1 866 766 3426 US 1 866 877 6637 ...
Страница 43: ...ETAPE 20 À VOUS D EN PROFITER MAINTENANT 43 CAN 1 866 766 3426 US 1 866 877 6637 ...
Страница 65: ...PASO 20 DISFRUTE 65 CAN 1 866 766 3426 US 1 866 877 6637 ...
Страница 68: ...86240 Rev 1 16 2015 Aquascape Inc All Worldwide Rights Reserved ...


