aquabrass.com
Last revision: 10/11/2020
Town of Mount Royal 15018
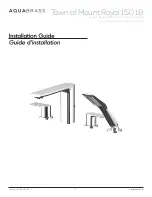
4-piece deckmount tub filler with handshower
robinet de bain 4 mcx avec douchette
4
1
2
4
5
6
3
1
Preparing the spou
Préparation du bec
2
Fig.1
Fig.2
11
2
WE RECOMMEND DRILLING A
1-3/8” DIAMETER HOLE.
Separate the spout (1) from the slip-
fit adaptor (2) and the ‘T’ body (3) as
shown (Fig.1).
NOUS RECOMMANDONS DE
PERÇER UN TROU DE 1 3/8” DE
DIAMÈTRE.
Séparer le bec (1) de sa base (2) et du
corps en ‘T’ (3) tel qu’illustré (Fig.1).
Put the slip-fit adaptor on top. From
underneath, reassemble the other ‘T’
body
components. Thread all-the-way in. Se-
cure with the set screw (6), Then, com-
plete the spout assembly and secure
with the set screws (6).
1
4
5
7
2
3
6
8
3
Fig.3
Place the metal washer (6) and the
rubber washer (5) on the threaded
valve body (8).
From underneath,
insert
the threaded body through the hole.
Screw the handle base (3) with the
rubber ring (4) to the valve and place
the handle (2). Under the deck, secure
the metal nut (7) with the 3 screws pro-
vided.
Secure the handle (2) with screw and
place the cap (1).
Installing the handles
Installation des poignées
Installing the spout
Installation du bec
Placer la rondelle en métal (6) et la ron-
delle en caoutchouc (5) sur le corps du
tube
fileté (8). Du dessous, insérer le corps
fileté dans le trou. Visser la base de la
poignée (3) avec la bague en caou-
tchouc (4) sur la vanne et placer la poi-
gnée (2). Sous le comptoir, fixer l’écrou
métallique (7) à l’aide des 3 vis fournies.
Fixer la poignée (2) avec la vis et placer
le capuchon (1).
Placez l’adaptateur sur le dessus. En des-
sous, assembler les autres composants du
corps en «T». Visser jusqu’au fond. Fixer
avec la vis de fixation (6), puis terminer
l’assemblage du bec. Compléter le bec
et le fixer avec les vis de fixation (6).
Содержание ABFB15018PC
Страница 11: ......


