background image

-8-

VII. REMOVING AND REPLACING THROUGH-HOLE COMPONENTS

(ENSURE THAT YOU ARE IN AUTO MODE)

A. Prepare board surface and component to be inserted appropriately
B. Ensure laser light locator is centered in wave nozzle
C. Enter program # desired (in edit mode)
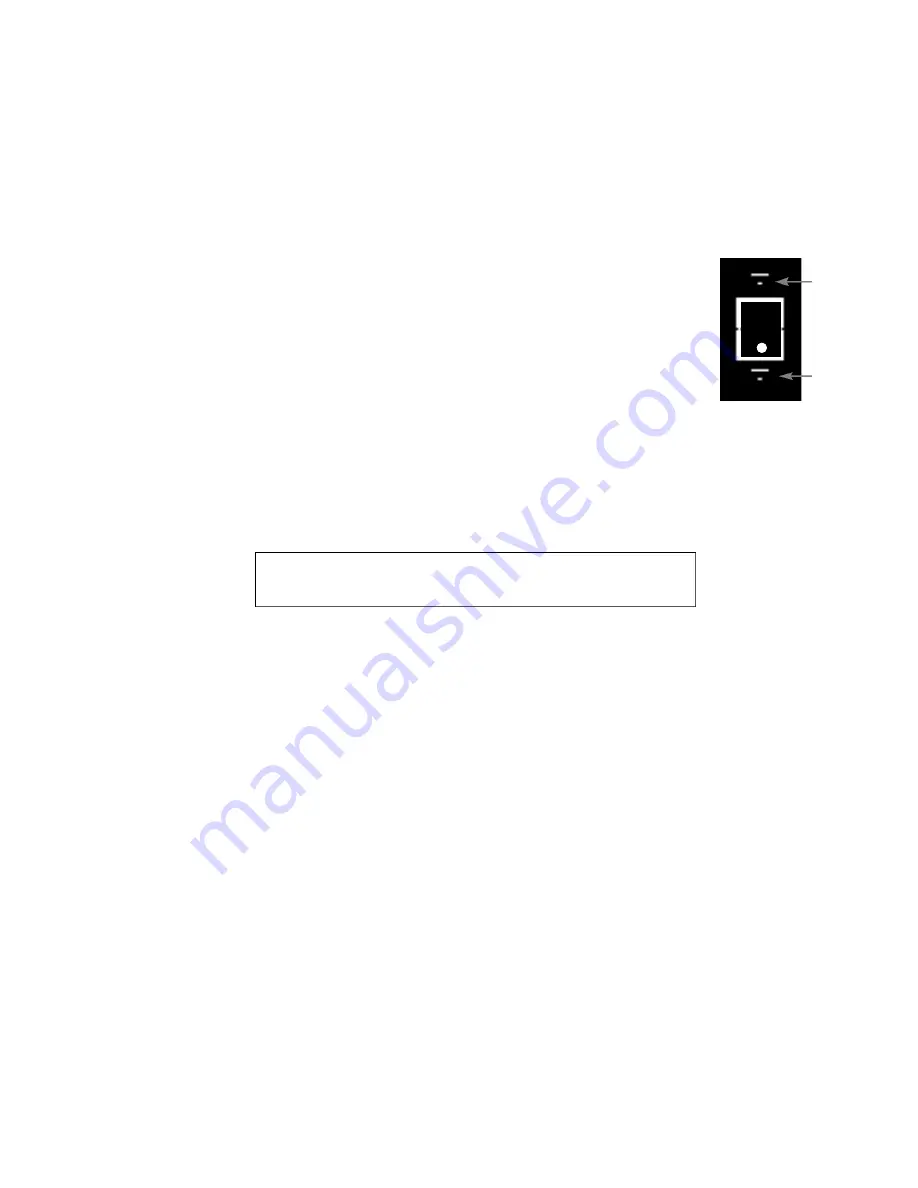
D. Ensure position switch is in Remove (down) position (see fig. 4) 
E. Press foot pedal and wave will activate for wave time indicated 
F. Remove component with tweezers while wave is activated
G.

(For GW-10A only, machine with blowoff feature):

1. Press position switch to Insert (up) position  (see fig. 4)
2. Place blowoff nozzle flush onto holes on board
3. Press foot pedal and nozzle will activate for blowoff time indicated
4. Remember to press position switch back to Remove (down) position 

before next step

H. Press foot pedal and insert part while wave is active 

(apply flux if required)

I. Remove board to let solder joint cool

IX. SHUTDOWN 

CAUTION

: After turning off main power, leave unit plugged in for 1 hour  

minimum to cool unit.

A. Turn main power OFF at rear of unit.  Last program will be saved for next startup.

X. MAINTENANCE

A. Solder Surface:

As a natural result of oxidation, a film of oxide (dross) will appear on the sur-
face of the solder.  The oxide film protects and inhibits further oxidation of the 
s o l d e r.  But the accumulation of too much dross is not desirable.

Remove this dross daily using a stainless steel spoon or ladle.  After removing 

the dross, restore solder to correct level by adding solder bars to the pot.

B. Solder Quality:

In time the solder may become contaminated.  Check the solder annually or 
more frequently if necessary.  A small sample may be sent to your local solder 
supplier or to a qualified lab for analysis.

To remove copper contamination from solder, set the solder pot temperature to 

369°F (187°C) and keep it ON for 8 hours.  Excess copper-rich solder can be 

skimmed off from the top of the solder.  For better results repeat this procedure 

2-3 times.

Note:

This procedure applies only to eutectic tin/lead alloy (Sn63/Pb37).

N O T E :

If you have no blowoff option, always leave

position switch in the remove position.

position switch

Insert

Remove

Содержание Gold-Wave GW-10

Страница 1: ...Serial no _____________ The Finest in Equipment for the Electronics Industry TM...

Страница 2: ...0 Hz 10 Amps max Compressed Air Option clean dry air 50 100 psi 1 CFM Solder Capacity 50 lbs 23 Kg approx WARNING FAILURE TO READ AND FOLLOW THESE INSTRUCTIONS IN THEIR ENTIRETY PRIOR TO INSTALLATION...

Страница 3: ...I O N Do not turn on solder heater until solder pot is filled with solder E Attach foot pedal to connector at front right side of machine F Initial Filling of Solder 1 Remove board holder plate and t...

Страница 4: ...ended level add solder until the proper level is reached 6 Replace top insulation and board holder plate 7 Turn machine ON at rear of unit When machine is first turned on display will show RUN mode an...

Страница 5: ...temperature gloves lift off Board Holder Plate to access solder 2 IMPORTANT Ensure nozzle is completely dry of any moisture It is recommended that nozzles recently washed may be preheated at temperatu...

Страница 6: ...Light Locator Laser Locator Assembly Bottom Impeller Leveling Feet Control Panel Foot pedal connection Bayonet mount nozzle Pressure Chamber Solder Cooling Fan Pump Motor Pump Motor Housing Fig 3 Sol...

Страница 7: ...the EDIT mode 4 The machine will operate in the RUN mode Blow off time Wave height Wave time sec Wave count down Standby wave height Fig 5 260 10 95 1 0 01 260 10 65 ON RUN Program Set point temp C A...

Страница 8: ...incrementing until the key is released This is the ENTER key When you are satisfied with the value of the parameter or ON OFF status in the edit mode press This will save the settings and auto matical...

Страница 9: ...esirable to switch the machine to manual mode For example when you want to make trial runs for a certain board type or to do some troubleshooting work Press F Prg EDIT will be displayed Change to Prg...

Страница 10: ...imum to cool unit A Turn main power OFF at rear of unit Last program will be saved for next startup X MAINTENANCE A Solder Surface As a natural result of oxidation a film of oxide dross will appear on...

Страница 11: ...ch the solder does not adhere results from the solder pulling back from the surfaces prior to solidifying 3 Disturbed Joint When components move in relation to PCB during the solidification stage dist...

Страница 12: ...is molten and has reached the preset temperature then check the solder pump and motor Solder motor not running Check voltage to the motor Check the relevant SSR and circuit breaker Replace the SSR and...

Страница 13: ...11 Fig 6 See electrical schematics for details Controller board Emergency stop Position switch Transformer To thermocouple Solder pump control SSR for heaters Terminal block...

Страница 14: ...screws 2 Slide 2 sheet metal covers in from front of machine on either side of nozzle 3 Adjust paths using thumb screws to position PC board between fingers 4 Operate machine using GW 10 operating man...

Страница 15: ...and turning clockwise 4 Open flow meter valve fully by turning flow meter knob counterclockwise 5 Adjust N2 standby valve by turning screwdriver counterclockwise until desired N2 standby rate appears...

Страница 16: ...ransformer GW 10 SPC solder pump control GW 10 SSR solid state relay GW 10 TB terminal block GW 10 SWITCH position switch GW 10 ES emergency stop switch GW 10 UBF universal board fixture option GW 10...

Страница 17: ......

Страница 18: ......

Страница 19: ......

Страница 20: ......

Страница 21: ......

Страница 22: ......

Страница 23: ......

Страница 24: ......

Отзывы:

Похожие инструкции для Gold-Wave GW-10