background image

PRODUCT

2


CHAP

Welco

The Gra
save pow
Grand  P
value.  T
monitor.
arrangem
match th
 

1.1 Un

Confirm 
missing 
 

1.


POS

(ord

4. Quic


T OVERVIEW

PTER 1

ome 

nd POS s

wer cons

POS includ
The main 

. The co
ment. Up

he mood o

npacking

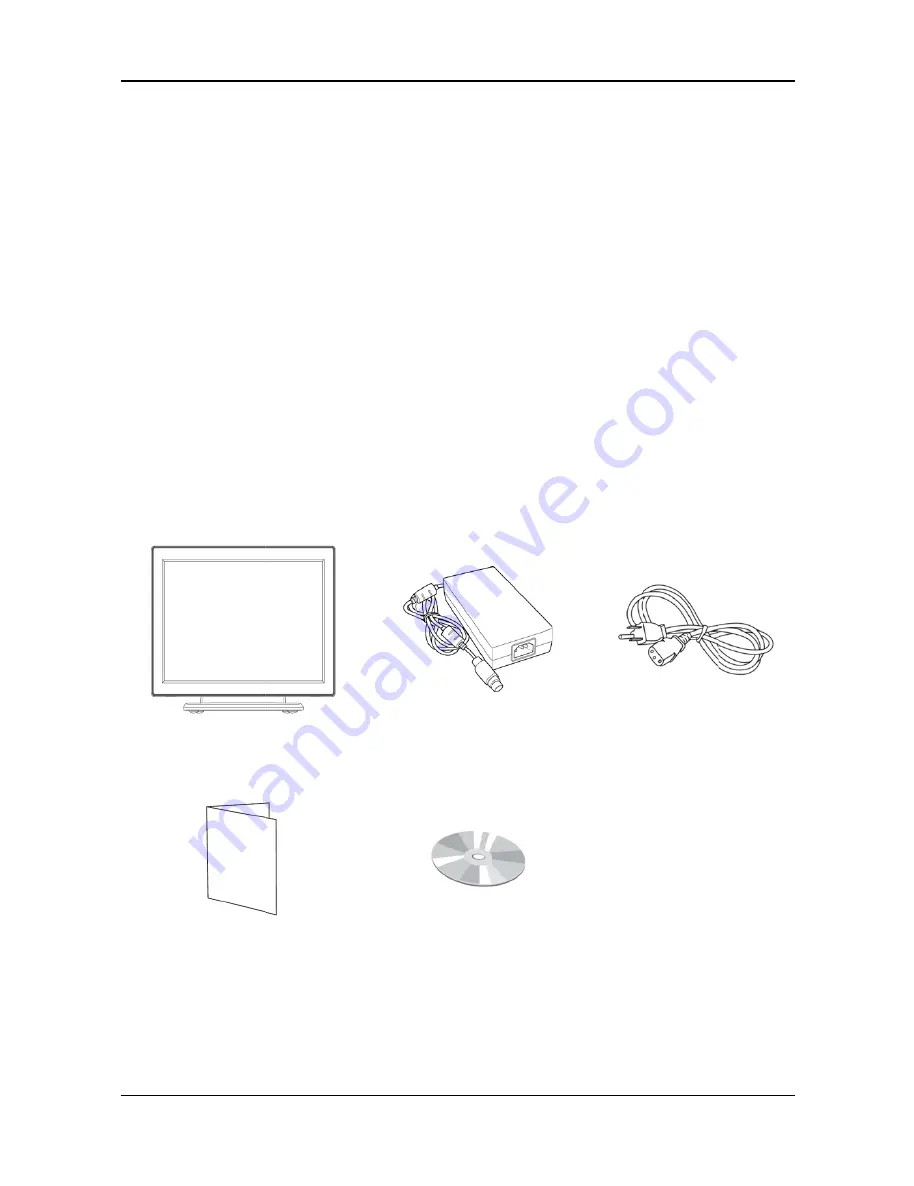
that all t

or damag

S Termina

dered spe

ck Refere


W


1 PRO

series is th

umption  t

des energ

board of

ompact  a

 to five c

of the ope

the follow

ged, conta

l Main Un

ecification)


nce Guide


ODUCT

he All-in-O

to meet t

gy saving

f Grand P

and solid

color opti

eration en

wing items

act the de

it 

2

(User

T OVER

One POS 
the trend

, low noi

POS is sk

d stand 

ons for t

nvironmen

s are con

ealer from 

. Power A

5. Drive

r’s Manua

RVIEW

Terminal

 for gree
se operat

killfully em

gives yo

he front 

nts. 

ntained in

whom yo

Adapter 


r CD 

l included


GP

which is 

n product

tion and 

mbedded 

ou flexible

panel are

 the carto

ou purcha

3

d) 

P-3460 POS

conceptu

ct. The fea

high perf
in the sl

e workin

e also pro

on. If any

sed the p

3. Power c


S Terminal

ualized to 

atures of 

formance

im touch 

ng space 

ovided to 

y item is 

product. 

cord 


All manuals and user guides at all-guides.com

all-guides.com

Содержание Grand POS GP-3460

Страница 1: ...http www appostar com Grand POS GP 3460 User s Manual Edition JAN 2014 Version 1 00 All manuals and user guides at all guides com a l l g u i d e s c o m...

Страница 2: ...eir w recycling ut where city office product s Comm d found to of the FCC ainst har rates uses sed in acc dio comm ot occur rference to equipment one or m ceiving an etween the to an outl ected xperie...

Страница 3: ...ublication from time to time in the contents hereof without obligation of the manufacturer to notify any person of such revision or changes Copyright This work is copyrighted Reproduction or retransmi...

Страница 4: ...roken The following instructions will help you to make better use of this product 1 Keep the machine away from locations subject to high humidity dust or temperatures that exceed the specification Ref...

Страница 5: ...READER MSR INSTALLATION 8 2 2 CPD 3210 VFD LCD CUSTOMER DISPLAY INSTALLATION 9 2 3 PCM SERIES 2SECOND LCD INSTALLATION 10 CHAPTER 3 SOFTWARE INSTALLATION 11 3 1 MAINBOARD DRIVER INSTALLATION 11 3 2 PE...

Страница 6: ...and solid color opti eration en wing items act the de it 2 e User T OVER One POS the trend low noi POS is sk d stand ons for t nvironmen s are con ealer from Power A 5 Drive r s Manua RVIEW Terminal...

Страница 7: ...POS Terminal 3 1 2 Appearance Front View Rear View 15 LCD touch panel Front bezel Base MSR module optional Attachable on both sides I O Cover Hinge cover Storage for power adaptor All manuals and user...

Страница 8: ...PRODUCT OVERVIEW 4 GP 3460 POS Terminal Side View Tilt angle 0 85 degree 85 All manuals and user guides at all guides com...

Страница 9: ...x 4 t with RJ45 onfusion w Remove e HDD S slot n No x 2 FF splay 4 5 with the L the lid be SSD brack o Por COM COM COM Stora COM CAS DRAW LAN port efore use ket the H P rt M 1 Ser M 2 Ser M 4 Ser age...

Страница 10: ...le dual VGA Port 1 x VGA DB15 Speaker 2 x Integrated 1 5W stereo speaker Ethernet Port 1 x RJ45 10M 100M 1GB Base T Parallel Port 1 x Bi directional Parallel USB Port 4 x USB 2 0 Type A DC output Jack...

Страница 11: ...GP 3460 POS Terminal 7 Mechanical Housing Color Black Construction ABS SECC Dimension W x D x H 350 x 242 x 320 mm NET GROSS N W 5 8 kg G W 7 7kg All manuals and user guides at all guides com a l l g...

Страница 12: ...to prevent possible damage to the product 2 1 Magnetic Stripe Reader MSR Installation An optional MSR can be installed in both right left side of GP 3460 By default the MSR is installed on the right s...

Страница 13: ...Step1 Use flat screw driver to remove the stand cover and break up the lid at the bottom of the cover Step2 Fit in the bracket and screw it up Step3 Install the VFD onto the bracket and lead the cabl...

Страница 14: ...the stand cover and break up the lip at the bottom of the cover Step2 Fit the bracket in position with 2 screws Step3 Reinstall the stand cover Step4 Hang the LCD onto the bracket and REMEMBER to scr...

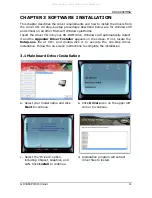
Страница 15: ...t and the Appostar Driver Installer appears on the screen If not locate the Setup exe file at CD and double click it to execute the one step driver installation Follow the on screen instructions to co...

Страница 16: ...f Select Install this driver software anyway in Windows Security window to continue the installation procedure g Select Install in Windows Security window to continue the installation procedure h Sel...

Страница 17: ...ipheral Devices b Click Touch Panel c Click Next on the Welcome screen to continue d Ignore the Install PS 2 interface driver option Click Next to continue e Select the Install RS232 interface driver...

Страница 18: ...k Next to continue h Select the Destination Folder or use the default one listed i Type a Folder name or use the default one listed Click Next to continue j A progress window appears Please wait k Cli...

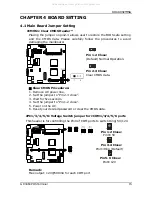
Страница 19: ...Clear CMOS data Clear CMOS Procedures 1 Remove AC power line 2 Set the jumper to Pin 2 3 close 3 Wait for five seconds 4 Set the jumper to Pin 1 2 close 5 Power on the AC 6 Reset your desired passwor...

Страница 20: ...4 Close Pin1 Ring 6 5 Pin 5 6 Close Pin1 12V Remark Max output 12V 500mA for each COM port JCOM2 Serial Port Connector Pin Assignment 1 COM2_RI 2 COM2C_DSR 3 COM2C_TXD 4 COM2C_RXD 5 COM2C_RTS 6 COM2C_...

Страница 21: ...h but the cursor is drifting use the touch tool from the Driver CD to execute calibration or draw test The Integrated VFD LCD display is not working properly 1 Make sure the power switch under the dis...

Отзывы: