8
3. MOUNTING THE FREESTANDING KIT
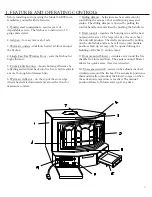
Tool needed: Drill
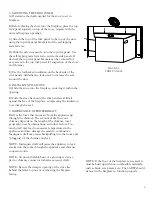
A) Remove the wooden blocks from the bottom of the
stove. A drill may be used to remove the screws.
B) Position the pedestal on the bottom of the stove so that
the “turned in” flanges are against the bottom of the stove.
The front flange corners should be aligned with the widest
stove corners.
C) Attach the pedestal using the drill screws provided. Drill
into the holes after the pedestal is positioned correctly. The
screws will make their own holes in the stove bottom.
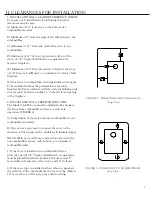
4. CHIMNEY INSTALLATION (GENERAL)
A) The single wall stove pipe used to connect the stove to
the flue, whether masonry or factory-built, must be a
minimum of 24-gauge blue or black steel.
B) Secure every pipe joint with three or more sheet metal
screws to prevent accidental separation.
C) If an elbow is installed, the horizontal section of the
stove pipe should slope 1/4” per foot, or run toward the
stove to allow creosote to drip into the firebox.
D) Always install the single wall stove pipe with the male
(crimped) end down to prevent leakage of creosote or
moisture.
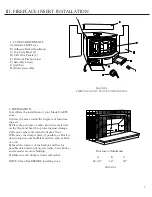
5. INSTALLATION INTO MASONRY FLUE
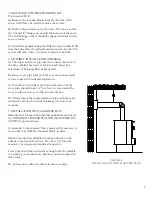
Masonry flue for use with solid fuel appliances must meet
the NATIONAL FIRE PROTECTION ASSOCIATION’S
CODE 211 specifications.
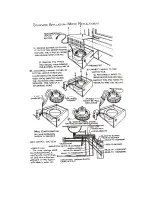
Connection to the masonry flue is made with a masonry or
terra-cotta type thimble cemented firmly in place.
Material around the thimble connection must provide
adequate protection from fire. Use either 24” of solid
masonry or an approved insulated connector.
Stove pipe should be inserted far enough into the thimble
to assure a good connection, but must not extend past the
flue lining.
Do not use more than one elbow in the stove pipe.
FIGURE 8
INSTALLATION INTO MASONRY FLUE
Содержание 36-BW
Страница 18: ......


