background image

13

© Apollo Fire Detectors Limited 2015

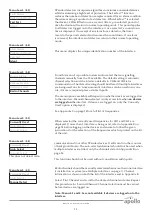
Menu Level: (4.3)

Fault Status
Background Level

Fast Test

Ident

XPander detectors incorporate algorithms to minimise unwanted alarms 
whilst maintaining a high level of protection. The FasTest™ function 
reduces the number of detection samples required for an alarm condition 
therefore making it quicker to test detectors. When FasTest™ is selected 
the device’s LED will flash once a second. After a pre-selected period of 
time the device will return to normal operating mode. This period applies 
to all detectors logged on to the interface. Once selected, a count-down 
time is displayed. On receipt of an alarm from a detector, the timer 
resets to the period selected and resumes the count down. If no alarm 
is received, the interface and detectors return to their normal operating 
mode. 

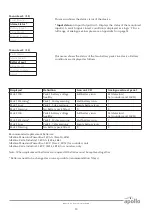
Menu Level: (4.4)

Fault Status
Background Level
Fast Test

Ident

 
This menu displays the unique identification number of the interface.

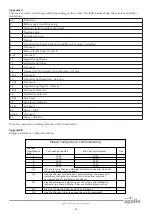
Menu Level: (5.0)

Device Status
Add New Device
Remove Device
Interface Status

Radio Channels

From this menu it is possible to view and/or select the two signalling 
channels manually from the 32 available. The default setting is automatic 
channel selection and the interface defaults to CH8 and CH26 for 
communication. The default setting should be altered if multiple interfaces 
are being used on site. A maximum of 5 interfaces can be used in any one 
site, if more is required please contact Apollo.  

The menu options available will depend on whether devices are logged on 
to the interface. Manual channel select is only accessible when 

no devices 

are logged on

 the interface. If devices are logged on, only the ‘Currently 

Used’ option is displayed.

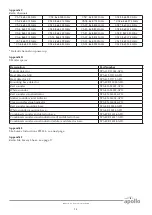
See Appendix C on page 15 for a full list of frequencies.

Menu Level: (5.1)

Currently Used

Auto Select
Manual Select

When selected the currently used frequencies for CH1 and CH2 are 
displayed. If more than 1 interface is being used, refer to Appendix B on 
page 14 before logging on the devices and ensure to follow the given 
instructions for the selection of the frequencies which is printed on the lid 
of the unit.  

Menu Level: (5.2)

Currently Used

Auto Select

Manual Select

This does not detect radio 

communications from other XPander devices. It will scan for other sources 
of background noise. The auto selected channels should not be used when 
multiple interfaces are fitted, only the channels stated in Appendix B on 
page 14. 

This function should not be used without consultation with Apollo.

Menu Level: (5.3)

Currently Used

Auto Select

Manual Select

Radio channels should be manually selected when more than one interface 
is installed on a system (see Multiple Interfaces on page 7). Channel 
information is shown on both the lid of the interface and in Appendix B. 

Select ‘First Channel’ and scroll to the desired channel and enter. Repeat 
this procedure for ‘Second Channel’. Channel selection must be carried 
before devices are logged on.

Note: Menu 5.2 and 5.3 are not available if devices are logged on to the 
interface.

Содержание XPander XPA-IN-14011-APO

Страница 1: ...Commissioning guide ...

Страница 2: ...Interfaces 7 Logging on interfaces 7 Log on procedure 8 Menu options 9 Menu Level 1 0 9 Menu Level 1 1 9 Menu Level 1 2 10 Menu Level 1 3 10 Menu Level 1 4 11 Menu Level 1 5 11 Menu Level 1 6 11 Menu Level 1 7 11 Menu Level 2 0 12 Menu Level 3 0 12 Menu Level 4 0 12 Menu Level 4 1 12 Menu Level 4 2 12 Menu Level 4 3 13 Menu Level 4 4 13 Menu Level 5 0 13 Menu Level 5 1 13 Menu Level 5 2 13 Menu Le...

Страница 3: ...s can send pre set analogue values to indicate low battery detector contaminated detector tamper and low signal strength fault conditions Up to 5 interfaces per site contact Apollo for more information Up to 31 devices per interface Loop powered interface Including bi directional Short Circuit Isolator Wireless addresses seen by control panel as normal addresses Radio base with wireless circuitry ...

Страница 4: ...O Red sounder with mounting base XPA CB 14001 APO White sounder with mounting base XPA CB 14002 APO Red sounder visual indicator with red mounting base XPA CB 14003 APO Amber sounder visual indicator with white mounting base XPA CB 14004 APO Clear sounder visual indicator with white sounder mounting base XPA CB 14005 APO Site Survey Kit XPA TE 14075 APO Single input output unit XPA IN 14011 APO Du...

Страница 5: ...tructions see page 08 Quick Start Guide for XPander Diversity Site Survey 1 Use the site survey tool to check the signal strength 2 Record all the survey signal strengths on the site survey sheet 3 Fit the interfaces as per instructions in the quick start guide below 4 Log the devices on to the interface as per instructions in the quick start guide below 5 Check the signal strength for each logged...

Страница 6: ...formation on features designed to help commission and troubleshoot a system Please note Should building structure change the site survey will need to be repeated The system will not comply to BS 5839 or other national codes if the site survey is not carried out properly and all supporting paper work completed site survey sheet Menu scrolling and selecting Selecting Menu Options A rotary select swi...

Страница 7: ...this manner until all 5 have been labelled Use the table in Appendix B on page 14 to set the channels on the interfaces Logging on interfaces Up to 31 wireless detectors or alarm signalling devices may be assigned to a single interface Prior to adding devices to the Interface batteries must be inserted the power jumper positioned correctly and the mounting plates fitted During the device log on ro...

Страница 8: ...re Ensure batteries are installed correctly and fit the battery jumper shown below across both header pins Note The XPander Combined Sounder Visual Indicator uses a DIL switch to connect the battery supply Push the rotary select switch on the interface and release Turn until add new device is shown on the menu and push to select On the device press the log on button shown below for two seconds A L...

Страница 9: ... the fault status of the device If multiple faults are present these can be viewed by turning the rotary select switch For a full range of analogue values please see Appendix A on page 14 Addr 067 L Optic Optic Optical Detector Sound Sounder Device I O Input Output Device Radio Loop Interface Module Multi Multisensor Detector Heat A1R Heat Detector H Temp CS Heat Detector MCP Manual Call Point Cmb...

Страница 10: ...ng Half battery icon 7 Pack 2 Low Pack 2 7 day warning Empty battery icon 7 Pack 2 Missing No battery pack fitted X 0 Recommended replacement batteries Alkaline Panasonic Powerline 1 5V AA Size M LR6 Alkaline Varta Industrial 1 5V AA 4006 LR6 Alkaline Panasonic Powerline 1 5V C Size L LR14 for sounders only Alkaline Varta Industrial 1 5V C 4014 LR14 for sounders only Note When replacement batterie...

Страница 11: ...el 1 5 Fault Status Alarm Status Battery Level Signal Level Manual Update Ident When selected the signalling status of all devices is updated The current status can then be viewed as described in the signal level menu Menu Level 1 6 Fault Status Alarm Status Battery Level Signal Level Manual Update Ident This menu shows the unique 5 digit identification number for the device This may be recorded o...

Страница 12: ...e ceiling Warning Once devices have been removed they will no longer be able to signal an alarm If the device is permanently removed this will also need to be removed from the control panel Menu Level 4 0 Device Status Add New Device Remove Device Interface Status Radio Channels From this menu the status of the loop interface and background noise can be viewed Menu Level 4 1 Fault Status Backgroun...

Страница 13: ...te if more is required please contact Apollo The menu options available will depend on whether devices are logged on to the interface Manual channel select is only accessible when no devices are logged on the interface If devices are logged on only the Currently Used option is displayed See Appendix C on page 15 for a full list of frequencies Menu Level 5 1 Currently Used Auto Select Manual Select...

Страница 14: ...50 Pre alarm detector 51 63 Not used 64 Alarm MCP 65 84 Not used 85 Alarm detector Note No response to polling indicates an RF comm failure Appendix B Multiple interfaces channel selection Please complete on commissioning XPander Interfaces on Site 1st Channel Selected 2nd Channel Selected Tick 1 Ch 08 Ch 26 2 Ch 16 Ch 32 3 Ch 01 Ch 20 4 Ch 04 Ch 23 5 Ch 12 Ch 29 Q 1 If there is more than one XPan...

Страница 15: ... channels on power up Appendix D XPander spares Description Part Number Optical detector XPA OP 12034 APO Heat detector A1R XPA HT 11170 APO Heat detector CS XPA HT 11171 APO Mounting base detector XPA WB 10022 APO Red sounder XPA SO 14001 APO White sounder XPA SO 14002 APO Red sounder visual indicator XPA SN 14003 APO Amber sounder visual indicator XPA SN 14004 APO Clear sounder visual indicator ...

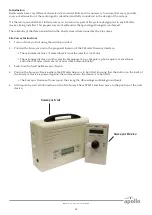
Страница 16: ...veyor Unit using the switch provided 2 Position the Surveyor unit in the proposed location of the XPander Diversity interface The minimum distance of metal objects from the interface is 400mm The minimum distance to other electrical equipment e g computers photocopiers fax machines and other XPander interfaces is 2 metres three dimensionally 3 Switch on the hand held Surveyor Device 4 Position the...

Страница 17: ...N Device Type O H MCP S SB I O Loop address Location Approx distance from interface AV Site Survey Site Survey dB Site Survey Site Survey dB Background Noise Levels dB Signal Strength CH1 LI D CH2 LI D CH1 LI D CH2 LI D 1 2 3 4 5 6 7 8 9 10 11 12 13 14 15 16 17 18 19 20 21 22 23 24 25 26 27 28 29 30 31 XPander Radio Site Survey Sheet ...

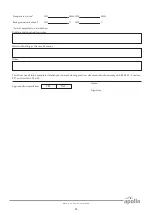
Страница 18: ...CH2 to be completed on installation Building and construction notes Status of building at the time of survey Notes Approved for installation YES NO Name Signature This sheet needs to be completed and kept as commissioning and user documentation to comply with BS 5839 1 section 2 27 and section 5 39 40 ...

Страница 19: ...PP2286 2015 Issue 11 ...

Отзывы: