background image

antyr

ra

W

3

For peace of mind and valuable services, please take a moment to register your product at www.tmaxdigital.com

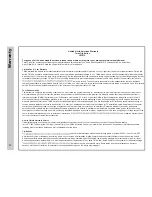
Limited One (1) Year Warranty

TMAX warrants the parts in this product against defects in material or workmanship for a period of one (1) year from the date of original purchase. During this 
period, TMAX will replace a defective part with a new or refurbished part without charge to you. TMAX also warrants it will be responsible for labor charges for
a period of one (1) year from the date of original purchase. It is the responsibility of the consumer to retain original packaging or provide like packaging in order 
to facilitate the warranty process. TMAX will incur no liability whatsoever to provide packaging for warranty items. Upon receipt of the warranty item, should 

ty may be voided. The consumer is responsible for the transportation cost and insurance 

charges (if applicable) to an authorized Service Center or TMAX. You must receive a return authorization number before taking or sending a unit in for warranty 
service. Service that is provided is warranted for the duration of the original warranty or 45 days. 

Your Responsibility

The warranty is subject to the following conditions: You must retain the original bill of sale (or a photocopy) to provide proof of purchase even if the product 
was received as a gift. You must call the provided phone number for an assessment of the problem. No warranty service shall be provided until a claim or 
return authorization (RMA#) is provided to you. If the screen size is below 32”, attach or print the RMA# to the shipping carton along with a copy of the bill 
of sale and ship back to the address provided to you. It is your responsibility to retain packaging or provide like packaging in order to ship and facilitate the 
warranty process on televisions. TMAX will incur no liability whatsoever to provide packaging. You are responsible for all tariffs and taxes imposed to ship or 
receive warranty replacement units to and from the U.S. over the Canadian border. Labor service charges for TV installation, setup, adjustment of consumer 
controls and installation or repair of any type of antenna or cable systems are not covered by this warranty. Reception problems caused by inadequate 
antenna or cable systems are your responsibility. Warranty extends only to defects in materials or workmanship as limited above and do not extend to any 
other products or parts that have been lost, mistakenly discarded, damaged by misuse, accident, neglect, acts of God such as lighting, or voltage surges in the 
home, improper maintenance or use in violation of instructions,

ved or altered. Warranty does 

not cover cosmetic or missing/lost accessories.

How to Obtain Warranty Service

If after following the user manual, quick start and troubleshoo

vice directly,

call 1-877-833-1888 daily from 7am-9pm (Central Time). You will be instructed on how your claim will be processed. Have pertinent information available 
including proof of purchase details and a full understanding of the issue.

Limitations

red to precise tolerances with active performing pixels of at least 99.99%. As such, it is NOT

a malfunction to view multiple non-performing pixels on your screen. All warranties implied by state law are expressly limited to the duration of the limited 
warranties set forth above with the exception of warranties implied by state law as hereby limited, the foregoing warranty is exclusive and in lieu of all other 
warranties, guarantees, agreements, etc., with respect to repair or replacement of any parts. TMAX shall not be liable for consequential or incidental damage. 

ghts that may vary from state to state. Some states don’t allow limitations on warranty 

duration, exclusions or limitation of incidental or consequential damages, so the above may not apply.

Limited North American Warranty

Tmax Digital Inc.

LE191

2

Tmax Digital Inc. expresses the following non-transferable and limited warranty on a new Apex Digital LE191

2

 purchased from an authorized

Apex Digital® U.S. retailer. Retain the original bill of sale for proof of purchase.

1

Содержание LE1912

Страница 1: ...LE1912 USER S MANUAL 19 LED TELEVISION 19 ...

Страница 2: ...ital device pursuant to Part 15 of the FCC Rules These limits are designed to provide reasonable protection against harmful interference in a residential installation This television generates uses and can radiate radio frequency energy and if not installed and used in accordance with the instructions may cause harmful interference to radio communications However there is no guarantee that interfe...

Страница 3: ... ...

Страница 4: ... ...

Страница 5: ...ial Setup Wizard TV Channel Setup Channel Auto Scan Picture Settings Contrast Brightness Color Tint Sharpness Color Mode Specifications Troubleshooting Index Warranty Audio Settings Bass Treble Balance Audio Language Date Time Settings Setup Settings Menu Language Transparency Zoom Mode Noise Reduction XVS Restore Default Closed Caption Settings Advanced Setting for PC Parental Control US Parental...

Страница 6: ...reduce power consumption and the associated cost of use From the factory the default picture setting is currently set in the Power Saving mode We recommend that you read the user manual thoroughly before use to fa miliarize yourself with the installation and adjustment options available to you thereby enjoying all the features of the LE1912 for many years to come For peace of mind and valuable ser...

Страница 7: ...f you do not plan to use the remote control handset for an extended period of time Do not mix bat teries of different age and or type Always discard used batteries safely Do not expose remote control to liquids direct sunlight or sources of excessive heat The IR receiver will not work properly if TV is in direct sunlight the remote control is pointed off axis or an object is in the IR path Place t...

Страница 8: ...ctions Press ENTER to confirm Exit 12 Press to exit a menu that is displayed Return 13 Press to return to the previous menu displayed Sleep 14 Press to activate the Sleep function to turn off the TV automatically OFF 5 Min 10 Min 15 Min 30 Min 45 Min 60 Min 90 Min 120 Min 180 Min 240 Min OFF Menu 15 Press to display the Main menu Zoom 16 Select viewable Wide Zoom Cinema Normal pg 27 17 Last 18 Pres...

Страница 9: ...ted menu then press VOL VOL to adjust settings 3 Channel CH CH Press the CH CH buttons to select a channel in TV mode 4 Volume VOL VOL Press the VOL VOL buttons to adjust volume up or down 5 Power Press the POWER button to turn the LCD display ON OFF standby When the power is on the blue LED illuminates The screen image will appear within a few seconds I w e i v r e v O V T A soft blue light illum...

Страница 10: ...2 SERVICE Port For service technician use only TV Overview Rear Panel oval Pedestal Rem 9 TV REAR PANEL 4 SERVICE PC IN COMPONENT YPbPr AV HDMI2 a ...

Страница 11: ...n o i t a l l a t s n I d r o C r e w o P o t n o i t c e n n o C x o B e t i l l e t a S e l b a C a n n e t n A 10 SERVICE PC IN COMPONENT YPbPr SERVICE PC IN COMPONENT YPbPr ...

Страница 12: ... i t a l l a t s n I s t u p n I I M D H o t n o i t c e n n o C 11 SERVICE PC IN COMPONENT YPbPr AV HDMI2 SERVICE PC IN COMPONENT YPbPr AV HDMI2 INPUT SOURCE INPUT SOURCE TV AV Component HDMI 1 HDMI 2 VGA ...

Страница 13: ...equipment to the Compo nent YPbPr input on the TV s rear panel Connect white red audio cables for sound from the audio L R output jacks on your external equipment to the Component YPbPr L R input on the TV s rear panel How to Use Press the INPUT button on the TV remote control Use arrow but tons to highlight the input to view Component then press ENTER Connecting External Equipment to Component Vi...

Страница 14: ...w Audio White Red Connect the yellow video cable from the video output jack on your external A V equipment ie DVD player set top box to AV input on the TV s rear panel Connect the white red audio cables for sound from the audio L R output jacks on your external equipment ie DVD Player set top box to the AV L R jacks on the TV s rear panel How to Use Press the INPUT button on the remote control Use...

Страница 15: ... output jack to the audio input on the TV s rear panel How to Use Press the INPUT button on the remote control Use arrow but tons to highlight the input to view VGA then press ENTER NOTE If your PC uses a standard signal mode the screen will adjust automatically TV REAR PANEL Connecting a Personal Computer with VGA to your television a o t n o i t c e n n o C r e t u p m o C l a n o s r e P 14 Opt...

Страница 16: ...mple Diagram illustrates the connection of audio cables from your AV equipment to a stereo receiver instead of the audio L R jacks on the TV s rear panel NOTE When audio cables are connected to a stereo receiver am How to Use Video Press the appropriate INPUT button on the remote control Use arrow buttons to highlight the input to view then press ENTER How to Use Audio Select the appropriate input...

Страница 17: ...16 zard up Wi t l Se a i t i n I 16 up t e S TV can reduce power consumption provides a more dynamic picture that will increase power consumption ...

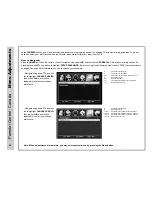
Страница 18: ...o Scan may take several minutes to complete Select CABLE if you subscribe to a pay television service with out a set top box Using the arrow button to highlight CABLE Press the arrow button to select AUTO SCAN Press ENTER and the cursor will move up and CABLE SYSTEM will be displayed next Press the arrow button to select STD IRC HRC Auto Auto is recommended Press the down arrow button to select Au...

Страница 19: ...te you may select another menu by pressing the Menu button Press down arrow button to highlight Contrast Navigate using the arrow buttons to increase or decrease contrast intensity Press down arrow button to highlight Brightness Navigate using the arrow buttons to increase or decrease overall brightness Press down arrow button to highlight Color Navigate using the arrow buttons to increase or decr...

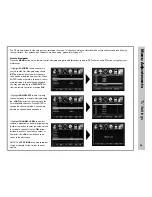
Страница 20: ...n to highlight Balance Navigate using the arrow buttons to adjust sound towards the left or right speaker Press down arrow button to highlight Surround Press the arrow button to turn the dimensional surround effect ON or OFF for built in speakers only Press down arrow button to highlight SPDIF type Navigate using the arrow buttons to select between PCM Analog Audio RAW Digital Audio See page 15 To...

Страница 21: ...tton to highlight Sleep Timer Then press the u arrow button to select time to view before television timer turns off 5 Min 10 Min 15 Min 30 Min 45 Min 60 Min 90 Min 120 Min 180 Min 240 Min OFF Press down q arrow button to highlight Time Zone Then press the u arrow button to select between EASTERN CENTRAL MOUN TAIN PACIFIC ALASKA HAWAII Press down q arrow button to highlight Daylight Savings Time N...

Страница 22: ... mode displayed Normal Wide Zoom Cinema This feature is also available on the remote control See page 27 Highlight Restore Default Press the u arrow button to automatically set all adjust ments back to their original settings Highlight Transparency Navigate using the t u ar row buttons to turn Off u On the translucent effect of the User menu Other languages include Spanish and French Highlight XVS...

Страница 23: ...te using the t u ar row buttons select Off On CC on Mute Press down q arrow but ton to highlight Basic Selec tion Navigate using the t u arrow buttons select CC 1 4 Text 1 4 Press down q arrow button to highlight Option Press the u arrow button to enter a menu with options to customize text fonts colors and opacities Press down q arrow but ton to highlight Advanced Selection Navigate using the t u...

Страница 24: ...sing arrow buttons to select SETUP Gain access to position adjustment options by pressing the down arrow button to highlight Advanced then press arrow button to select from the following options Highlight V Pos Navigate using the arrow but tons to adjust the position of images displayed up and down Highlight Clock Navigate using the arrow buttons to control the width of the image Highlight H Pos N...

Страница 25: ... buttons to highlight TV MPAA menu Highlight TV then press the arrow button to enter the TV Ratings menu to select your preference TV Y Appropriate for all children TV Y7 Appropriate for all children over 7 TV G General Audience TV PG Parental Guidance Suggested TV 14 Parents Strongly Cautioned TV MA Mature Audience Only Highlight MPAA then press the arrow button repeatedly to select your movie ra...

Страница 26: ...ANADA ENGLISH then press the arrow button repeatedly to select your ratings preference E Appropriate for everyone C Appropriate for all children C8 Appropriate for everyone 8 years old and up G General Audience PG Parental Guidance 14 Appropriate for Children over 14 years old 18 Mature Audience Only E Appropriate for everyone G General Audience 8 ans Appropriate for Children 8 years old and up 13...

Страница 27: ...dded Highlight CHANNEL LABEL to name or rename a broadcast channel Navigate using the u arrow button to enter the screen menu to re label a channel Use the qp arrow buttons to spell out each letter number or character Use t u arrow buttons to ad vance to the next space NOTE The DTV SIGNAL is a measurement of signal strength for the current channel viewed The TV menu provides for the setup of your ...

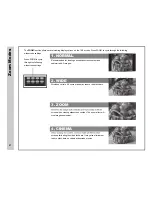
Страница 28: ...escreen content and undistorted 4 3 images Stretches certain 4 3 content and may reduce the black bars screen when viewing widescreen content The zoom effect will crop images somewhat screen eliminating the side black bars It may also eliminate or reduce black bars on certain widescreen movies 1 NORMAL 2 WIDE 3 ZOOM 4 CINEMA Press ZOOM to cycle through the following widescreen settings 27 ...

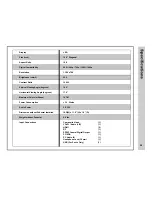
Страница 29: ...ower Consumption Audio Power Dimension without Pedestal Installed Weight without Pedestal Input Connections LED 18 5 Diagonal 16 9 480i 480p 720p 1080i 1080p 1 366 x 768 250 160 170 16 7M 30 Watts 2 X 3W 6 9 lbs Composite Video 1 YPbPr Audio L R 1 HDMI 2 RF 1 SPDIF Coaxial Digital Output 1 PC VGA 1 PC Audio IN 1 Headphone Jack 3 5mm 1 USB For Serice Only 1 18 2 W x 11 9 H x 1 9 D 1000 1 ...

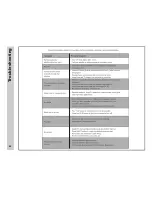
Страница 30: ...g n i t o o h s e l b u o r T 29 ...

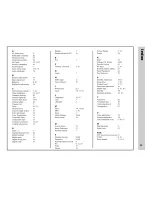
Страница 31: ...x e d n I 30 ...

Страница 32: ...to ship or receive warranty replacement units to and from the U S over the Canadian border Labor service charges for TV installation setup adjustment of consumer controls and installation or repair of any type of antenna or cable systems are not covered by this warranty Reception problems caused by inadequate antenna or cable systems are your responsibility Warranty extends only to defects in mate...

Отзывы: