background image

Anypos


                                                              Point of Service


10 

Draw Test 

This function is used for accuracy and performance check. Press this button 
and a new pop up window will be popped up in the location where the 
touchscreen was mapped to the touch system. 
 

  COM1~COM4 Ring function selector                                                                   

JP1 

COM1/COM2 Ring function selector 

JP2 

COM3/COM4 Ring function selector   

JP1and JP2 enable you to choose between 5V and 12V on COM1

COM4 

respectively. Since pin 9 on COM1

COM4 is reserved for switching 

between 5V and 12V 


  Troubleshotting                                                                           


Often after time spent troubleshooting, the problem is traced to something 
as simple as a loose connection. Check the following before proceeding to 
the problem-specific solutions. 
 

PROBLEM


SOLUTION


The display screen is 

dark. 

Make  sure  that  the  Power  LED  is  on  and 

Anypos  is  not  in  suspend  mode,  and  adjust 
the display brightness.   

The following message 

appears at boot up: 

Invalid system disk, 

Replace the disk, and 
then press any key


Ensure  that  an  operating  system  is  installed. 
Check  the  boot  sequence  in  the  BIOS  setup 
utility.   

An unidentified 

message is displayed.   

Reboot the terminal and run the BIOS Setup 

Utility.  Confirm  the  Setup  Utility  parameters. 
If the same message is displayed after booting 
up again,   

You cannot turn on the 

Check the AC adapter connection. Make sure 

Содержание Anypos200

Страница 1: ...Anypos200 User Manual AOPOS SYSTEMS S A...

Страница 2: ...xperience and product development capability A full range of functions are designed developed and produced to meet the requirements of department store supermarket hypermarket convenient store boutiqu...

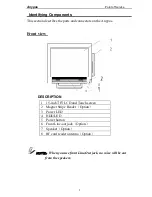
Страница 3: ...s on the Anypos Front view DESCRIPTION 1 15 inch TFT LCD and Touch screen 2 Magnet Stripe Reader Option 3 Power LED 4 HDD LED 5 Power botton 6 Front Line out jack Option 7 Speaker Option 8 RF card rea...

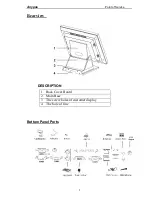
Страница 4: ...Anypos Point of Service 3 Rear view DESCRIPTION 1 Back Cover Board 2 Main Base 3 The screw holes of customer display 4 The hole of line Bottom Panel Ports...

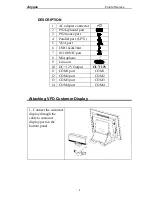
Страница 5: ...llel port LPT1 5 VGA port 6 USB 1 2 3 4 7 10 100 NIC port 8 Microphone 9 Line out 10 DC 12V Output OUT 12V 11 COM1 port COM1 12 COM2 port COM2 13 COM3 port COM3 14 COM4 port COM4 Attaching VFD Custome...

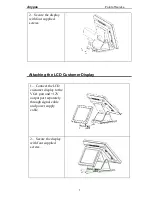
Страница 6: ...isplay with four supplied screws Attaching the LCD Customer Display 1 Connect the LCD customer display to the VGA port and 12V output port separately through signal cable and power supply cable 2 Secu...

Страница 7: ...llation 1 Secure the holder on the rear board with 6 screws 2 Mounting the bracket on the wall or other place with 4 screws 3 Put the holder into bracket and fix them with 2 screws NOTE Anypos can be...

Страница 8: ...3 There are 2 ways to turn off the Anypos 1 Click Start button and then Turn Off Computer next Close 2 Use the main power button to turn off the power for example if the operating system you are usin...

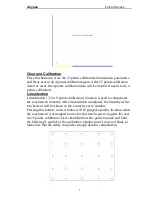
Страница 9: ...ing the function push buttons Linearization Curve Linearization curve of the touchscreen is list in this page for reference and trouble shooting purpose 4 points calibration Pressing this button a new...

Страница 10: ...s calibration function is used to compensate the touchscreen linearity After linearization completed the linearity of the touchscreen will be shown in the Linearity curve window Pressing this button a...

Страница 11: ...g the problem is traced to something as simple as a loose connection Check the following before proceeding to the problem specific solutions PROBLEM SOLUTION The display screen is dark Make sure that...

Страница 12: ...and power on the Anypos Audio problems Ensure the audio cable is not defective The mute is off Terminal is not working at all Wait 30 seconds and try again If still not working Reboot the terminal Ot...

Отзывы: